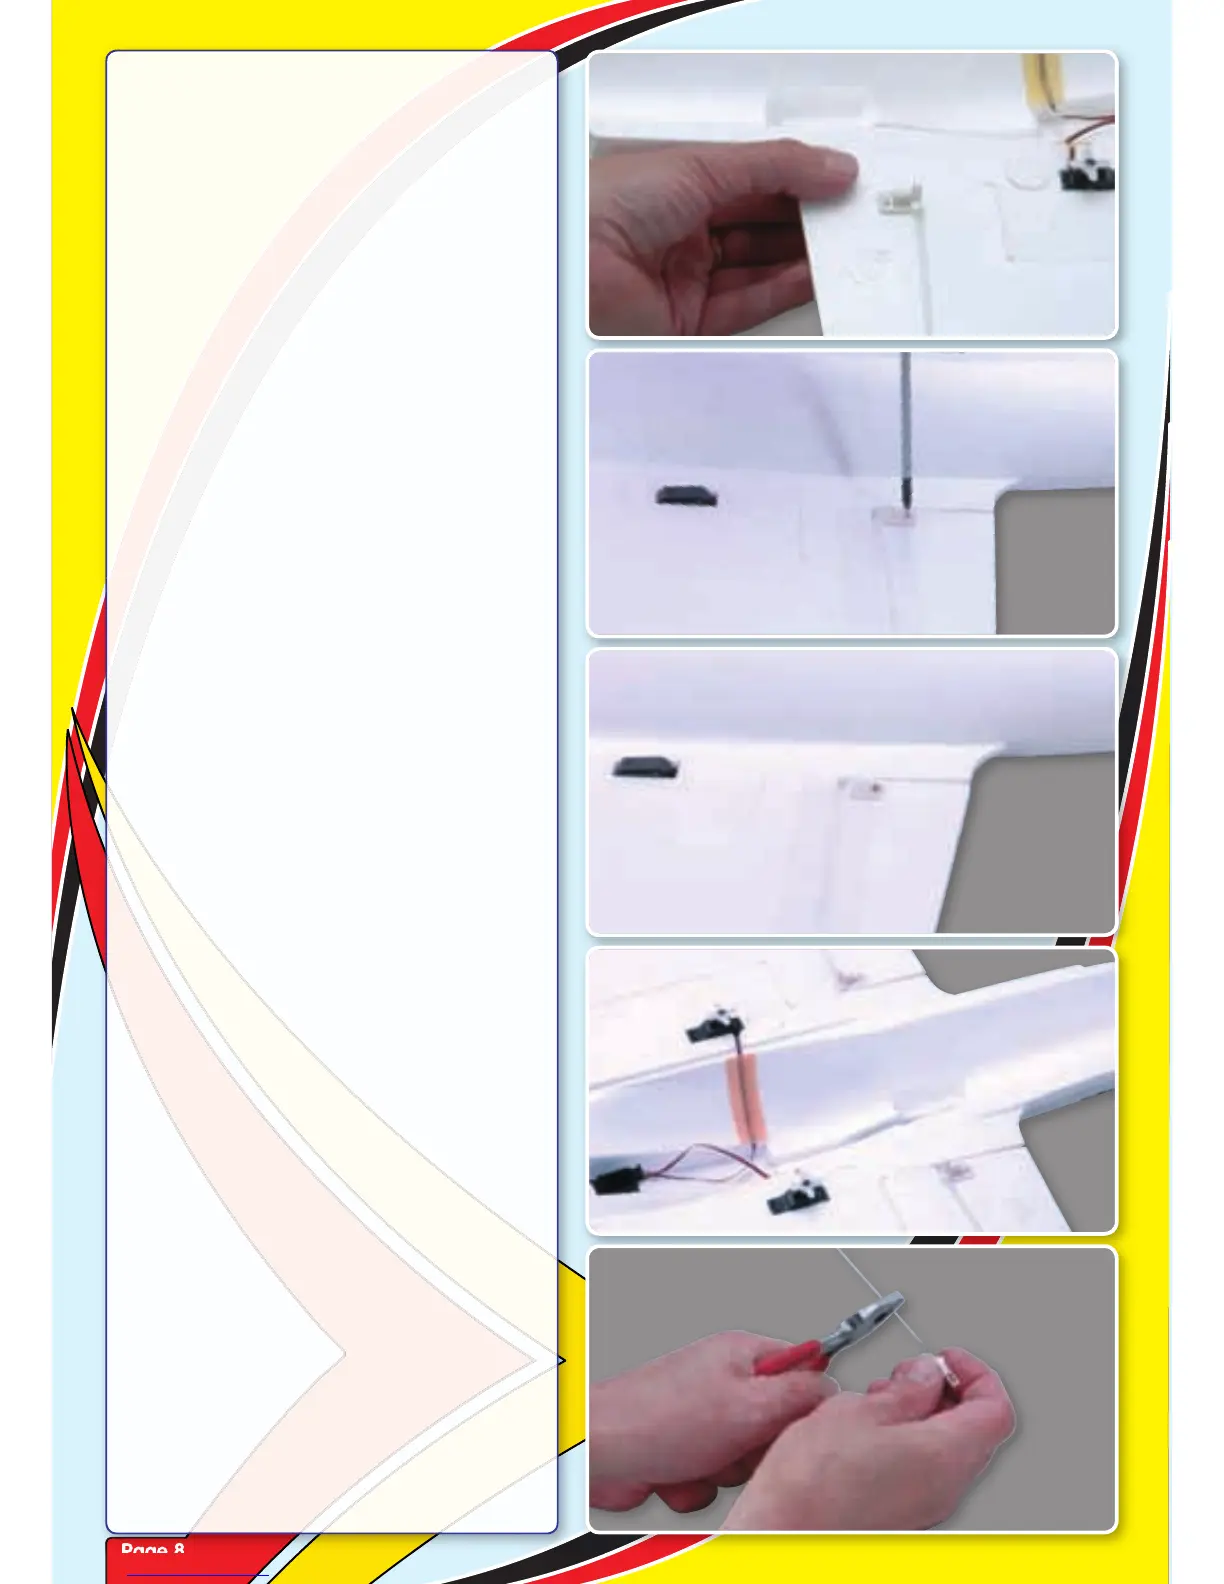
Step 21
Squeeze the two parts together until
the bottom of the horn is flush with the
underside of the elevon.
Step 22
Locate a control horn self tapping screw
and install through the top of the horn and
into the retaining plate.
Step 23
Do not over tighten the retaining screw -
you do not want to crush the elevon.
Step 24
Fit the second elevon horn using the same
procedure.
Step 25
Locate a moulded clevis and threaded
pushrod. Screw the clevis onto the rod until
the thread is just visible through the clevis.
 Loading...