10BDL4551T
4
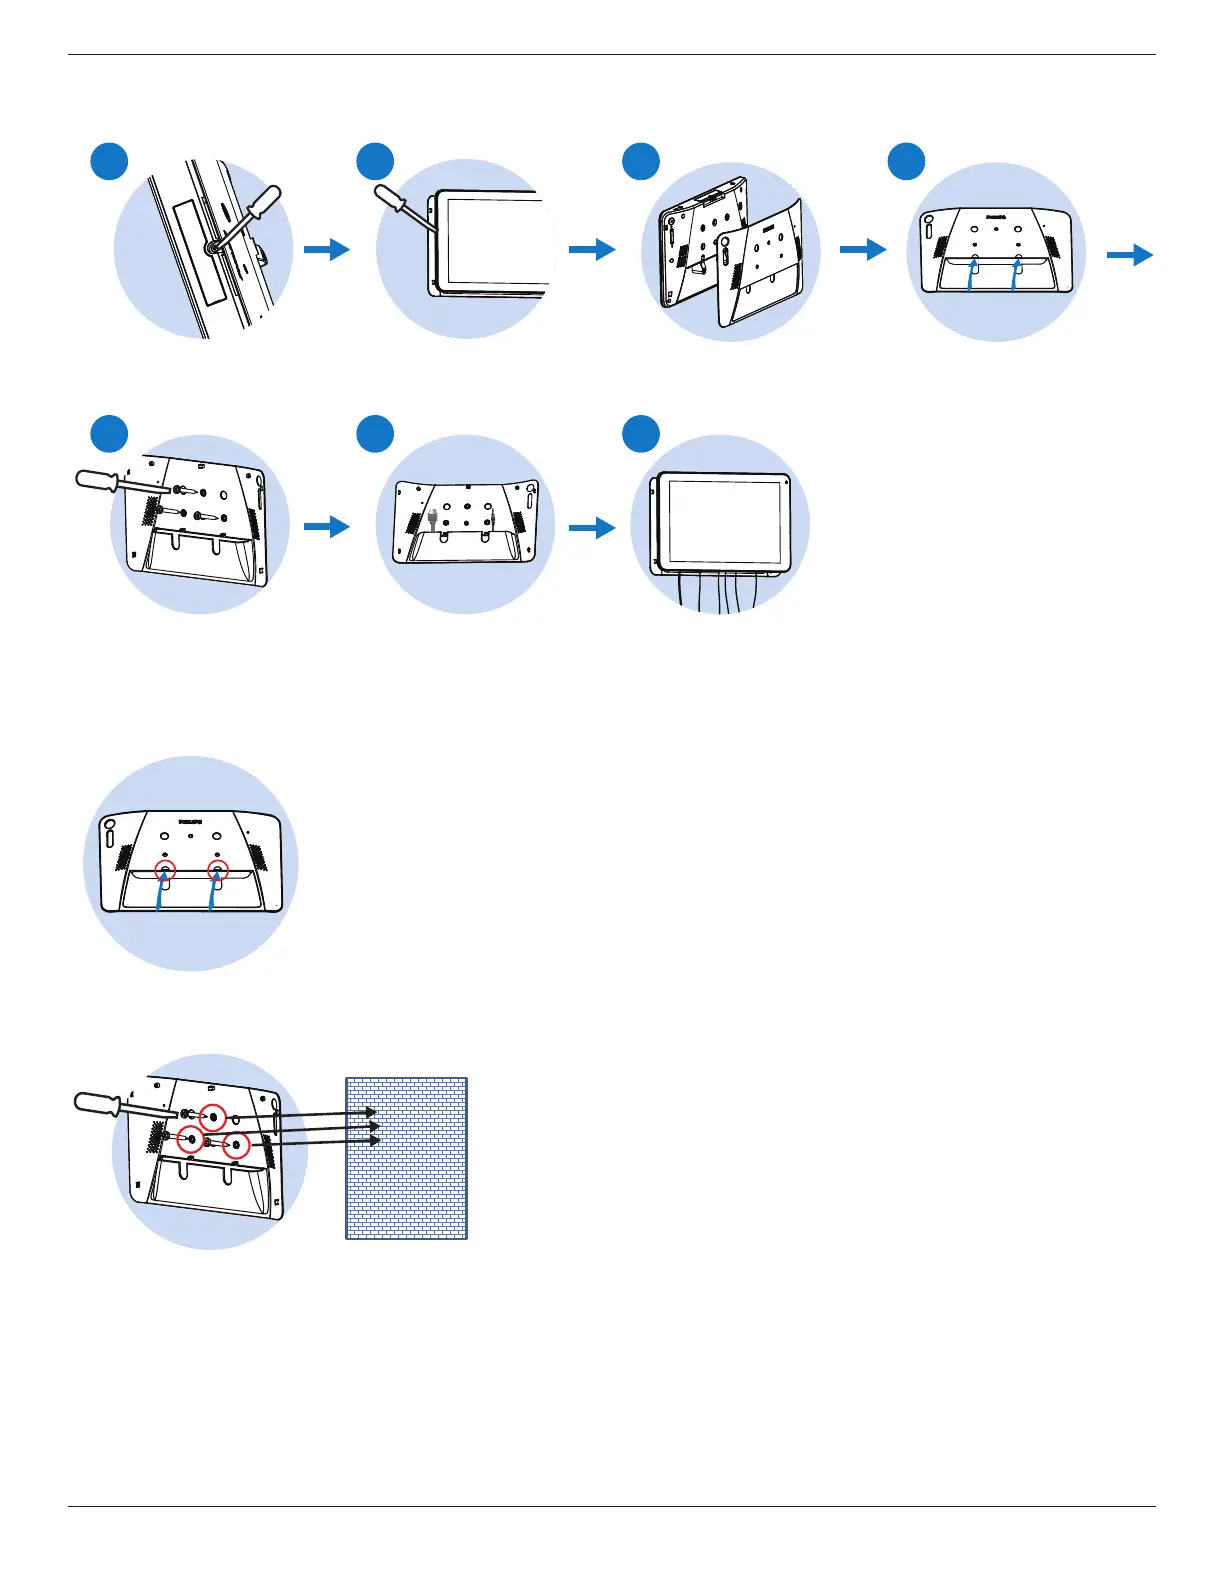
Mounting Option 2: [Using back cover]
Supporting screw: Self-tapping screw*3pcs (exclude the mounting plate thickness)
1 2 3
5 6 7
4
Step 1 Use a screwdriver to loosen the screw on the left side of the back cover.
Step 2 Use a screwdriver to detach the back cover.
Step 3 Remove the back cover from the signboard.
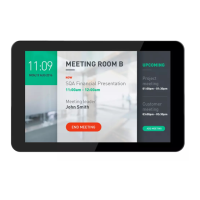
Step 4 Stick the silicon gaskets (provided) on the back cover (as indicated below)
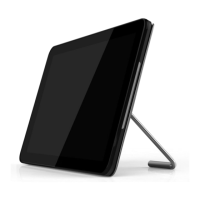
Step 5 To mount the back cover to the wall, flip over the back cover, the “Philips” logo should face the wall. Use a screwdriver to
insert nails (x3) into the holes (indicated below) of back cover, then fix the back cover to the wall.
wall
Step 6 Plug the power cable to the “DC12V” port, then connect the network cable to “LAN” port of the signboard.
Step 7 Insert the signboard carefully into the back cover which is already mounted on the wall.