55BDL2005X
23
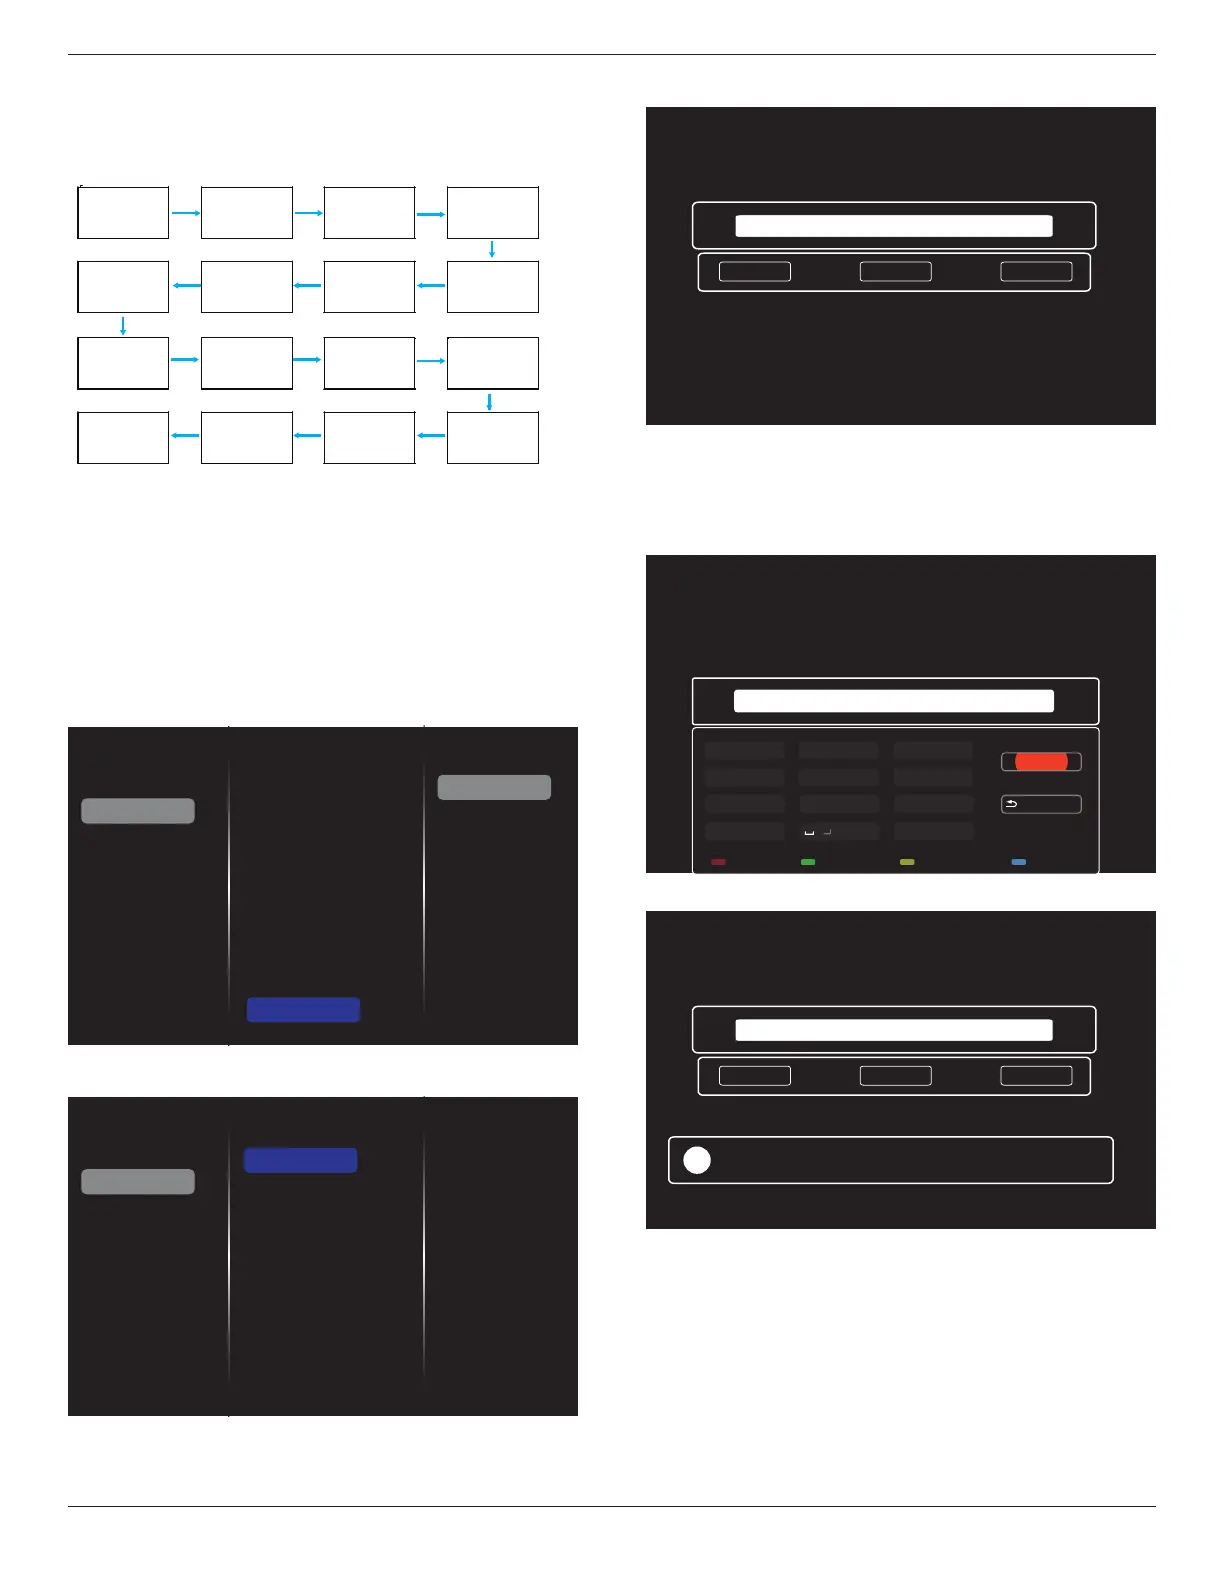
Auto ID
Set up {Monitor ID} of the connected device according to {H
monitors} settings.
Example: H monitors sets as 4
1 2
5 6
3
4
7 8
9 10 11 12
13 14 15 16
Note: To use this function, serially connect all machines
with RS-232 cable and set their Network control port to
RS-232.
Note: To use this function for DP 1.2 connectivity, the
maximum resolution is 1920x1080@60Hz supported 4sets.
For 4Kx2K/30Hz, it only supports 2 sets connectivity.
Tilling tool
Activate the tiling tool function by entering the serial
number purchased from dealer.
Picture
Sound
Tiling
Network
General settings
Advanced
Help
Status
Activate
Enable
H monitors
V monitors
Position
Frame comp.
Frame comp. H
Frame comp. V
Switch on delay
RS232-Routing
Auto ID
Tiling tool
(1). Enter activate menu
Picture
Sound
Tiling
Network
General settings
Advanced
Help
Status
Activate
(2). Enter activate key in OSD
Cancel
Done Clear
_
(3). Press [OK] button and an on-screen keypad appears
to allow you enter the activate key. Select Done when you
nish.
Note: Press yellow key on the remote control to switch to
numeric key.
Done
Hide
. , @ ‘
g h i
p q r s
a b c
j k l
t u v
? ! -
<
d e f
m n o
w x y z
abc ABC 123 www Backspace
_
(4). A tiling tool activation prompt is displayed.
Cancel
Done
Tiling tool activation successful
Clear
xxxxxxx
!