7EN
4 Using the air
purifier
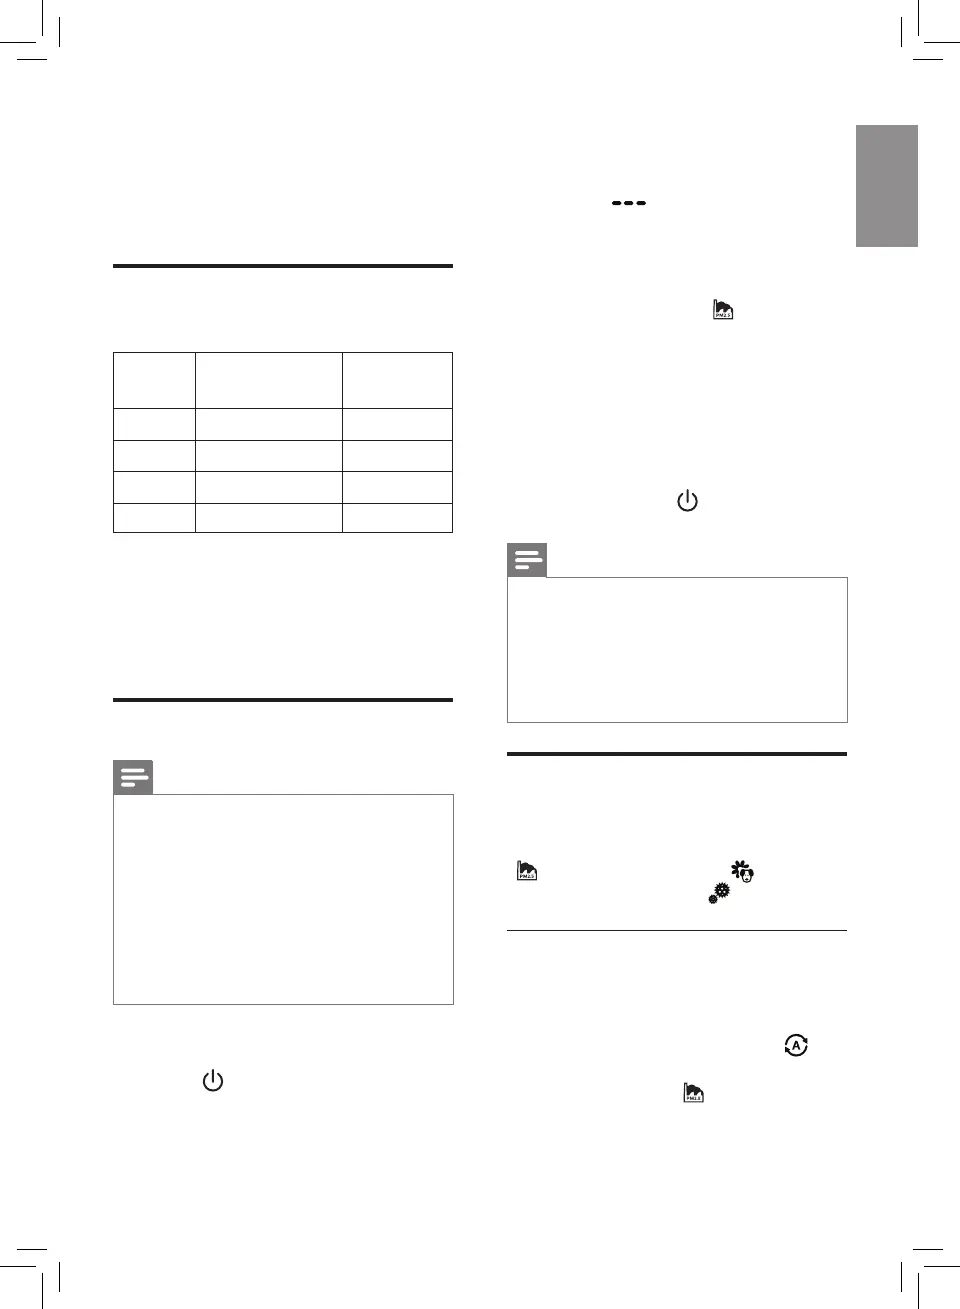
Understanding the air
quality light
PM2.5
level
Air quality light
color
Air quality
level
≤35
Blue Good
36-75
Blue-Purple Fair
76-115
Purple-Red Poor
>115 Red Very poor
The air quality light automatically goes
on when the air purier is switched on,
and lights up all colors in sequence.
After approximately 30 seconds, the
air quality sensors select the color that
corresponds to the ambient air quality.
Turning on and o
Note
• Always place the air purier on a
stable, horizontal, and level surface
with the front of the unit facing
away from walls or furniture.
• For optimum purication
performance, close doors and
windows.
• Keep curtains away from the air inlet
or air outlet.
1 Put the plug of the air purier in the
wall outlet.
2 Touch to switch on the air purier
(g. j).
» The air purier beeps.
» The air purier operates under
the Pollution mode by default.
» When the air purier is warming
up, "
" displays on the
screen. After measuring the
particulate matter only in the
air, the air purier shows the
PM2.5 level and operates in the
auto mode with displayed on
the screen (g. k).
» After measuring the air
quality for approximately
30 seconds, the air quality
sensor automatically selects
the appropriate air quality light
color.
3 Touch and hold for 3 seconds to
switch o the air purier.
Note
• After the appliance is switched o
by the on/o button , if the plug
is still in the power socket, the
appliance will operate under the
previous settings when it is switched
on again.
Changing the Auto mode
setting
You can choose the Pollution mode
( ), the Allergen mode ( ), or the
Bacteria & Virus mode (
).
Pollution mode
The specially designed pollution
mode can eectively remove airborne
pollutants such as PM2.5.
• Touch the Auto mode button
to
select the Pollution mode (g. l).
» Auto (A) and
display on the
screen.