11
The language options may vary from •
different regions.
4 Press to select a language, and press OK.
Set up a network
To enjoy software updates of this player and BD-
Live for certain Blu-ray discs, set up the network
connection.
Note
Ensure that the network cable is properly connected and •
the router is switched on.
1 Connect this player to the broadband modem
or router.
2 Press to display the home menu.
3 Select [Setup] and press OK.
4 Select [Network], and press .
5 Select [Network Installation], and press OK.
6 Follow the on-screen instructions to complete
the network installation.
Tip
You can check the status of the wired connection of •
this player (see “Adjust settings” > “Network Setup” >
[View Network Settings]).
View Network Settings
Network Installation
Video
Advanced
Audio
Network
Preference
EasyLink
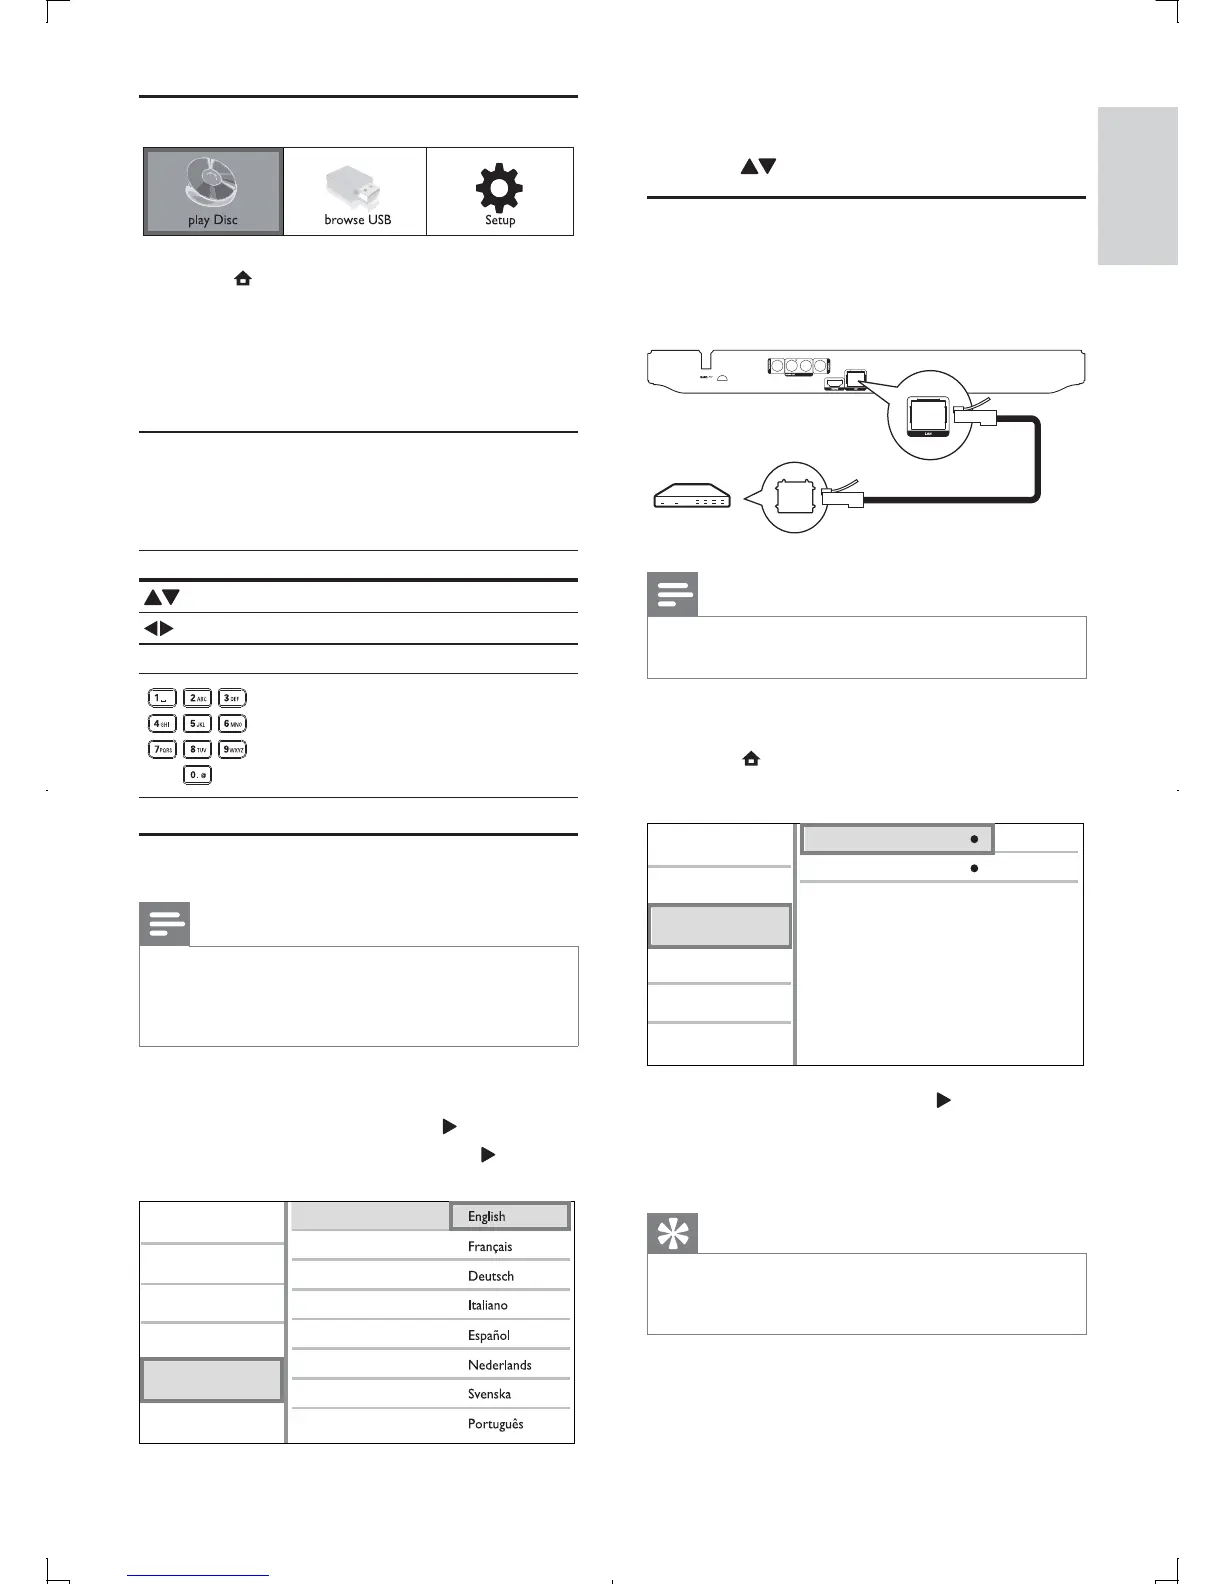
Use the Home menu
1 Press to display the home menu.
To start disc play, select • [play Disc].
To view the USB contents, select •
[browse USB].
To access the setup menus, select •
[Setup].
Navigate a menu
1 When a menu is displayed, press the buttons
on the remote control to navigate.
Button Action
Move up or down.
Move left or right.
OK Confirm a selection.
Enter numbers.
Select a menu display language
Note
If this player is connected to a HDMI CEC compliant •
TV, skip this setting. It switches automatically to the
same OSD menu language as per your TV setting (if the
language set on TV is supported by this player).
1 In the Home menu, select [Setup] and press
OK.
2 Select [Preference], and press .
3 Select [Menu Language], and press .
Video
Advanced
Audio
Network
Preference
EasyLink
Menu Language
Parental Control
Disc Menu
Audio
Subtitle
Screen Saver
Change Password
Auto Subtitle Shift
English
EN