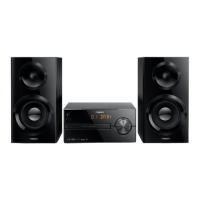
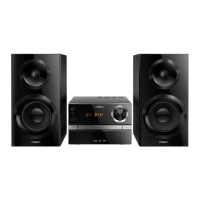
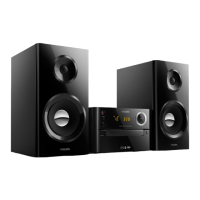
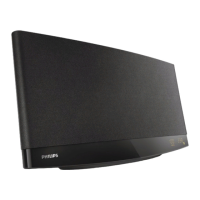
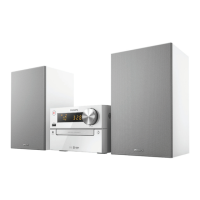
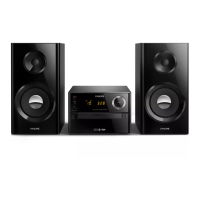
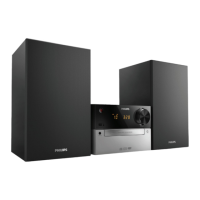
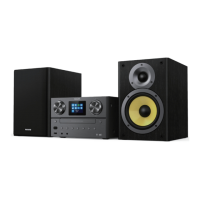
This document describes the Philips BTB4800 Micro Music System, a versatile audio device designed for home use. It allows users to enjoy audio from various sources, including discs, USB devices, Bluetooth-enabled devices, and external audio sources, as well as listen to FM and DAB+ radio.
Function Description
The Philips BTB4800 Micro Music System serves as a central hub for your audio entertainment. It features a disc compartment for playing CDs, a USB port for connecting USB storage devices, and Bluetooth connectivity for wireless streaming from compatible devices. An Audio In jack allows connection to other external audio sources. The system also includes an FM/DAB+ tuner for radio listening.
Usage Features
General Operation:
- Power On/Standby: The system can be switched on or put into standby mode. In standby, the clock display can be toggled on or off by pressing and holding the CLOCK button. The product will automatically switch to standby after 15 minutes of inactivity to save energy.
- Source Selection: Users can select between various audio sources: DISC, USB, FM, DAB+, AUDIO IN, and BT (Bluetooth) using the dedicated buttons on the main unit or remote control.
- Volume Control: The volume can be adjusted using the volume knob on the main unit or the +/- buttons on the remote control.
- Mute: The sound can be muted or unmuted using the mute button on the remote control.
- Display Brightness: The display brightness can be adjusted using the DIM button on the remote control.
- Sound Effects: Preset sound effects can be selected using the SOUND button on the remote control.
Disc Playback:
- Loading/Unloading: The disc compartment opens and closes by pressing the button on the main unit. Discs should be inserted with the label side up.
- Play/Pause/Stop: Playback can be started, paused, or resumed using the ►II button. The ■/MENU button stops playback.
- Track Navigation: Users can skip to the previous or next track using the /►►I buttons. Pressing and holding these buttons allows for searching backward or forward within a track.
- Program Tracks: Up to 20 tracks can be programmed to play in a desired sequence. This feature is activated by pressing PROG/SCAN in stop mode.
- Repeat/Shuffle: Tracks can be played repeatedly (single track or all tracks) or in a random (shuffle) order using the MODE button.
USB Playback:
- Connection: USB storage devices are connected to the USB socket.
- Source Selection: The USB source is selected using the USB/AUDIO IN button.
- Play/Pause/Stop: Playback starts automatically once the USB device is selected; otherwise, press ►II. The ■/MENU button stops playback.
- Track/Folder Navigation: Users can select albums or folders using the / buttons, and skip to previous/next tracks using the /►►I buttons. Pressing and holding these buttons allows for searching backward or forward within a track.
- Program Tracks: Similar to disc playback, tracks from a USB device can be programmed.
- Repeat/Shuffle: Tracks can be played repeatedly or in a random order.
Bluetooth Connectivity:
- Pairing: To connect a Bluetooth-enabled device, select the BT source. The Bluetooth indicator will flash blue. On the external device, enable Bluetooth, search for 'Philips BTB4800', and pair. A password '0000' may be required. After successful pairing, the indicator turns solid blue, and the unit beeps.
- Audio Streaming: Once connected, audio from the Bluetooth-enabled device will stream to the micro music system.
- Disconnecting: Bluetooth can be deactivated on the external device or by pressing and holding the PAIRING button on the main unit for 2 seconds.
- Memory: The unit can memorize up to 8 previously connected Bluetooth devices.
Radio Listening (DAB+ and FM):
- Antenna Connection: The supplied FM/DAB+ antenna must be connected for radio reception.
- Source Selection: DAB/FM button is used to select either DAB+ or FM radio.
- Automatic Station Storage (DAB+): Press and hold PROG/SCAN for more than 2 seconds to automatically scan and store all available DAB+ radio stations.
- Manual Station Storage (DAB+): Users can manually store DAB+ stations by selecting a station, entering program mode with PROG/SCAN, assigning a preset number, and confirming.
- DAB+ Menu: Access the DAB+ menu using the ■/MENU button to scan for stations, manually tune, prune invalid stations, or adjust system settings.
- DAB+ Information: While listening to DAB+ radio, press INFO repeatedly to view various information like frequency, signal strength, and time.
- Automatic Station Storage (FM): Press and hold PROG/SCAN for more than two seconds to automatically store all available FM stations.
- Tuning (FM): Press and hold / for more than two seconds to automatically tune to the next strong FM station. For weak stations, press /►►I repeatedly for optimal reception.
- Preset Stations: Preset radio stations can be selected using the ALBUM/PRESET / buttons on the remote control.
- RDS Information (FM): While listening to FM radio, press INFO repeatedly to scroll through available RDS information such as station name, program type, and time.
External Device Listening:
- Connection: Connect an external audio device (e.g., smartphone, MP3 player) to the AUDIO IN jack using a 3.5mm stereo audio cable (not supplied).
- Source Selection: Select the AUDIO IN source using the AUDIO IN button.
- Playback: Start playing audio on the external device.
Alarm and Sleep Timer:
- Setting the Clock: Press and hold CLOCK for more than 2 seconds to enter clock setting mode, then use /►►I and CLOCK to set the hour and minute.
- Alarm Timer: The system can function as an alarm clock, using disc, USB MP3 files, FM, or DAB+ radio as the alarm source. To set the alarm, press and hold SLEEP/TIMER for 2 seconds in standby mode, then use /►►I and SLEEP/TIMER to set the hour, minute, alarm source, and volume.
- Activating/Deactivating Alarm: Press SLEEP/TIMER repeatedly in standby mode to activate or deactivate the alarm.
- Sleep Timer: The system can be set to automatically switch to standby after a specified period. Press SLEEP/TIMER repeatedly while the system is on to select the desired sleep time.
Maintenance Features
Safety and Handling:
- Casing: Never remove the casing of the apparatus to avoid electric shock.
- Lubrication: Do not lubricate any part of the apparatus.
- Laser Beam: Never look into the laser beam inside the apparatus.
- Placement: Avoid placing the apparatus on other electrical equipment, in direct sunlight, near naked flames or heat sources. Ensure adequate free space around the product for ventilation.
- Power Cord: Always ensure easy access to the power cord, plug, or adaptor to disconnect the apparatus from power. When unplugging, always pull the plug, not the cord.
- Liquids: Do not expose the device to rain or moisture, and do not place liquid-filled objects (e.g., vases) on it. The device should not be exposed to dripping or splashing.
- Batteries: Install batteries correctly (+ and - as marked). Do not expose batteries to excessive heat. Remove batteries if the unit is not used for a long time. Only use manufacturer-specified attachments/accessories.
Troubleshooting:
- No Power: Check AC power cord connection and outlet.
- No Sound/Poor Sound: Adjust volume.
- No Response from Unit: Disconnect and reconnect AC power plug, then turn on the unit. If in demo mode, adjust volume to 03 and hold ►II on the main unit for 10 seconds to exit.
- Remote Control Not Working: Select the correct source, reduce distance, check battery polarity, replace batteries, and aim directly at the IR sensor.
- No Disc Detected: Insert a disc correctly (label side up), wait for moisture condensation to clear, replace/clean the disc, or use a finalized CD/correct format disc.
- USB File Display Issues: Some USB devices may have too many folders/files, or file formats may not be supported.
- USB Device Not Supported: Try a different USB device.
- Poor Radio Reception: Increase distance from TV/radiation sources, adjust antenna position, fully extend FM/DAB+ antenna, or connect an outdoor antenna.
- Bluetooth Connectivity Issues: Ensure the device supports required profiles, Bluetooth is enabled on the external device, the unit is in pairing mode, or disconnect other connected Bluetooth devices.
- Clock/Timer Not Working: Set the clock correctly and ensure the timer is switched on. If settings are erased due to power interruption, reset them.
- Continuous Clock Display in Standby: Hold CLOCK on the remote control for 2 seconds in standby mode.
- Packaging: The packaging is designed for easy separation into recyclable materials (cardboard, polystyrene foam, polyethylene).
- Product Disposal: The product is designed with high-quality materials and components that can be recycled and reused. Dispose of the product and batteries according to local regulations. The product is covered by European Directive 2012/19/EU (WEEE) and 2013/56/EU (batteries).