Do you have a question about the Philips BTM1360/12 and is the answer not in the manual?
This document is a user manual for the Philips BTM1360 Micro Music System, providing comprehensive instructions for its setup, operation, and maintenance.
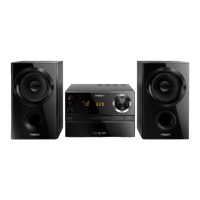
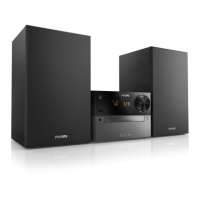
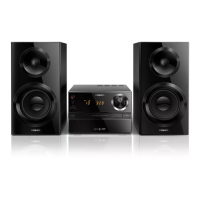
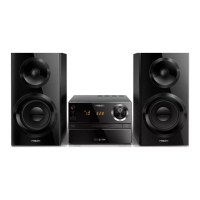
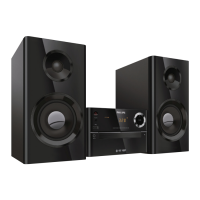
The Philips BTM1360 Micro Music System is a versatile audio device designed to provide a rich listening experience through various sources. Its primary function is to play audio from discs (CD-DA, CD-R, CD-RW, MP3-CD), USB devices, and Bluetooth-enabled devices. It also features an FM tuner for radio listening and an AUDIO IN port for connecting external audio devices. The system is equipped with two speakers for stereo sound output. A remote control is included for convenient operation from a distance. The system also offers a Digital Sound Control (DSC) feature to enrich the sound output with various preset sound effects. Additionally, it includes an alarm timer and a sleep timer for added convenience. The system also supports charging external devices via its USB port.
To begin using the system, users must first connect the speakers to the main unit. The right speaker connects to the "R" sockets (red wire to red (+), black wire to black (-)), and the left speaker connects to the "L" sockets following the same polarity. Speaker wires are inserted by holding down the socket flap, inserting the wire, and then releasing the flap. After connecting the speakers, the power cable should be connected to a wall socket. The remote control requires one AAA battery, inserted with correct polarity.
The system can be powered on by pressing the power button. It will switch to the last selected source. Pressing the power button again will switch the product to standby mode, where the clock (if set) is displayed. The system also features an ECO power standby mode, activated by pressing and holding the power button for more than two seconds, indicated by a red ECO power standby indicator. If no button is pressed for 15 minutes in standby mode, the product automatically enters ECO standby mode.
Users can select audio sources either from the main unit or the remote control. On the main unit, repeatedly press the SOURCE button to cycle through DISC, USB, TUNER, AUDIO IN, and BT. On the remote control, dedicated buttons (CD, FM, USB, AUDIO IN, BT) allow direct selection of the desired source.
To play a disc, select the CD source. Press the open/close button to open the disc compartment, insert a disc with the label side up, and then press the button again to close the compartment. Playback typically starts automatically; if not, press the play/pause button.
For USB playback, insert a USB device into the USB socket and select the USB source. Playback usually starts automatically; if not, press the play/pause button. The system supports MP3 files stored on USB devices.
To play audio from a Bluetooth-enabled device, select the BT source. The Bluetooth indicator will flash blue, indicating pairing mode. On the external device, enable Bluetooth, search for "Philips BTM1360," and connect. If prompted, enter "0000" as the pairing password. Once connected, the Bluetooth indicator turns solid blue, and the unit beeps twice. Audio can then be streamed from the Bluetooth device. If pairing fails, press and hold SOURCE/PAIRING (or play/pause on the remote) for three seconds to re-enter pairing mode. The system can memorize up to 8 previously connected Bluetooth devices. To disconnect, deactivate Bluetooth on the device or move it out of range. To clear the pairing history, press and hold the stop button on the main unit for 8 seconds.
To listen to the radio, select the FM source. Press and hold the previous/next track buttons to automatically tune to a station with strong reception. For weak stations, repeatedly press the previous/next track buttons to manually tune. Up to 20 FM radio stations can be programmed automatically by pressing and holding the PROG button for two seconds in tuner mode. Stations can also be programmed manually by tuning to a station, pressing PROG, using the up/down buttons to assign a preset number (1-20), and pressing PROG again to confirm. Preset stations can be selected using the up/down buttons in tuner mode.
The system offers Digital Sound Control (DSC) with preset effects (DSC1-DSC5), selectable by repeatedly pressing the SOUND button. The volume level can be adjusted using the VOL +/- buttons on the remote or the VOLUME knob on the main unit. Sound can be muted or unmuted by pressing the mute button.
The alarm timer allows users to set an alarm using a disc, USB, or FM radio as the source. To set, press and hold SLEEP/TIMER for two seconds in standby mode, then use the previous/next track buttons to set the hour and minute, confirm with SLEEP/TIMER, select the alarm source, and set the alarm volume. The alarm timer can be activated or deactivated by repeatedly pressing SLEEP/TIMER in standby mode. The sleep timer allows the system to switch to standby automatically after a set period. While the system is on, repeatedly press SLEEP/TIMER to select the desired duration. To deactivate, select [OFF].
An external audio device can be connected via the AUDIO IN port using an MP3 link cable (3.5 mm jack). Connect the cable between the product's AUDIO IN jack and the headphone jack of the external device, then select the AUDIO IN source and start playback on the external device.
The system's USB port can be used to charge external devices like cell phones or MP3 players. Connect the device to the USB socket on the system using a USB cable. Once the system is powered on and recognizes the device, charging will begin.
To maintain the product, avoid inserting any objects other than discs into the disc compartment. Do not insert warped or cracked discs. Remove discs from the compartment if the product will not be used for an extended period. Only use a microfiber cloth to clean the product.
For the remote control, remove batteries if the unit is not used for long periods to prevent leakage. Install batteries correctly, observing polarity. Do not mix old and new batteries or different types (carbon and alkaline). Batteries should not be exposed to excessive heat.
The manual provides a troubleshooting section for common issues. For no power, check the AC power cord and outlet. For no sound or poor sound, adjust volume, check speaker connections, and ensure speaker wires are clamped. If the unit is unresponsive, disconnect and reconnect the AC power plug. For remote control issues, ensure the correct source is selected and reduce the distance to the unit. For disc detection problems, insert a disc correctly, check for moisture condensation, replace/clean the disc, and ensure it's a finalized CD or correct format. For USB device issues, ensure the files are supported formats and that the number of folders/files does not exceed limits. For poor radio reception, increase distance from other radiation sources and fully extend the FM antenna. For Bluetooth connection issues, ensure the device supports required profiles, Bluetooth is enabled, and the unit is in pairing mode. If the paired mobile device connects and disconnects constantly, improve Bluetooth reception by moving the device closer or removing obstacles. If the timer does not work, set the clock correctly and switch on the timer. If clock/timer settings are erased, power may have been interrupted, requiring a reset.
Users are warned not to remove the casing, lubricate any parts, look into the laser beam, or place the apparatus on other electrical equipment. The device should be kept away from direct sunlight, naked flames, or heat. Easy access to the power cord/plug/adaptor is essential for disconnection. The device should not be exposed to dripping or splashing liquids, and no liquid-filled objects should be placed on it. Proper ventilation is required. Only manufacturer-specified attachments/accessories should be used. The product is a Class 1 Laser Product.
The product is designed with high-quality, recyclable materials. It complies with European Directives 2012/19/EU (WEEE) and 2013/56/EU (batteries). Users are advised to follow local regulations for disposing of packaging materials, exhausted batteries, and old equipment to prevent negative environmental and health consequences.
| Brand | Philips |
|---|---|
| Model | BTM1360/12 |
| Category | Stereo System |
| Power Output | 20 W |
| Tuner Bands | FM |
| USB Direct Recording | Yes |
| Disc Playback | CD, CD-R |
| Audio Playback | MP3 |
| Connectivity | USB, AUX in |
| Speaker Type | 2.0 Channels |