c
SAFETY
INSTRUCTIONS
Read
before
operating equipment
m
~
iii'
::r
INt C An.
250.
Part
HI
the
safety
and
operating
instructions
shouid
Inco
is
operated.
2..
Retain
Instructions
The
safety
and
operating
illstructions
shuuld
be
retained
for
futuro
toforence.
3.
Heed
Warnings -
All
un
the
appliance
and
in
the
iny
in,tructions
should
be
to
4.
Follow
Instructions -
All
operating
and
use
instructions
should
bo
followed.
5.
Water
and
for
Example
of
Antenna
Grounding
as
per
NEC
- National Electric
Code
Ground
Clamp
Antenna
lead-in Wire
tirounding Conductors
(NEe
Sectinn
810-21)
tiround
Clamps
I'uw",
Service Grounding Electrode
SYS\Hm
Electric Service Eqllillment
~I.
4562.-1
91/8
4
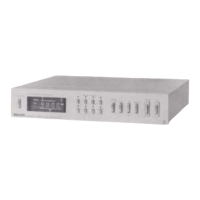
INTRODUCTION
INSTALLATION
@
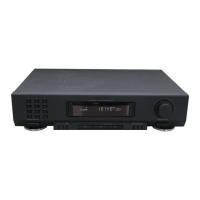
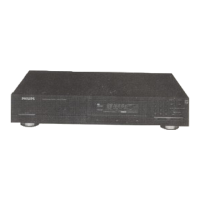
Congratulations and
thank
you
for
selecting
the
Philips FT920 Digital Synthesized Stereo Tuner.
A tuner
In
state-of-the art
the FT920 combines high quality
radiO
reception
with
a high degree of usedriendliness.
• tuner
is
designed for full integration into
ESi
(Enhanced Intelligence) remote·
control!ed Philips series) HiFi systems.
•
kAd digital
can
be slored
in
the memory
with
a programmabie station name
preferred program type.
o The rotary knob allows easy tuning
and
selec-
tion
of
presets.
Please
read
this manual carefully before you
attempt to connect or operate the tuner
This manual is divided into five sections:
Installation: explains how to connect your
tuner.
Operation: explains
how
to
use the major con-
trols.
-
Advanced
Options:
malion on operation, including special features.
-
System
Aspects: the Enhanced
System Intelligence and its benefits.
General
Information:
includes maintenance
information
and
technical data.
.t:
WARfVlNG
.!!!
Do
not
connect
the
set
to
the
power
supply
"'5l
until
all
other
connections
have been
made
and
the
power
supply
voltage
(indicated
on
w
the
type
plate) has been checked.
POWER SUPPLY
o Check that the power voltage
as
shown on
type plate corresponds
to
your local power
sourco. If does not, consult your dealer or
Philips Authorized Service Center.
• If your unit
has
a
only
to
change the
position.
• Insert the plug
ot
the
AC
cord into
AC
out-
let. If vour receiver/amplifier
has
POWER
may also insert the plug of the
one ot these outlets.
is
now
connected.
• To disconnect set from the
completely, remove
tile
AC
outlel
or
from the
of
your receiver/amplifier
The type plate is located on the back
of
the set.
5