GC8030
STAND
TRAY ASSY 31
STAND TOP PRINTED 32
PUMP ASSY 41
ELECTRONIC MODULE
(STAND) 46
BOILER MOUNTED ASSY 50
STAND BOTTOM 52
Disassemble
TRAY RUBBER CAP 30
at positions H1, H2, H3
H1
H2
H3
Remove Screw H (3 x)
Disassemble TRAY ASSY 31
Remove Screw J (5 x)
Disassemble STAND TOP
PRINTED 32
REED SWITCH ASSY 47
Remove Screw K
Disassemble REED SWITCH
ASSY 47
* For full details on disassembly, please refer to service CD-ROM.
REPAIR INSTRUCTIONS – STAND
- For disassembly, you will need a Torx screwdriver 362TR T20 x 100
- To avoid damage to the sealing and components of the boiler, NEVER clean the boiler with vinegar, descaling agent or other
chemicals.
- When replacing PUMP ASSY 41 or ELECTROVALVE ASSY 43, be reminded to apply loctite at the joint for good sealing.
- When replacing REED SWITCH ASSY 47, be reminded to orientate such that the red wire is facing the water tank.
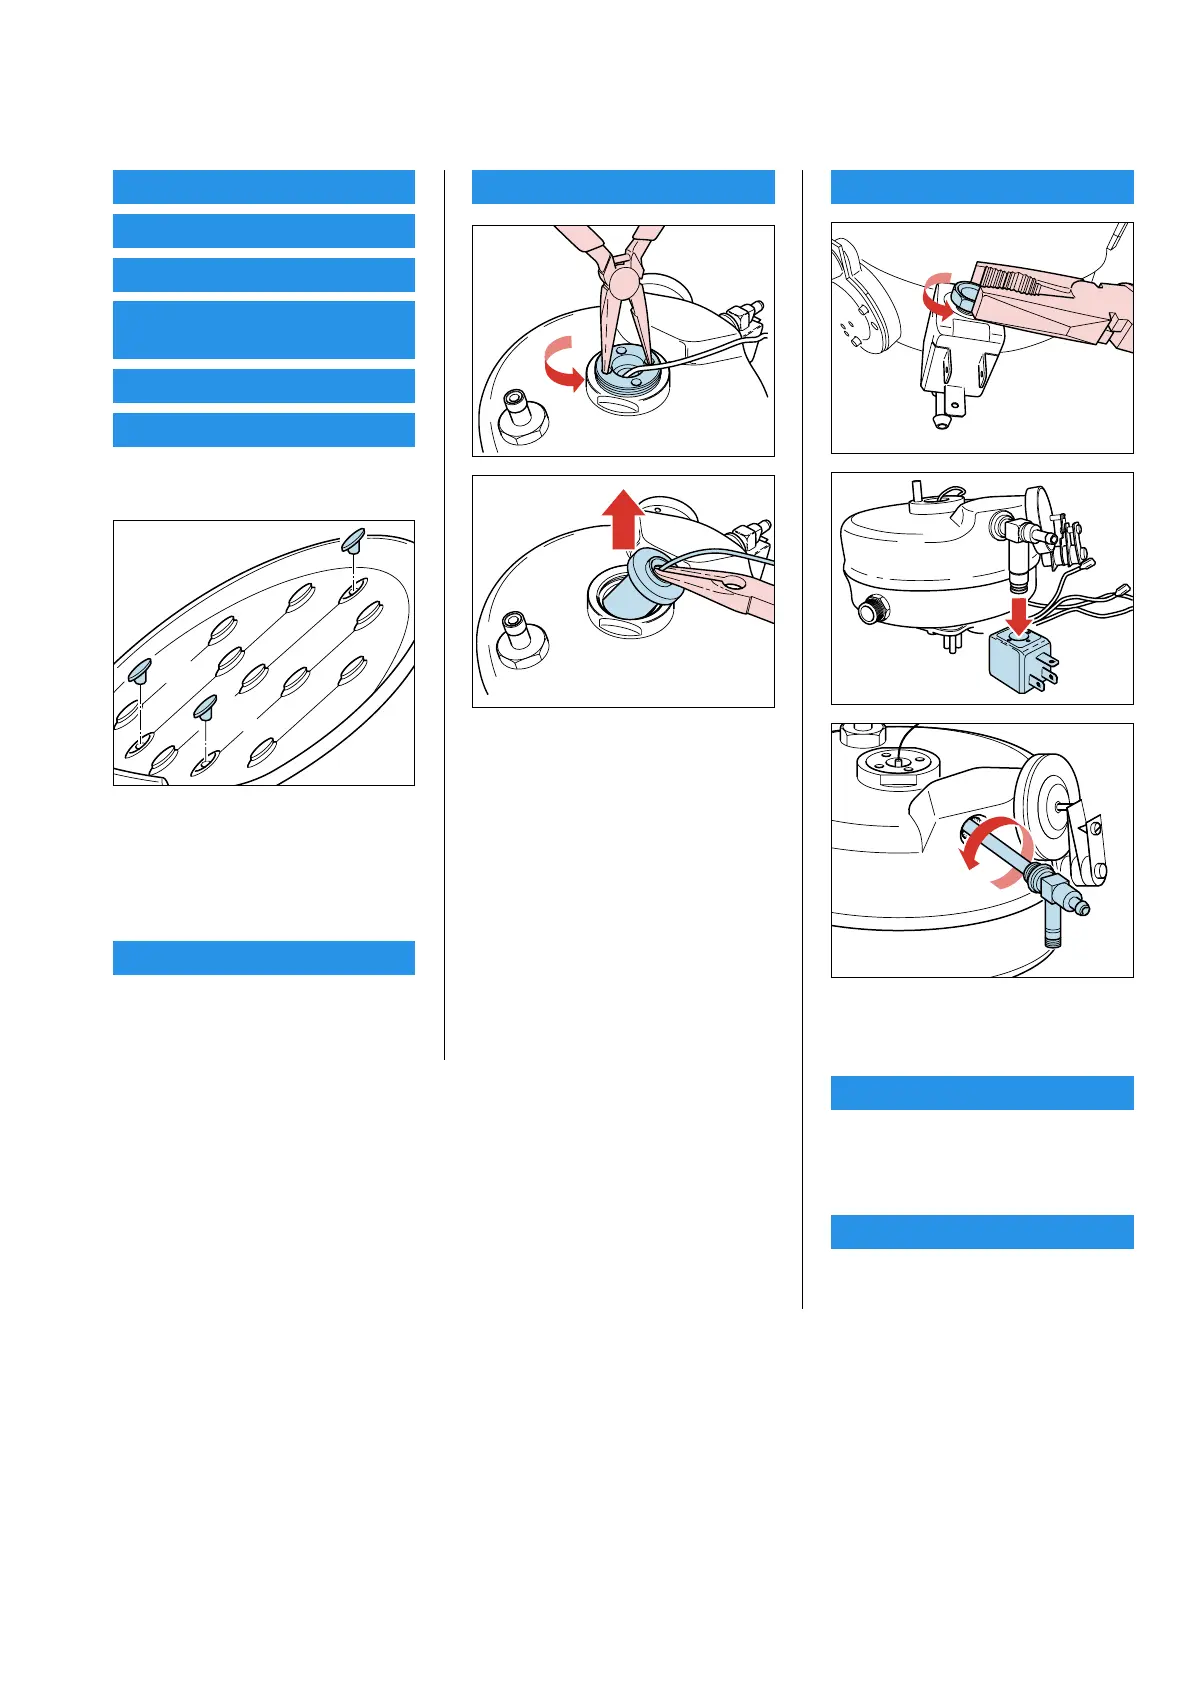
WATER LEVEL SENSOR 42 ELECTROVALVE ASSY 43
Bottom View
DETACHABLE TANK ASSY
SEALING RING 61
Remove Screw L (2 x)
Disassemble Tank washer
Disassemble SEALING RING 61
SPRING (TANK) 62
Remove Screw M (7 x)
Disassemble SPRING (TANK) 62
DISASSEMBLY ADVICE - STAND & DETACHABLE TANK ASSY
4-6