Do you have a question about the Philips GC8375 and is the answer not in the manual?
Details about the iron's functional capabilities and design aspects.
Guidelines for safe operation and compliance with regulations.
Recommendations for using tap water and demineralised water.
Description of the soleplate's properties: scratch resistant and durable.
Information on quick heat-up and powerful steam for efficient ironing.
Mechanism for securely storing the iron on its stand.
Procedure for simple and hassle-free boiler rinsing.
Details on the water tank capacity and ironing duration.
Steps for removing and disassembling the backplate and hose cord.
Procedure for disassembling inlay, steam lock, and microswitch.
Instructions for removing housing and soleplate cover using screws.
Steps for disassembling trigger and thermostat dial assemblies.
List of iron components with service codes and descriptions.
Schematic representation of the iron's electrical connections and components.
Visual guide to iron parts with numerical references for assembly/disassembly.
Identification of screws (D1, D2, D3, E1, E2, E3) used in iron disassembly.
Steps for disassembling stand, water tank, and related assemblies.
Diagram showing connections on the control board.
Diagram showing connections on the power board.
List of parts for the stand and boiler assembly with codes.
Schematic showing wiring for the Boiler Assy EE.
Visual guide to stand parts with numerical references for assembly/disassembly.
Identification of screws (F1, F2, F3, G1, G2, G3, G4, H1, H2) used in stand disassembly.
Details on mounting control board (41) and power board (35) with screws (K1, K2, K3, J1, J2).
Instruction to use only specified cord sets and replace damaged ones.
Guidance on dressing microswitch wires to prevent tension issues.
Warning against using vinegar or corrosive chemicals for boiler cleaning.
Advice to apply loctite for sealing when replacing electrovalve or pump.
Common checks for repaired products: soleplate temperature, leakage current, water leakage, loose parts.
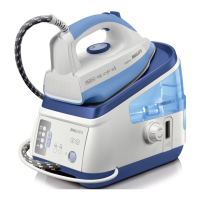
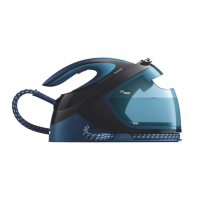
The Philips GC8375 Boiler Steam Iron is a sophisticated garment care appliance designed for efficient and effective ironing. This device combines the power of a boiler with the convenience of a steam iron, offering a range of features to simplify the ironing process and ensure professional results.
At its core, the GC8375 functions by generating high-pressure steam from a boiler unit, which is then delivered to the iron's soleplate. This high-pressure steam penetrates deep into fabrics, relaxing fibers and making it easier to remove stubborn creases. The iron can be used for both horizontal and vertical steaming, providing versatility for various garments and household textiles. The continuous steam output, coupled with a powerful shot of steam function, ensures that even the most challenging wrinkles are tackled effectively. An adjustable steam rate allows users to customize the steam intensity according to the fabric type, preventing damage and optimizing results. The device also incorporates an automatic drip stop system, which prevents water from leaking onto garments, especially at lower temperatures, thus protecting delicate fabrics from water stains.
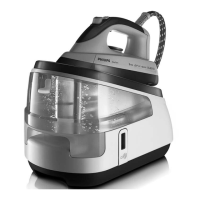
The GC8375 is engineered with several features to enhance the user experience and make ironing more convenient. The SteamGlide Soleplate is a key component, designed to be scratch-resistant, non-stick, and easy to clean, ensuring smooth gliding over all fabric types. This durable soleplate contributes to faster and more effortless ironing.
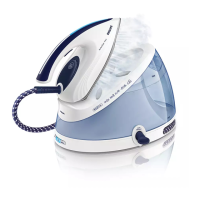
The appliance boasts fast heat-up capabilities, with steam ready in approximately two minutes. This quick preparation time allows users to start ironing almost immediately, saving valuable time. The boiler generates up to 5 bar of steam pressure, which is crucial for deep steam penetration into fabrics, leading to more efficient crease removal.
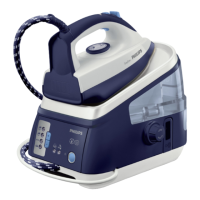
For user comfort and safety, the iron is equipped with a soft touch hand grip, reducing strain during extended ironing sessions. The steam tip is specifically designed to reach difficult areas, such as around buttons, collars, and pleats, ensuring a pristine finish on every part of the garment. The iron also features an iron lock mechanism, allowing it to be securely stored on its stand, preventing accidental falls and ensuring safety, especially in households with children.
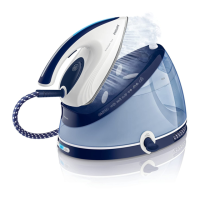
The large detachable water tank is another significant usage feature. With a capacity of 1.4 liters, it provides up to three hours of continuous ironing without the need for frequent refilling. This extended ironing time is particularly beneficial for large loads of laundry, enhancing productivity and convenience. The steam activator lock allows for continuous steam without needing to hold down a button, further reducing hand fatigue during long ironing tasks.
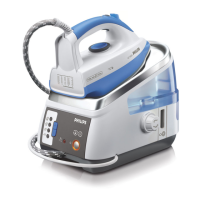
Maintaining the Philips GC8375 is designed to be straightforward, ensuring the longevity and optimal performance of the appliance. The Easy to rinse feature simplifies the descaling process. The new design of the rinse cap allows users to easily unscrew it and pour out the "dirty" water into the sink. This eliminates the need for coins, extra tubes, or complicated procedures often associated with descaling, making regular maintenance hassle-free. This feature is crucial for preventing limescale buildup, which can affect steam performance and the lifespan of the boiler.
The anti-calc cartridge located in the water tank further aids in preventing limescale, especially when using tap water. This cartridge helps to filter impurities from the water, protecting the internal components of the boiler and ensuring consistent steam quality. The anti-corrosion Inox boiler is built to resist corrosion, contributing to the overall durability and reliability of the appliance.
The hose cord storage system helps keep the power cord and steam hose neatly organized when the iron is not in use, preventing tangles and making storage more convenient. The boiler sensing system, which is electronic, monitors the boiler's status, likely providing feedback or alerts for maintenance needs.
In summary, the Philips GC8375 Boiler Steam Iron is a comprehensive ironing solution that combines powerful steam generation with user-friendly design and easy maintenance. Its features are geared towards delivering efficient, effective, and comfortable ironing, while also ensuring the durability and longevity of the appliance through simple descaling and anti-limescale measures.
| Power | 2400 W |
|---|---|
| Water tank capacity | 1.8 L |
| Heating time | 2 min |
| Cord length | 1.8 m |
| Auto shut-off | Yes |
| Steam pressure | 5 bar |
| Vertical steam function | Yes |
| Self-cleaning | Yes |
| Anti-calc system | Yes |