ITS4843B and ITS4843C Installation Procedure
IntelliVue Smart-hopping 1.4 GHz Access Point Installation Guide 2-7
Caution Do not kink the RA Coax-and-UTP-cable-bundle during installation. You must
maintain a minimum 2.5-inch (64-mm) bend radius for the RA Coax-and-UTP-cable-
bundle throughout the installation.
a) Connect the first Remote Antenna to the Core AP using the UTP and Coaxial
cable connectors labeled RA 1 in Figure 2-1.
b) Connect the second Remote Antenna to the Core AP using the UTP and
Coaxial cable connectors labeled RA 2 in Figure 2-1.
c) Be sure to label the UTP cable bundles and the Remote Antennas
themselves as RA 1 and RA 2 corresponding to the cable connections you
made in steps a and b.
5. Route a Category 5e (or higher) RJ-45 cable between each IntelliVue Smart-
hopping Core Access Point and the equipment closet in which the IntelliVue
Smart-hopping infrastructure devices are installed.
- ITS4843B and ITS4843C Access Points use Unshielded Twisted Pair cables.
- ITS4843D Access Points require Shielded Twisted Pair cables to protect the
system from power line transients.
6. Install a ferrite block on the RJ-45 cable within 20 inches (50 cm) of the RJ-45
connector that connects to the Core Access Point as shown in Figure 2-2.
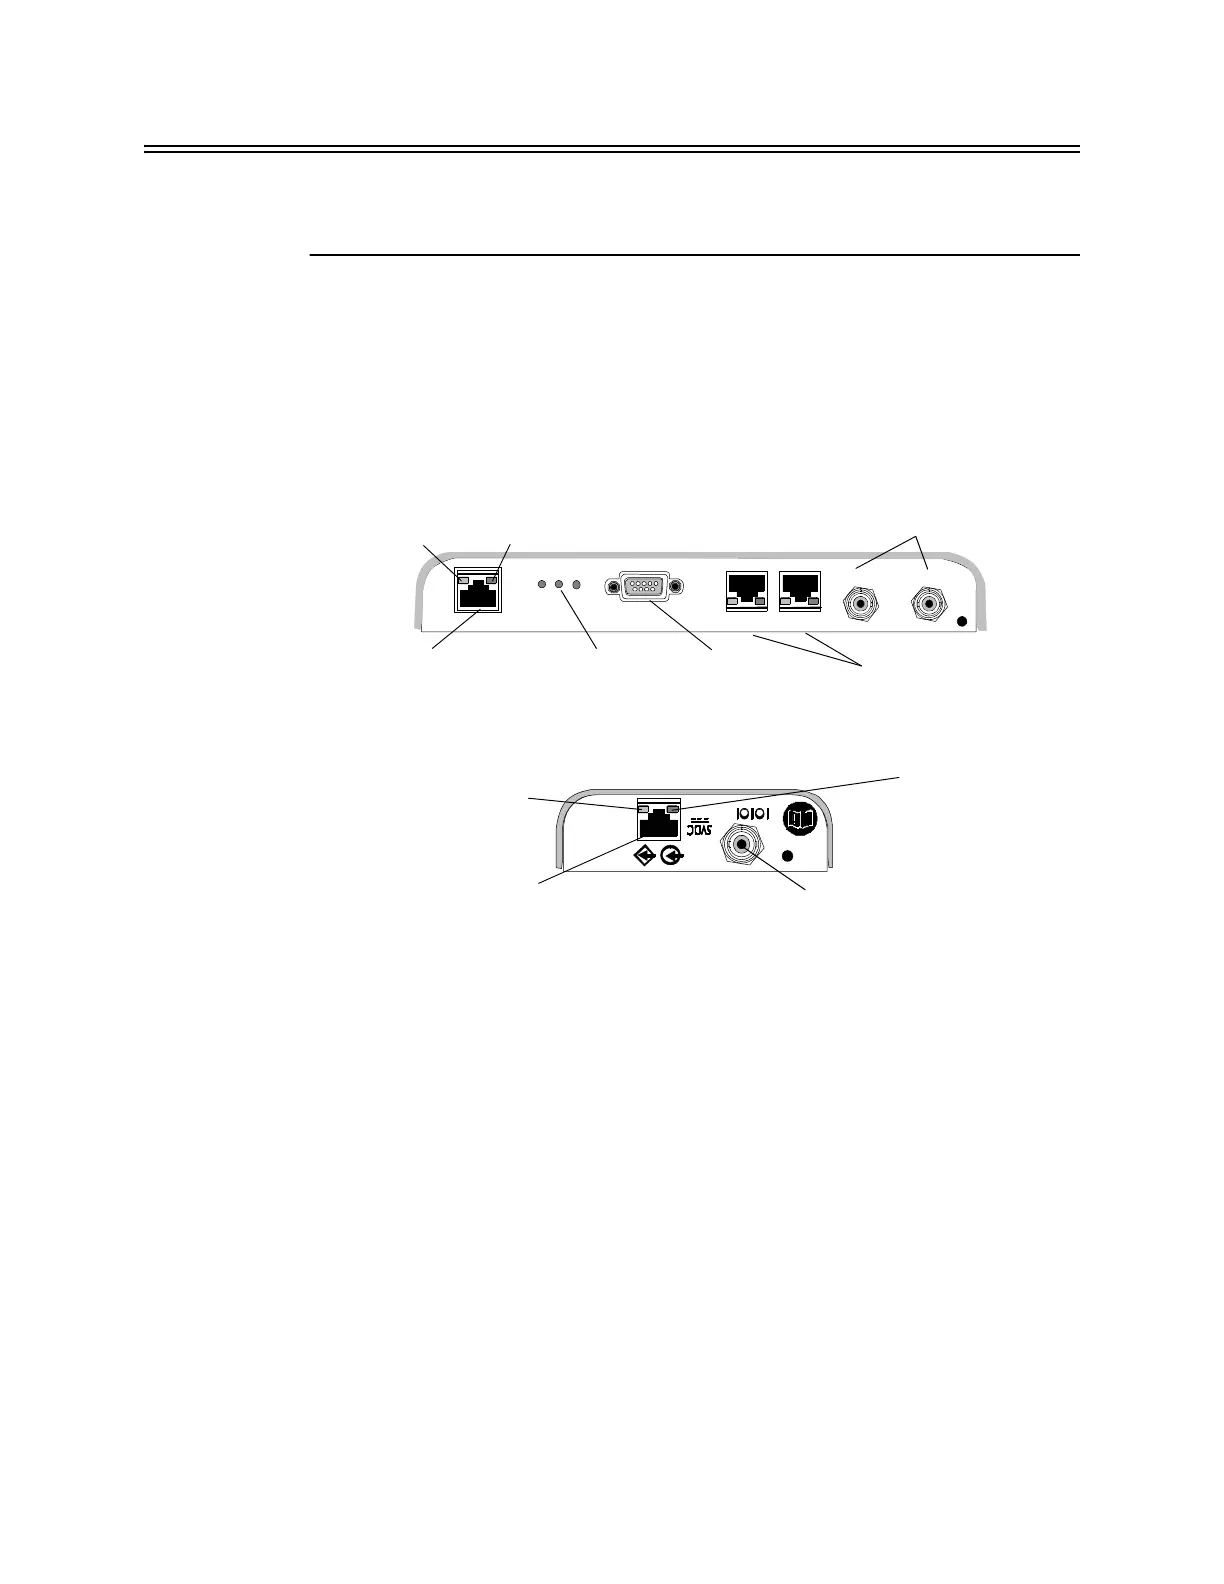
Figure 2-3: 1.4 GHz IntelliVue Smart-hopping Core AP and Remote Antenna Controls
and Connectors
Ethernet Interface to
IntelliVue Smart-hopping
IntelliVue Smart-
hopping Core Access
IntelliVue Smart-hopping
Remote Antenna
Power/Sync, Radio,
and Network
Status LEDs
Serial Port
UTP Cable Connectors
to Remote Antennas (2 & 1)
with RA Status LEDs
Coaxial Cable Connector
to IntelliVue Smart-hopping
Core Access Point
Coaxial Cable Connectors
to Remote Antennas (2 & 1)
UTP Cable Connector
to IntelliVue Smart-hopping
Link LED
Activity LED
Connection LED
(Green)
Power LED
(Yellow)
RA 2 RA 1
RA 2 RA 1