Do you have a question about the Philips NT5600/42 and is the answer not in the manual?
The Philips Norelco Nose Trimmer Series 5000, model NT5600/42, is a versatile grooming device designed for various facial hair trimming needs. This document provides comprehensive instructions on its functionality, usage, and maintenance, ensuring users can effectively operate and care for their device.
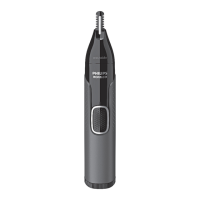
The Philips Nose Trimmer is primarily designed for trimming nose and ear hair, but depending on the model, it can also be used for eyebrow trimming and detail trimming of beards, sideburns, and neck hair. It is a multifunctional device that comes with different attachments to cater to these diverse grooming requirements.
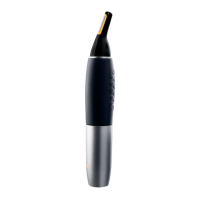
For nose and ear trimming, the device utilizes a specific cutting unit that can be inserted into the nostrils or ear canal to trim unwanted hair. The design ensures that hair is cut to a short length, maintaining a natural defense system against particles entering the body.
Eyebrow trimming is facilitated by specialized eyebrow combs, available in different lengths (3mm or 0.12" for small, and 5mm or 0.19" for large). These combs guide the trimming head to achieve a uniform length for eyebrows.
Detail trimming, for models equipped with a detail trimming head, allows for precise shaping and maintenance of facial hair areas like beards, sideburns, and necklines. This attachment can be used with or without a comb, offering flexibility for different levels of precision.
The device's power source can vary, with some models being rechargeable and others operating on disposable AA batteries. Rechargeable models feature a charging indicator to signal battery status, while battery-operated devices require periodic battery replacement.
To begin using the device, ensure it is adequately charged or has fresh batteries. For rechargeable models, a flashing charging indicator signifies charging, which turns solid when fully charged. Battery-operated devices require correct insertion of AA batteries, ensuring the positive and negative poles are oriented as indicated.
Philips MultiGroomers with a rotary nose trimmer attachment allow for easy removal and attachment. To remove, place a finger on the back of the attachment and push it upwards. To attach, insert the lug into the guiding slot at the front and push the back until it clicks into place. For Philips Nose Trimmers with a nose trimmer or detail trimmer head, removal involves firmly gripping the handle, holding the attachment, and turning it counterclockwise until the triangle indications on the handle and head align. Then, pull the attachment off. To attach, align the triangle indications, place the head on the handle, and turn it clockwise until the indicator triangle and line on the body and attachment are aligned and fixed.
For effective trimming, place the flat part of the comb on your skin and move the trimmer slowly with light pressure against the direction of hair growth. Detailer combs are available in 3mm (M) and 5mm (L) lengths. Slide the detailer comb onto the front of the detailer trimmer head and push down the back until it clicks. For first-time use, it is recommended to use the detail trimming head with its comb. Without the comb, the precision trimmer will cut every hair it touches.
Charge the device when the charging indicator signals low battery or when the groomer operates slower than usual.
The ability to rinse the Philips Groomer with water depends on its waterproof rating, indicated by symbols on the device's box or body.
Thorough cleaning is recommended after each use, especially for nose and ear trimming, to maintain hygiene and device performance. If the device is not washable, use a brush or cloth to remove hair and debris.
If the trimmer does not switch on or runs slower, it's time to replace the disposable AA batteries. Only use the battery type specified in the user manual. Do not mix different types of batteries or old and new batteries. Ensure new batteries are inserted with the correct polarity (+ and - poles).
The model and serial numbers are crucial for product registration and support.
Regular maintenance, including proper cleaning and adherence to charging guidelines, will ensure the longevity and optimal performance of your Philips Norelco Nose Trimmer. If unsure about cleaning methods, consult the user manual or contact customer support.
| Type | Electric Shaver |
|---|---|
| Model | NT5600/42 |
| Blade Material | Stainless Steel |
| Power Source | Battery |
| Battery Type | Lithium-ion |
| Battery Life | 60 minutes |
| Usage Time | 60 minutes |
| Charging Time | 1 hour |
| Wet & Dry | Yes |
| Wet and Dry Use | Yes |
| Cordless Use | Yes |
| Washable | Yes |
| Number of Length Settings | 5 |
| Precision Mode | Yes |
| Quick Charge | Yes |
| Cleaning System | Fully washable |
| Travel Lock | Yes |
| Series | 5000 Series |
| Display | LED |
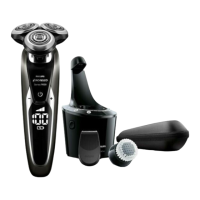
| Accessories | Cleaning brush, travel pouch |