6
EverFlo / EverFlo Q User Manual
Chapter 2: Operating Instructions
Warning: Do not use extension cords or electrical adapters.
1. Select a location that allows the concentrator to draw in room air without
being restricted. Make sure that the device is at least 15 to 30 cm away
from walls, furniture, and especially curtains that could impede adequate
airflow to the device. Do not place the device near any heat source.
2. After reading this entire manual, plug the power cord into an electrical
outlet. Before plugging the unit into a wall outlet (AC power):
• VerifythattheACpowercordislabeledwith120VACor230VAC.
• VerifythattheACpowerinthewalloutletmatchesthevoltagethatis
labeled on the AC power cord.
• IftheACpowerinthewalloutletmatchesthevoltagelabeledonthe
AC power cord, plug the device into the AC wall outlet.
• IftheACpowerinthewalloutletdoesnotmatchthevoltagelabeled
on the AC power cord, do not plug the device into the AC wall
outlet. Contact your health care professional for assistance.
3. Do either Step A or Step B below.
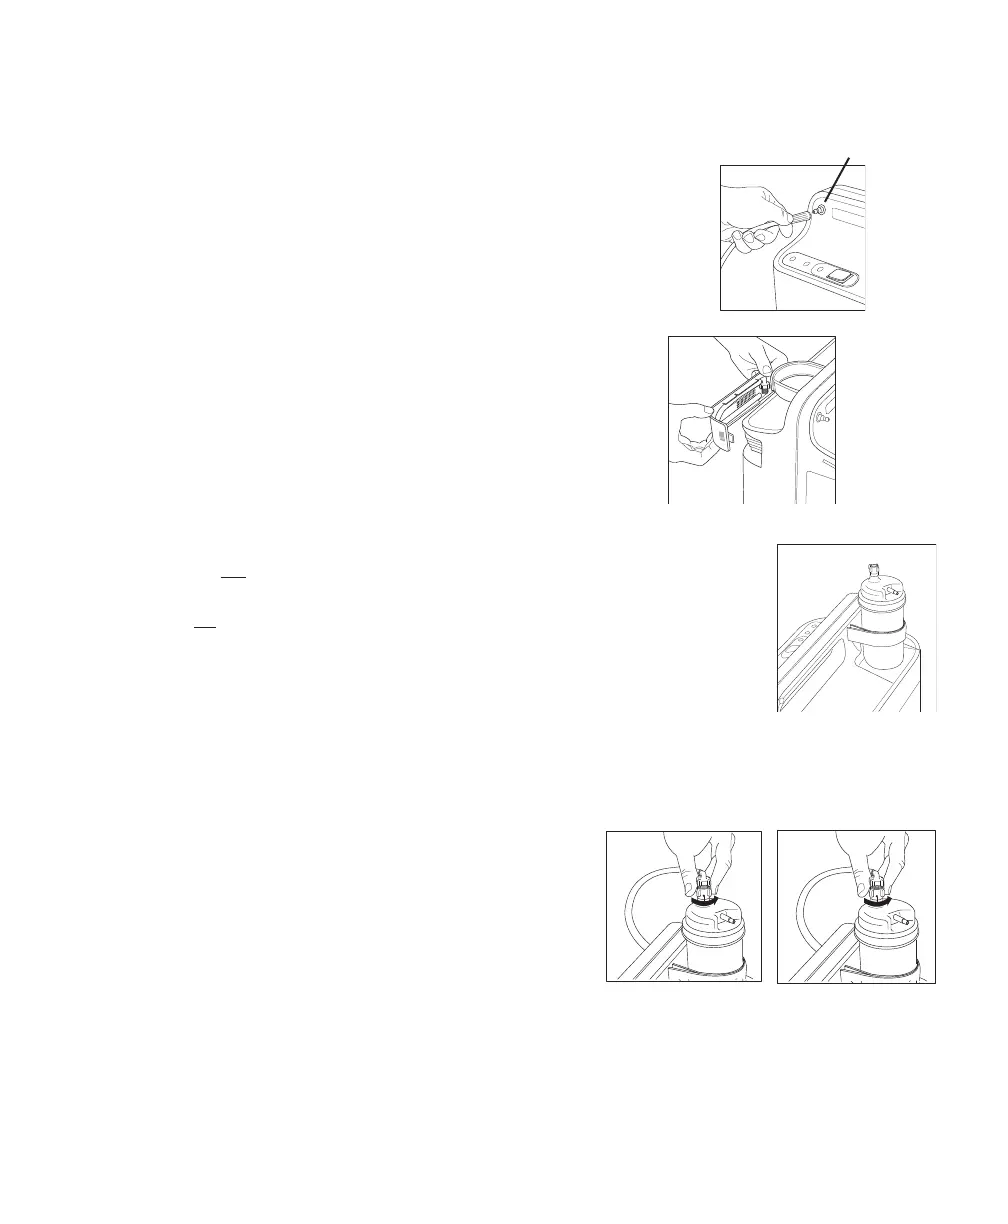
A. If you are not using a humidifier, connect your nasal cannula to the
Oxygen Outlet Port, as shown in the top illustration on the right.
B. If you are using a humidifier, follow the steps below:
1. Open the filter door on the back of the device as shown.
2. Remove the humidifier connector tube from the back of the
filter door and replace the filter door, as shown.
3. Fill your humidifier bottle according to the manufacturers
instructions.
4. Mount the filled humidifier on the top of the EverFlo / EverFlo
Q device inside the Velcro strap, as shown in the illustration on
the right.
5. Tighten the Velcro strap around the bottle and secure it
so it is held firmly in place.
6. Connect the humidifier connector tube (that you
retrieved from the filter door) to the Oxygen Outlet Port
(as shown in Step 3-A above).
7. Connect the other end of the humidifier connector tube
to the top of the humidifier with the elbow in the tubing
facing the front, as shown here.
8. Connect your cannula to the humidifier bottle according to the
humidifier bottle manufacturer’s specifications.
Oxygen Outlet Port
Step 3-A
Step 3-B1
Step 3-B4
Step 3-B7