Do you have a question about the Philips RQ1095 and is the answer not in the manual?
Cap to protect the shaving heads during travel or storage.
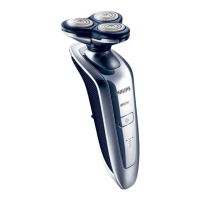
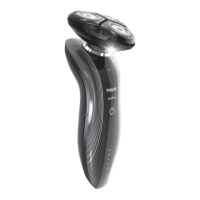
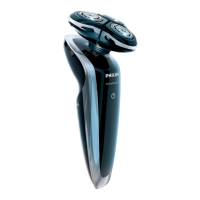
The primary shaving head assembly of the electric shaver.
Attachment for grooming sideburns and moustaches.
Control mechanism for the trimmer function.
Specifies the RQ1090, RQ1062, RQ1060, RQ1052, RQ1050 shaver types.
The main button to switch the shaver on and off.
Screen showing battery status, cleaning indicators, and other information.
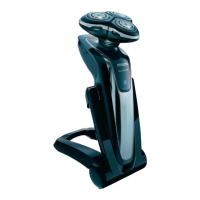
Component for placing the shaver, likely in a cleaning system.
Automated cleaning and charging station for the shaver.
Control button for the Jet Clean System's operations.
Symbol or light indicating the cleaning cycle status.
Symbol or light indicating the drying cycle status.
Indicator for low cleaning fluid level.
Reservoir within the Jet Clean System for cleaning fluid.
Base unit for charging the shaver.
Tool provided for manual cleaning of shaver parts.
Unit that supplies power to charge the shaver.
Connects the adapter to the shaver or power source.
Display behavior for RQ1090 during charging.
Display behavior for RQ1062/RQ1060 during charging.
Display behavior for RQ1052/RQ1050 during charging.
Approximate charging duration and automatic display switch-off.
Display indicators for RQ1090 during charging.
Display indicators for RQ1090 when the battery is fully charged.
Display indicators for RQ1062/RQ1060 when the battery is fully charged.
Display behavior for RQ1090 when the battery is almost empty.
Display behavior for RQ1062/RQ1060 when the battery is almost empty.
Display behavior for RQ1052/RQ1050 when the battery is almost empty.
Remaining capacity shown by shaving minutes on RQ1090.
Remaining capacity shown by flashing arrowheads on RQ1062/RQ1060.
Procedure to lock the shaver for travel, including display and sound feedback.
Procedure to unlock the shaver for use, including motor start indication.
Approximate charging time and shaving time achieved.
Provides enough energy for one shave after 5 minutes of charging.
How to switch on the shaver and perform the shaving action.
Steps to slide out, use, and retract the trimmer.
Details on the cleaning light, drying symbol, and program duration.
How pressing buttons or removing the adapter affects the cleaning program.
Signals and actions when the cleaning fluid level is too low.
Procedure for emptying and rinsing the cleaning chamber.
Instructions for filling the cleaning chamber with cleaning fluid.
Troubleshooting steps for reduced shaving performance.
Reasons why the shaver might not respond to the power button.
Troubleshooting why the shaver might not be entirely clean after using the Jet Clean System.
Steps to resolve issues when the Jet Clean System does not operate.
Explanation for differing operating times of the Jet Clean System programs.
Reasons why the shaver might not be fully charged after using the charging system.
| shaving unit | RQ 10 |
|---|---|
| triple-track shaving heads | 50% more shaving surface |
| charging time | 1 hour |
|---|---|
| shaving time | up to 21 days |
| voltage | 100-240 V |