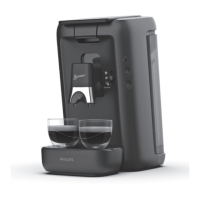
HD6596/50/G /51/G
9-18
Example table, switching from WEU to French/Spain speci cation or vice versa, you need to execute below:
Change volume setting
Adjusting normal 1-cup
volume step 1 – 3
Adjusting normal 2-cup
volume step 5 - 6
Adjusting short/strong
scale factor step 11
WEU French/Spain
Push 7x 1-cup button Push 14x 1-cup button Push 16x 2-cup button
French/Spain WEU
Push 7x 2-cup button Push 14x 2-cup button Push 16x 1-cup button
Boiler reset
1. Keep the 1-cup button pressed while connecting the appliance to the mains.
2. Button can be released when the 2-cup LED blinks rapidly.
Test procedure:
The test procedure allows you to check the basic functions of the appliance.
1. Test step 1: Enter the test procedure:
a. Keep the 2-cup button pressed while connecting the appliance to the mains.
b. The button can be released when the 1-cup, 2-cup and jug LED are switched on.
Heater and pump should be o .
2. Test step 2: 1-cup button, 1-cup LED and heater
a. Press the 1-cup button and hold it.
b. 1-cup LED and heater turn on. Other LEDs and the pump are o . Heater is on for a maximum of 3 seconds or if
1-cup button is released.
c. Release the 1-cup button.
d. Heater turns o , 1-cup LED remain on.
3. Test step 3: 2-cup button, 2-cup LED and pump
a. Press the 2-cup button and hold it.
b. 2-cup LED and pump turn on. Other LEDs and the heater are o .
c. Release the 2-cup button.
d. Pump turns o , 2-cup LED remain on.
4. Test-step 4: Test temperature sensor and descale LED
a. Press the 1-cup button and hold it.
b. The descale LED turns on. Other LEDs and the heater are o .
c. If the temperature sensor is connected and has the right value (approx. 1.5 kOhm) the pump turns on.
d. Disconnect the temperature sensor and the pump turns o .
e. Release the 1-cup button, CALC LED remain on.
5. Test-step 5: Test water level sensor
a. Press the 2-cup button and hold it.
b. The 2-cup LED turns on. Other LEDs and the heater are o .
c. Hold a magnet for the water level sensor and the pump turns on.
d. Remove the magnet and the pump turns o .
e. Release the 2-cup button.
6. To proceed to the nal test step shortly push the 1-cup button.
(Pump starts shortly, 1-cup and CALC LED remain on)
7. Test-step 7: Test Jug button
a. Press the jug button and hold it.
b. All LEDs and the heater are o .
c. The pump turns on after ± 300 ms.
d. Release the jug cup button.
e. Descale LED and jug button LED turn on and the pump turns o .
8. End of test procedure.
Unplug appliance from the mains to exit test procedure.
Repair instruction
 Loading...

