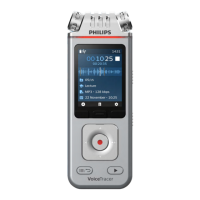
10 Device nd dt
mngement
Transfer data to the computer
You can quickly and conveniently move les from
your VoiceTracer to your computer. Link the device
to a computer with a USB cable. Your recorder will
automatically be recognized as a mass storage device.
You don’t need to install any software.
For more information on how to connect your device to a
computer, see the illustration in Charging the battery.
Caution
• Don’t disconnect the USB cable from the device while
you are transferring les. This might cause data loss.
Note
• While the device is connected to a computer, it can’t
be operated manually.
Transfer data from VoiceTracer to the computer
1
Connect the device to the computer via the supplied
USB cable.
X A charging battery icon appears on the screen
and the Record/Status LED ashes orange for a
few seconds.
2
Open Windows Explorer on a Windows computer, or
open Finder on a Mac computer.
X Your VoiceTracer is recognized as an external
drive.
3
Double-click the VoiceTracer drive.
X The content of your VoiceTracer is displayed in a
new window.
4
Select the desired les from one of the folders and
copy, cut or drag them to the desired location on your
computer.
Reset your device and data
Device reset
If you should encounter problems with your device
software, for example, the software freezes, the device
works slowly or apps don’t respond, you can reset your
device and restart it.
1
Press and hold the reset button on the right side
of your device by using a small, pointed object, for
example, a paper clip.
2
To restart the device, slide and hold the Power switch
on the right side of the device downwards for three
seconds.
17Device and data management
 Loading...