4 Phoenix 10 Installation and Operation Guide
6. To minimize interference, try moving the Phoenix 10 away from the device
or antennas used with the system. If the console still does not display
speed, check the cable and power connections for the system or device
and verify that the system is functioning properly.
7. Once all radio and GPS equipment is powered up, continue driving the
vehicle and monitor the speed display on the console for a short period.
8. If no further problems are encountered, power down the vehicle and all
equipment. Mount the speed sensor securely and route the cable to avoid
tripping hazards and pinch points which may damage or break the cable.
9. Finally, repeat the power up steps to verify operation and complete the
installation.
Specifications
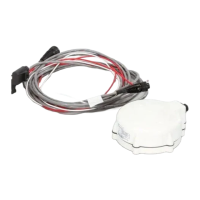
Phoenix 10 Speed Sensor
4-Pin Conxall Connector
Size 2.1” x 5.09”
Weight 18 oz. [0.51 kg]
Mounting Magnetic
Operating Temperature -40° to 158° F [-40° to 70° C]
Storage Temperature -40° to 176° C [-40° to 80° C]
Operating Humidity
5% to 95% R.H.
Non-condensing at 140° F [60° C]
Storage Humidity 100% Condensing
Power Consumption 2-3 Watts (Typical)
Voltage 9-16 VDC
Radar Out 45 Hz/mph
Radar Update Rate 4 Hz
Minimum Speed Output 0.5 mph [.8 km/h]
Minimum
Recommended
Operating Speed
2 mph [3.2 km/h]
Pin
Number
Description
1 +12 VDC
2 Signal Ground
3 Ground
4 Radar

 Loading...