Solution
Open the upper cover and remove the
labeling tape. Cut and remove the broken
tape and reinstall the tape into the printer.
Replacelabeling tape.
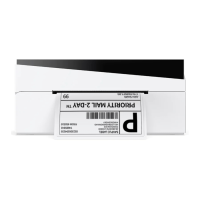
Youonly needto tick the mirror imageoption for
thermal transferlabels. Donot tick that option
for other products.
Cutribbons and fabric thermal printing labels
with scissors.
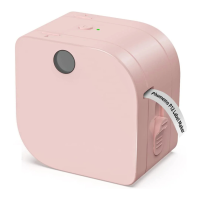
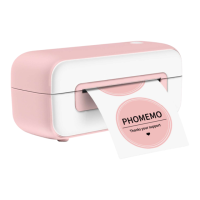
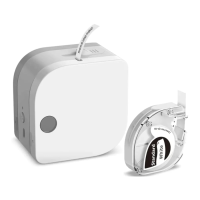
P12 Wireless Label Printer
Quick Start Guide
Please read the Quick Start Guide in detail before using the product.
3. Closethe cover carefully
04. How to download the Print Master app
06. How to edit labels
I.Tap "Create label" button
print Master
Creat label
3. nsert borders and stickers
Hellot
Frequently Asked Questions and Solutions
2.Tap "Text" button to edit the text
Hello
Issue
Prints won't
come out.
The labelsprinted
are reversed
(mirror image).
The printer's
cutter is dulled.
Reason
The printer is jammed.
Thelabeling tape is
used up.
Themirror imageoption
insidethe app isswitched
Please do not use the
printer's cutter to cut
fabric thermal printings
and ribbon labels.
Border Insert sticker
Setting
Method 1:
Search and download in the
App Store or Google Play
Google Play
App Store
Method 2:
Scan the QRcode to download
English
Contents
Item checklist
Introduction to printer components
How to install the battery and the labeling tape
How to download and use the Print Master app
How to connect to the printer from the app
08. Customer services
Online contact information :
Whatsapp: +86 13928088284 / +86 15338193665
Skype: Phomemo Team-Jessie / Phomemo Team Helen
Customer service phone number: +1 855 957 5321(US only)
Service time: Mon-Fri 9AM-5PM(EST)for any questions & suggestions.
Email address: Support@Phomemo.com
Official website: www.Phomemo.com
OVouIubePlease search "Phomemo" to get the printer operation guide
09. Product Warranty Description
Thank you for choosing Phomemo.
@We will provide customers with reliable " replacement/return" support during
the one-year warranty period from the date of purchase;
@Pleasekeep the warranty card in a safe place so that you can read it when
needed.
This manual has been carefully checked. If there are printing errors or
misunderstandings in the content, please consult customer service.
02
03
04
05
06
071
08
09
10
11
05. How to connect to the P12 label printer in the Print
Inse ticker
Setting
How to edit labels
Frequently asked questions
Customer services
Product Warranty Description
FCC Caution
Maintenance Card
01. Item checklist:
Master app
1. Pressand hold the power button
for 3 seconds to start the printer.
Turn green
Note
• If the supporting software is updated, it will be compiled into the new
version of the manual without notice.
2. Enable Bluetooth on your phone
(And enable GPSif you are using
an Android device).
O
Bluetooth
5.After printing, push the cutter button
to cut Off the label
Push the cutter button
4. After you complete editing, tap the
"Print" button
Helloe
Print
6.For labeling tapes with a carbon
tape on it, remove the carbon tape
before use
Tear the carbon tape
Printer* 1
Labeling Tape
Quick Start Guide* 1
Note
• The number of Labeling Tape in the list is subject to the actual
delivery
Note
• According to Google's requirements, Android devices must enable GPS
before using Bluetooth, or connection would fail.
You can find detailed tutorial videos in the Print Master app.
Instructions:
Enter the Print Master app, select to find detailed tutorial videos.
O Tutorials Softwareinstructions
07. Frequently asked questions
Frequently Asked Questions and Solutions
10. FCC Caution
1. This device complies with Part 15Ofthe FCCRules.Operation is subject to the
following two conditions:
(1) This device may not cause harmful interference,and
(2) This device must accept any interference received, including interference that •
may cause undesired operation.
2. Changes or modifications not expressly approved by the party responsible for
compliance could void the user's authority to operate the equipment.
NOTE:This equipment hasbeen tested and found to comply with the limits for a
ClassB digital device, pursuant to Part 15 Ofthe FCCRules. These limits are
designed to provide reasonable protection against harmful interference in a
residentialinstallation.
This equipment generates usesand can radiate radio frequency energy and, if
not installed and used in accordance with the instructions, may cause harmful
interference to radio communications. However, there is no guarantee that
interference will not occur in a particular installation. If this equipment does
causeharmful interference to radio or television reception, which can be
determined by turning the equipment off and on, the user is encouraged to try
to correct theinterference by one or more Ofthe following measures:
Reorient or relocate the receiving antenna.
ncrease the separation between the equipment and receiver.
Connect the equipment into an outlet on a circuit different from that to which
the receiver is connected.
Consult the dealer or an experienced radio/TV technician for help.
RF warning statement:
The device has been evaluated to meet general RFexposure requirement.
The devicecan be used in portable exposure condition without restriction.
02. Introduction to printer components
Cutter
Paper outlet
Reset Hole
Bluetooth indicator
Power
Visual Window
Opening for Labeling
Tape
Opening for Battery Slot
03. How to install the battery and the labeling tape
3. Open Print Master and pair with your printer in the app.
10: 53
Cutrent comoct•d
Print Master
1. Open the lower cover and
insert 6 AAA batteries
11:as
ssue
Theprints are
not clear and
have vertical
lines
can't switch
on the printer
The printer's
indicator light
is red
Cannot close
printer covers
Cannot connect
the printer to
your phone
via Bluetooth.
Prints won't
come out.
*J'Y5—
Bluetooth}fi'XJ
03.
3cm31äH:åT
04.771) (Print Master)
App Store&Google PlayiiBT
Google Play
App Store
05. -r-jl) rprint
(AndroidYÄiLAT1t
—95—7
ECTiiBBluetootht-*l
Note
Solution
Please use high quality alkaline batteries such
as Duracell.
use a cotton bud with a small amount of
medical alcohol to wipe the printer head.
Donot turn on the printer beforethe alcohol
fully evaporates.
nstall the batteries properly accordingto the
positiveand negativesigns.
nsert new batteries.
After installing the labeling tape, close the cover
and the indicator light should turn green
nsert new batteries.
Closethe upperand lowercoversproperly.
Enable Bluetooth on your phone.
The printer is not switched on. The printer must
be switched on.
Enable GPS. (Android phones)
Theprinter cannot be connectedto multiple
devicesat thesametime. Restartyour printer
and connect it to our intended device.
Open the app and tap "Connect now".
Before installing the labeling tape, make sure
the label and the carbon tape are properly
aligned, and then pull out around 3 cm of
the tape.
II. Maintenance Card
Replace
Return
Gender:
User Information
Product
Information
Reason for Return
( Replace / Repair /
Request
Malntenance )
01.
Name:
Phone:
Adress:
Date Ofpurchase:
Product order number:
Product serial number:
Fault descri ption:
2. Open the cassette cover, pull out
3 cm tape labeling tape before
installing the tape
Align the label and carbon tape and
pull out about 3cm
After the printer is connected
successfully, a green tick will appear
next to the printer icon, which is
located on the upper-right corner.
O O O
Print Master
• Please do not connect to your printer in your phone's Bluetooth
setting, or connection would fail.
Reason
Battery power is
insufficient,causing
unstable power supply.
here's a foreign object
on the print head.
The batteries are installed
incorrectly.
The batteries have run
out of power.
Labelingtape is not
installed.
power is low.
he upper and lower
covers are not aligned
properly with the mark.
Your phone's Bluetooth
is off.
The app cannot detect
your printer
Your phone's GPSis not
enabled.
The printer is connected
to other devices.
Please do not connect
your printer directly in
your phone's Bluetooth
setting.
The carbon tape andthe
labelare not pulledto the
printer's paperoutlet, so
the label and the carbon
tape arestuck inside the
printer