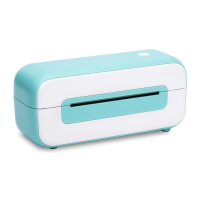
The Phomemo PM-246S is a label printer designed for quick and efficient label printing. This Quick Start Guide provides comprehensive instructions for setup, operation, troubleshooting, and maintenance, ensuring a smooth user experience.
Function Description:
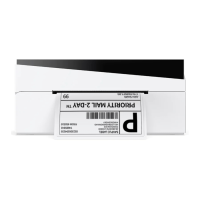
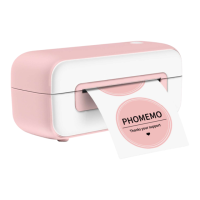
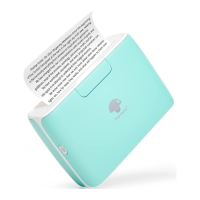
The Phomemo PM-246S is a thermal label printer primarily used for printing labels. It supports various label types and sizes, making it suitable for a wide range of applications, including shipping labels, product labels, and organizational labels. The printer connects to a computer via a USB cable, allowing users to print labels directly from their preferred operating system (Windows or Mac). It features automatic label size identification, which simplifies the setup process when changing label rolls. The device also includes a Feed Button with multiple functions, such as skipping labels, restoring factory settings, automatic label identification for different label types (separated by black lines/marks or gaps), printing test pages, pausing/resuming printing, and clearing printing data.
Important Technical Specifications:
The manual does not explicitly list detailed technical specifications such as print resolution, print speed in specific units (though it mentions adjusting print speed in "in/sec"), or memory. However, it implies that the printer uses thermal printing technology, as indicated by the "Thermal Printhead" component and instructions for cleaning it. The printer is compatible with both Windows and Mac operating systems, requiring specific driver installations for each. It connects via a USB cable and is powered by an external power adapter. The device supports various label sizes, with options to define custom sizes if needed.
Usage Features:
Package Contents:
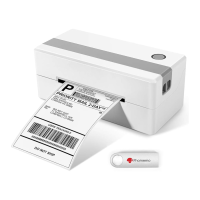
The package includes:
- Printer (PM-246S)
- USB Cable
- Power Adapter
- Power Cord
- Quick Start Guide
- U disk (containing driver installation files, how-to videos, printer getting started guides, troubleshooting tips, how-tos including label adjustments, tips & tricks, and platform setup)
Machine Components:
- Feed Button (①): Used for various operations like feeding labels, initiating automatic identification, and controlling printing.
- Status Light (②): Indicates the printer's status (e.g., solid blue for standby, flashing blue for errors).
- Cover (③): Protects the internal components and needs to be opened for maintenance or label loading.
- Tear Bar (④): For cleanly tearing off printed labels.
- Cover Release Button (⑤): Releases the cover for opening.
- Paper Guide (⑥, ⑧): Guides the labels to ensure straight feeding.
- USB Port (⑦): For connecting the printer to a computer.
- DC Adapter Connector (⑨): For connecting the power adapter.
- Power Switch (⑩): To turn the printer on or off.
- Thermal Printhead (⑪): The component responsible for printing.
- Platen Roller (⑫): Works with the printhead to feed labels.
Quick Start Guide:
- Connect the power source safely:
- Connect the power cord to the adapter.
- Ensure the printer is OFF (O:Off), then insert the adapter cable into the machine.
- Connect the power cord to the power source.
- Connect the USB cable: Connect the USB cable from the printer to the computer.
- Turn on the power: Use the power switch to turn on the printer (I:On).
- Warning: Do not disconnect from the power line when the printer is on, as this may damage the printer and lead to data loss.
Driver Installation:
- Download the Driver: Download the driver from www.phomemo.com.
- For Windows:
- Go to "Devices and Printers" -> Right Click on "Label Printer" -> choose "Printing preferences".
- Go to "page setup". Choose the correct paper size from "Paper Name".
- If the required size is not listed, click "New", input "Paper Width", "Paper Length", and "Paper Name", then click "OK".
- For Mac:
- Click "System Preferences" -> "Printer & Scanners".
- Click "+" to set up a printer.
- Select "Label Printer" and click "Select Software".
- Select "Label Printer" again and click "OK".
- Finally, click "Add".
- When printing a file (e.g., PDF), choose the correct paper size from "Paper Size".
- If the required size is not listed, click "Manage Custom Sizes", input width and height, then click "OK".
Label Setup:
- Load your label:
- Turn the printer on.
- Adjust the paper guide.
- Insert the label, ensuring it is straight and smooth.
- Make sure the label is automatically caught by the printer.
- Attention: The print side should be facing up.
- Run the automatic identification of the label size:
- Press and hold the Feed Button for 5 seconds.
- After the blue light flashes 2 times, release the Feed Button. The printer will move the label back and forth to determine the gap size and other properties.
- Printing can begin once the label is positioned at the tear-off point.
- Note: Anytime you change your label, run the automatic identification of the label size.
- Skip a label: Press the Feed Button while the printer is standby.
- Restore factory setting: Press and hold the Feed Button for 10 seconds (after 4 blue light flashes).
- Automatic identification of the label size (black lines/marks): Press and hold the Feed Button for 7 seconds (after 3 blue light flashes).
- Automatic identification of the label size (gaps): Press and hold the Feed Button for 5 seconds (after 2 blue light flashes).
- Print out test page: Press and hold the Feed Button for 2 seconds (after 1 blue light flash).
- Pause printing: Press the Feed Button while printing.
- Resume printing: Press the Feed Button when printing is paused.
- Clear printing data: Double-click the Feed Button when printing is paused.
Status Light Descriptions (Troubleshooting):
- Solid Blue (Standby): Printer is ready.
- Flashing Blue slowly (Label jams or label detection error): Turn off printer, open cover, clean printhead, platen roller, and detection sensor with alcohol pads. Allow to dry, then close cover and turn printer back on.
- Flashing Blue quickly (Wrong media tracking): Change automatic identification method for label size. For black lines/marks, hold Feed Button for 7 sec (3 flashes). For gaps, hold Feed Button for 5 sec (2 flashes). Run automatic identification anytime labels are changed.
- Solid Red (Printhead over temperature): Printing will stop until the printhead cools down, then resume automatically.
- Flashing Red slowly (Labels empty or not loaded properly): Check label status or replace labels.
- Flashing Red quickly (Cover NOT completely closed): Firmly press the cover to close it completely.
- Solid Purple (Printing): Printer is currently printing.
- Flashing Purple quickly (Pause printing): Printer is paused.
- Note: It is not necessary to turn off the printer for these errors; troubleshooting should allow it to continue working.
Troubleshooting (Detailed):
- Poor print quality:
- Cover not completely closed: Firmly press the cover.
- Poor quality label paper: Use high-quality labels.
- Margins and paper size incorrect: Ensure correct label size in settings. If content exceeds label size, it may shrink, causing faded content. For 4x6 inch labels, use the sample from Phomemo website.
- Print density and speed: Adjust print density and speed via Phomemo website FAQs. High density can cause dark lines or labels sticking to the printhead.
- Dust or adhesive on printhead: Turn off printer, open cover, clean printhead and platen roller with alcohol pads. Allow to dry, then close cover and turn printer back on.
- Blank labels / Skipping labels / Continuously feeding:
- Labels loaded upside down: Ensure print side faces up.
- Not "Direct Thermal" labels: Use direct thermal labels.
- Try to print test page: If test print is good, try printing your label again.
- Change label type and size: Disconnect USB, run automatic label identification (hold Feed Button for 5 sec, 2 flashes), then change label type/size on computer, then reconnect USB.
- Dust on sensor: Turn off printer, open cover, clean sensor with alcohol pads. Allow to dry, then close cover and turn printer back on.
- Horizontal instead of vertical label:
- Mac: Open file, printing -> "Show Details" -> select printing direction in "Orientation".
- Windows: "Devices and Printers" -> right click "Label Printer" -> "Printer Preferences" -> select "90" under "Rotate".
- Barcode not printing clearly:
- Source file not ideal quality: Print a sample label to test printer function.
- High print speed or density: Reduce print speed (try 3 in/sec) and density (try 3) for better results.
- Paper jams or labels print only half/stops:
- High print density: High density causes labels to get too hot and stick. Set print speed to "4 in/sec" and density to "2". Increase density by 1 if too light.
- Same label keeps printing (printer doesn't believe it printed correctly): Turn power switch off to clear pending jobs. Run automatic label re-learning (hold Feed Button for 5 sec, 2 flashes).
- Nothing happens when trying to print (connected to new USB Port): Open "Control Panel" -> "Printers and Devices" and ensure the correct "Label Printer" (e.g., Label Printer, Copy 1, Copy 2) is active and selected for printing.
- Printer doesn't turn on:
- Wall plug electricity: Check if the wall plug has power.
- Power cable connection: Ensure power cable is fully plugged into adapter and printer.
- Power switch: Turn the power switch off and on.
- Printer makes loud noise when printing:
- Print speed/density too low/high: Set print speed to "5 in/sec" and density to "4". Increase density by 1 if too light.
- Label sizes in millimeters: Windows uses the metric system. Convert inches to millimeters using Google if needed.
Maintenance Features:
Printhead Cleaning Steps:
- Turn the printer off and remove the power cord. Open the cover.
- Wait until the Printhead cools down (it can be very hot after printing).
- Completely clean the Printhead using an alcohol swap (NOT WATER).
- Wait until the alcohol has completely vaporized. Close the cover.
- Connect the power cord and print a test page to check if it is clean.
- NOTICE: Ensure power is off when performing maintenance.
Pro Tips:
- Anytime you change your label: Run the automatic identification of the label size.
- To print a test page: Press and hold the Feed Button for 2 seconds (after 1 blue light flash) while the printer is standby.
- Avoid using poor quality labels: They can damage the printer.
- Regularly clean the Printhead.
- Insert Phomemo into the same USB port on your computer every time: This prevents creating duplicate printer copies in the operating system.
- If paper is jammed: Turn the printer off and allow the printhead to cool down. Open the Cover. Check for any residue on the Printhead and Platen roller. Clean it with alcohol pads. Close the Cover securely after it's dry, firmly press to confirm closure, then print.
Safety Notices:
- Do not touch the Printhead when hot.
- Do not bend the power cord excessively or place objects on it.
- Do not use the printer if irregularities are found, to prevent fire or electrocution.
- Keep the printer out of reach of children.
- Use only approved accessories and do not disassemble or repair the unit yourself.
- Keep the printer away from water and objects that could penetrate components.
- Unplug the printer when not in use for long periods.
Support:
- The Phomemo PM-246S comes with a one-year warranty.
- Contact Phomemo priority customer service for troubleshooting or replacements.
- Contact Information:
- Whatsapp 1: +86 13928088284 (Skype 1: Phomemo Team-Jessie)
- Whatsapp 2: +86 15338193665 (Skype 2: Phomemo Team-Anna)
- US Only: +1 855 957 5321
- Email: support@phomemo.com
- Website: www.phomemo.com (for how-to videos, parts, and full warranty details).