PHONIC CORPORATION
Page 6
MQ3600/3400/3300 USER
’
S MANUAL
4 Individual boost/cut control
Moving these sliders upward boosts their labeled
frequency bands, and moving them downward cuts
(decrease) them. When moving these controls past
zero, you will feel the center-detent (notch) in the
control which makes it very easy to find zero in a
hurry, or even in the dark.
5 EQ RANGE selector switch
One of the reasons to use a graphic equalizer is
that the frequencies sliders themselves from a graphic
depiction of the frequency response curve you have
set. But if your setting is very subtle, the graph
becomes difficult to set and see. If you encounter
this difficulty, simply push this RANGE selector
switch.
6 EQ RANGE LED
This LED will change from red to green indicating
the maximum boost/cut range of the frequency
sliders has been reduced from 12dB to 6dB. And
you can make your adjustments, taking advantage
of the greater fader travel necessary to get the same
amount of boost or cut.
7 EQ IN/OUT switch with LED
This switch allows instant comparison of the original
sound with the equalizer sound. The LED will go off
when the equalizer is out of the circuit.
8 LEVEL control
After setting your response curve by using the
individual frequency sliders, use this level control to
compensate for overall changes in the audio signal
level (volume).
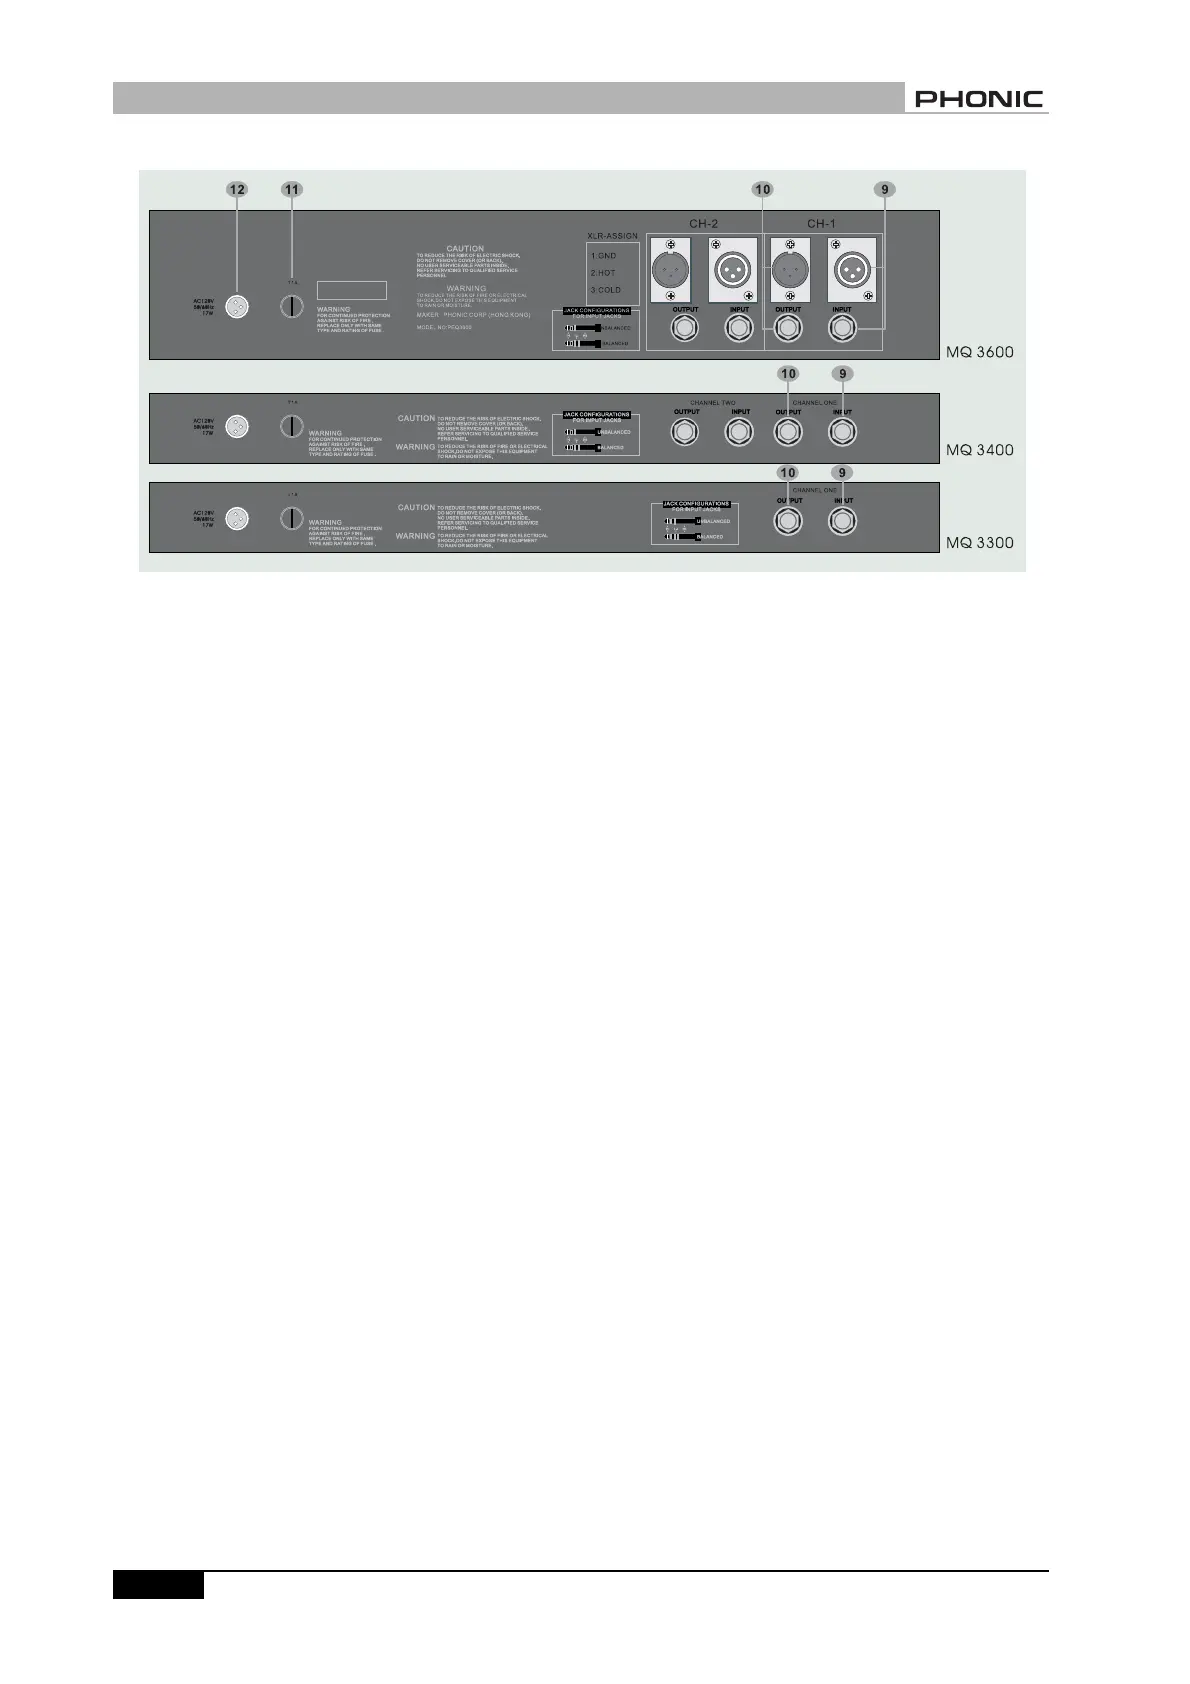
REAR PANEL DESCRIPTION
9 Audio In
MQ3300 has one balanced 1/4
”
-inch jack. MQ3400
has two balanced 1/4
”
-inch jacks, one for each
channel; while MQ3600 has an XLR male jack and a
balanced 1/4
”
-inch jack for each channel.
10 Audio Out
MQ3300 has one balanced 1/4
”
-inch jack. MQ3400
REAR PANEL DESCRIPTION