10
En
INSTRUCTION MANUAL
4. Press the “Adjust/Set Knob” to conrm the setting.
5. Press the corresponding function button to
in
to adjust
from Manual and Multi.
For Odin-C/Odin-N/Strato II
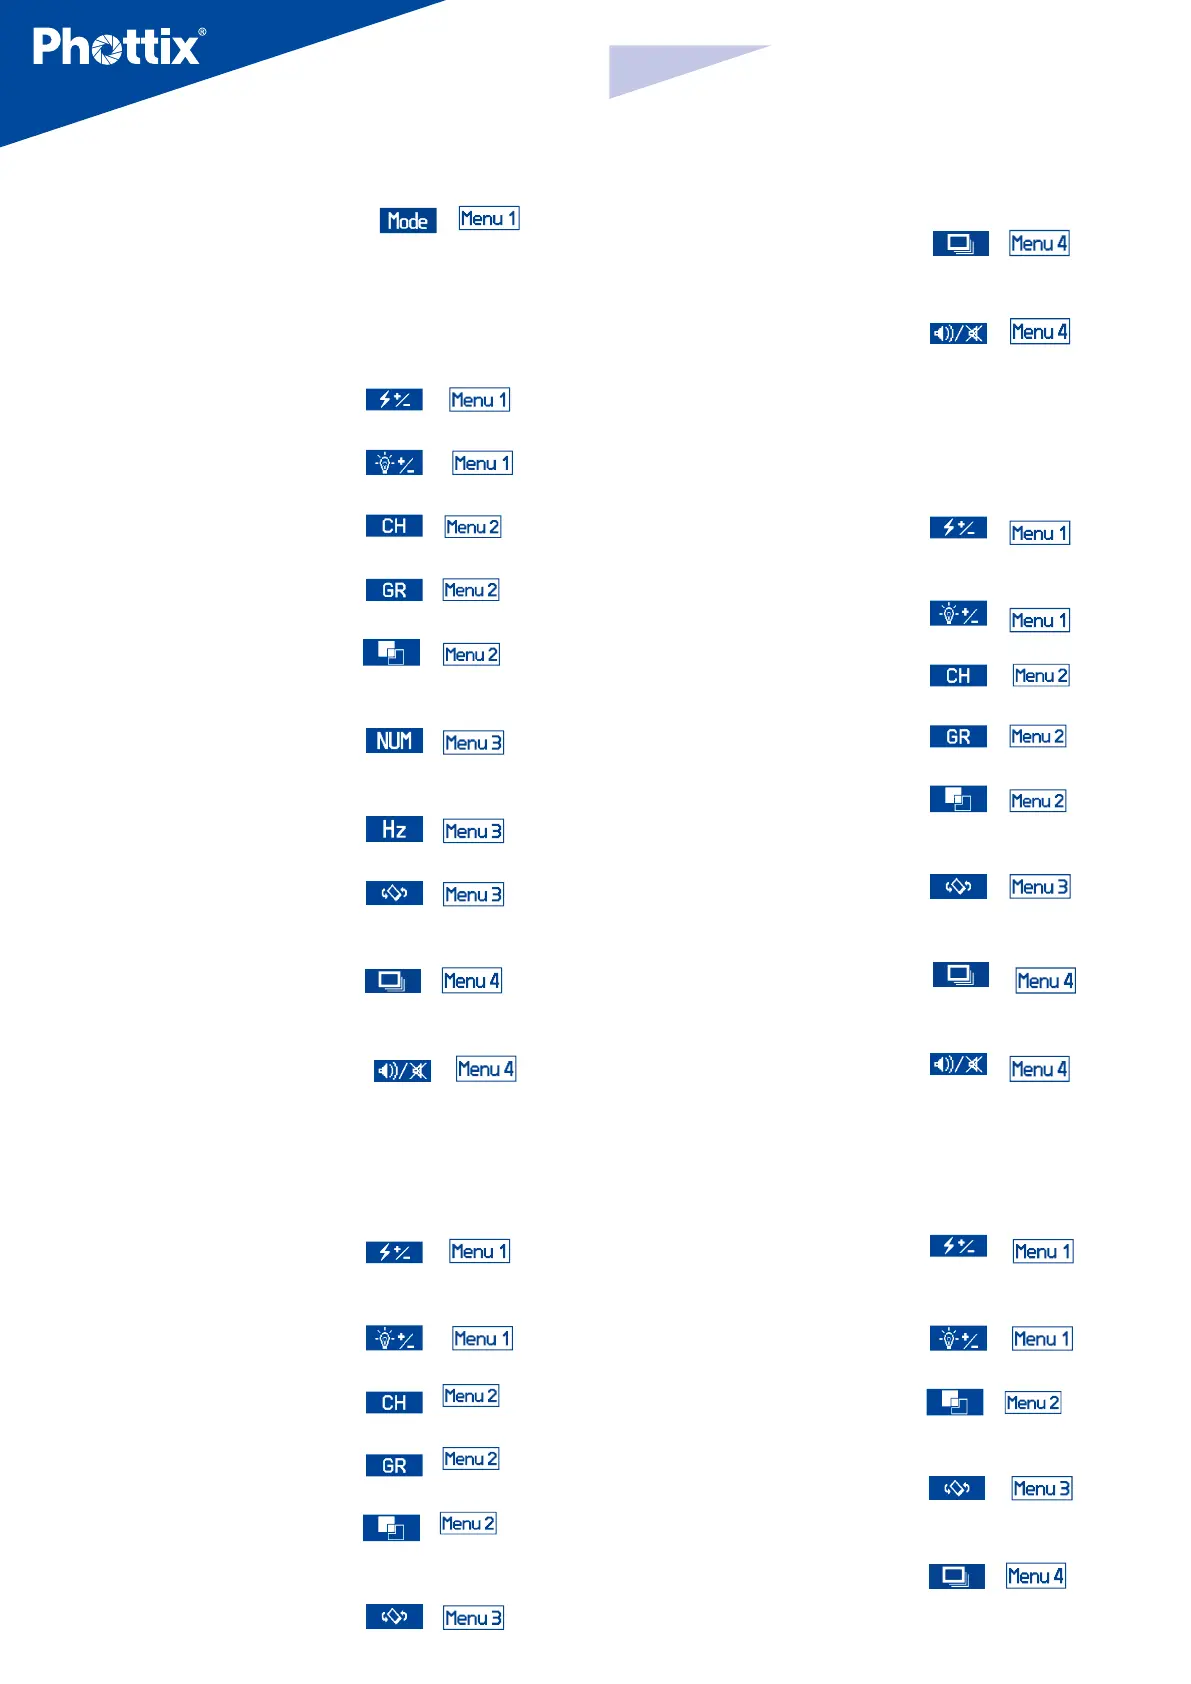
Functions in Multi mode
1. Press the corresponding function button to
in
.
Turn the
“Adjust/Set knob”to adjust the ash power from 1/4 to 1/128 - 6 stops.
2. Press the corresponding function button to
in
. Turn the
“Adjust/Set knob” to adjust the Modeling Light mode (OFF/01-09).
3. Press the corresponding function button to
in
.
Turn the
“Adjust/Set knob”to adjust the Chanel from 1-4.
4. Press the corresponding function button to
in
.
Turn the
“Adjust/Set knob” to adjust the Group from A, B to C.
5. Press the corresponding function button to
in
.
Turn the
“Adjust/Set knob”to adjust the LCD Color Screen Setting (Classic, Dynamic,
Elegant).
6. Press the corresponding function button to
in
.
Turn the
“Adjust/Set knob” to adjust the ash count from 1-100 times (based on the
ash frequency and ash output).
7. Press the corresponding function button to
in
.
Turn the
“Adjust/Set knob”to adjust the ash frequency from 1-100Hz.
8. Press the corresponding function button to
in
.
Turn the
“Adjust/Set knob”to adjust the LCD Display Sensor Setting (Regular, Up-
side-down and Auto by sensor).
9. Press the corresponding function button to
in
,
the
Continuous ash mode option will be highlighted on the LCD screen. Turn the
“Adjust/Set knob” to turn the Quick Continuous ash mode on/o.
10. Press the corresponding function button to
in
.
Turn
the “Adjust/Set knob”to turn the sound on/o.
For Odin-C/Odin-N
Functions in TTL mode
1. Press the corresponding function button to
in . Turn
the “Adjust/Set knob”to adjust the Flash Exposure Compensation Value from
-3.0EV to +3.0EV.
2. Press the corresponding function button to
in
. Turn the
“Adjust/Set knob”to adjust the Modeling Light mode (OFF/01-09).
3. Press the corresponding function button to
in
.
Turn the
“Adjust/Set knob”to adjust the Chanel from 1-4.
4. Press the corresponding function button to
in
.
Turn the
“Adjust/Set knob”to adjust the Group from A, B to C.
5. Press the corresponding function button to
in
.
Turn the
“Adjust/Set knob”to adjust the LCD Color Screen Setting (Classic, Dynamic,
Elegant).
6. Press the corresponding function button to
in
.
Turn
the “Adjust/Set knob”to adjust the LCD Display Sensor Setting (Regular,
Upside-down and Auto by sensor).
7. Press the corresponding function button to
in
.
the
continuous ash mode option will be highlighted on the LCD screen. Turn the
“Adjust/Set knob” to turn the Quick Continuous ash mode on/o.
8. Press the corresponding function button to
in
.
Turn the
“Adjust/Set knob”to turn the sound on/o.
For Odin-C/Odin-N/Strato II
Functions in Manual mode
1. Press the corresponding function button to in . Turn
the “Adjust/Set knob” to adjust the ash power from 1/1 to 1/128 in 1/3rd stop
increments.
2. Press the corresponding function button to
in . Turn the
“Adjust/Set knob” to adjust the Modeling Light mode (OFF/01-09).
3. Press the corresponding function button to
in . Turn the
“Adjust/Set knob” to adjust the Chanel from 1-4.
4. Press the corresponding function button to
in . Turn the
“Adjust/Set knob”to adjust the Group from A, B to C.
5. Press the corresponding function button to
in . Turn the
“Adjust/Set knob”to adjust the LCD Color Screen Setting (Classic, Dynamic,
Elegant).
6. Press the corresponding function button to
in . Turn the
“Adjust/Set knob” to adjust the LCD Display Sensor Setting (Regular, Up-
side-down and Auto by sensor).
7. Press the corresponding function button to
in
. the
Continuous ash mode option will be highlighted on the LCD screen. Turn the
“Adjust/Set Knob” to turn the Quick Continuous ash mode on/o.
8. Press the corresponding function button to
in
. Turn the
“Adjust/Set knob”to turn the sound on/o.
For Opt-Slave/RX OFF
Functions in Manual mode
1. Press the corresponding function button to in . Turn
the “Adjust/Set knob”to adjust the ash power from 1/1 to 1/128 in 1/3rd stop
increments.
2. Press the corresponding function button to
in
. Turn the
“Adjust/Set knob” to adjust the Modeling Light mode (OFF/01-09).
3. Press the corresponding function button to
in . Turn the
“Adjust/Set knob”to adjust the LCD Color Screen Setting (Classic, Dynamic,
Elegant).
4. Press the corresponding function button to
in
.
Turn
the “Adjust/Set knob”to adjust the LCD Display Sensor Setting (Regular,
Upside-down and Auto by sensor).
5. Press the corresponding function button to
in
, the
Continuous ash mode option will be highlighted on the LCD screen. Turn the
“Adjust/Set knob” to turn the Quick Continuous ash mode on/o.


 To Next Page
 Loading...