-5-
PKI-0041-5-E
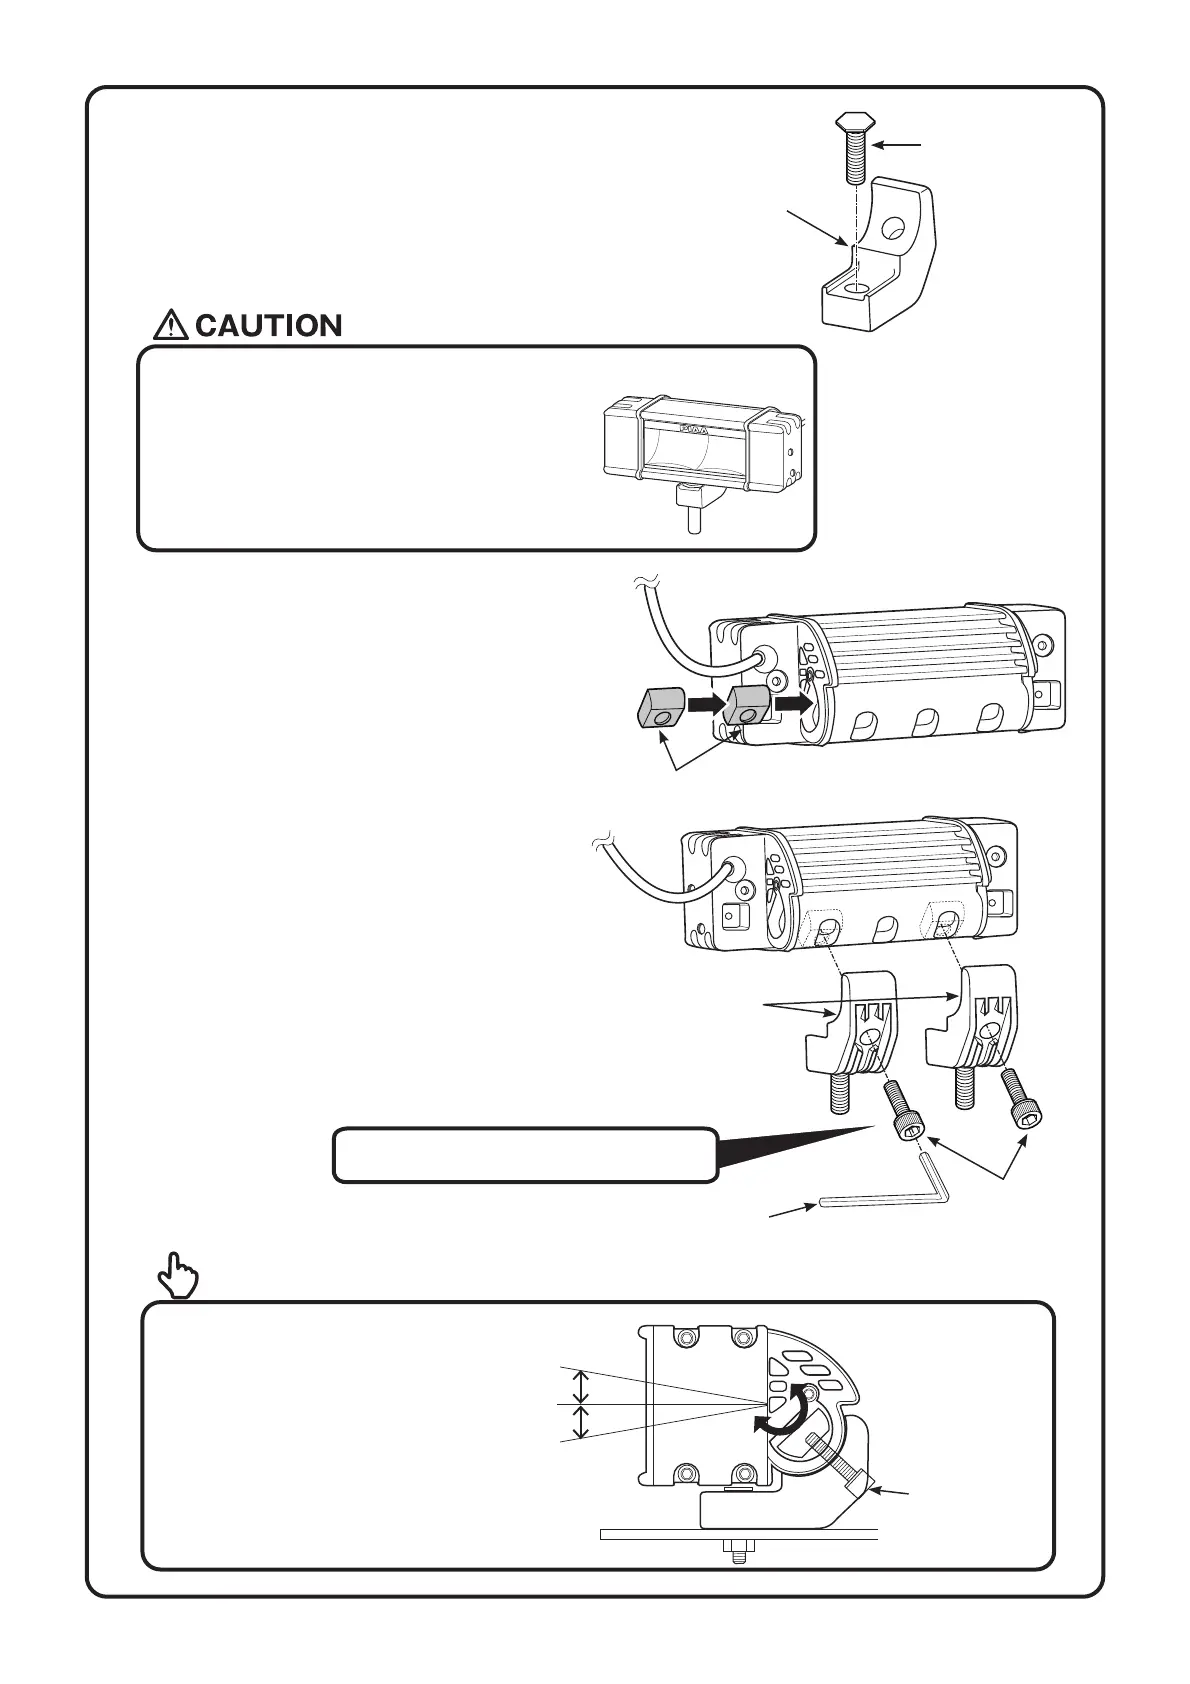
Hexagonheadbolt
(Item ③ )
InstallationbracketA
(Item ② )
(2)CombinetheInstallationbracket(Item② )andthe
Hexagonheadbolt(Item③ )asshowninthefigure
below.
(3)Take2setsmadeupoftheHexnutandSlider
assemblythatwascombinedin(1)puttheminto
thelampmainunitpositionsasindicatedinthe
figure.BecarefulnottodroptheHexboltoutof
theSlider.
●IfinstallingthelampmainunitsRF10and
RF18tothevehicleswithoutcombiningthem,
makesuretoinstall2Installationbracketson2
positionsonthelampmainunit.WithunitRF6,
oneInstallationbracketcanbeusedinthecenter
butwerecommendinstallingthemon2positions.
Sliderassembly
(4)Take2setsmadeupoftheHexnutandbracket
assemblythatwerecombinedin(2)andusingthe
Hexagonsocketheadbolt(M10/Item⑥ ),screwit
firmlyinplace.
Hexagonsocket
headbolt
(M10)(Item ⑥ )
Hexagonalwrench
(M10)(Item ㉘ )
InstallationbracketA
(Item ② )
Tighteningtorque:18ft・Ibs(24N・m)
●Afterthelampsareinstalledonthe
vehicle,theHexagonsockethead
bolts(M10/Item⑥ )canbeloosed
andtheangleofthelampcanbe
adjusted.
Advice
10°
10°
Hexagonsocket
headbolt
(M10)(Item ⑥ )