7
ASSEMBLY
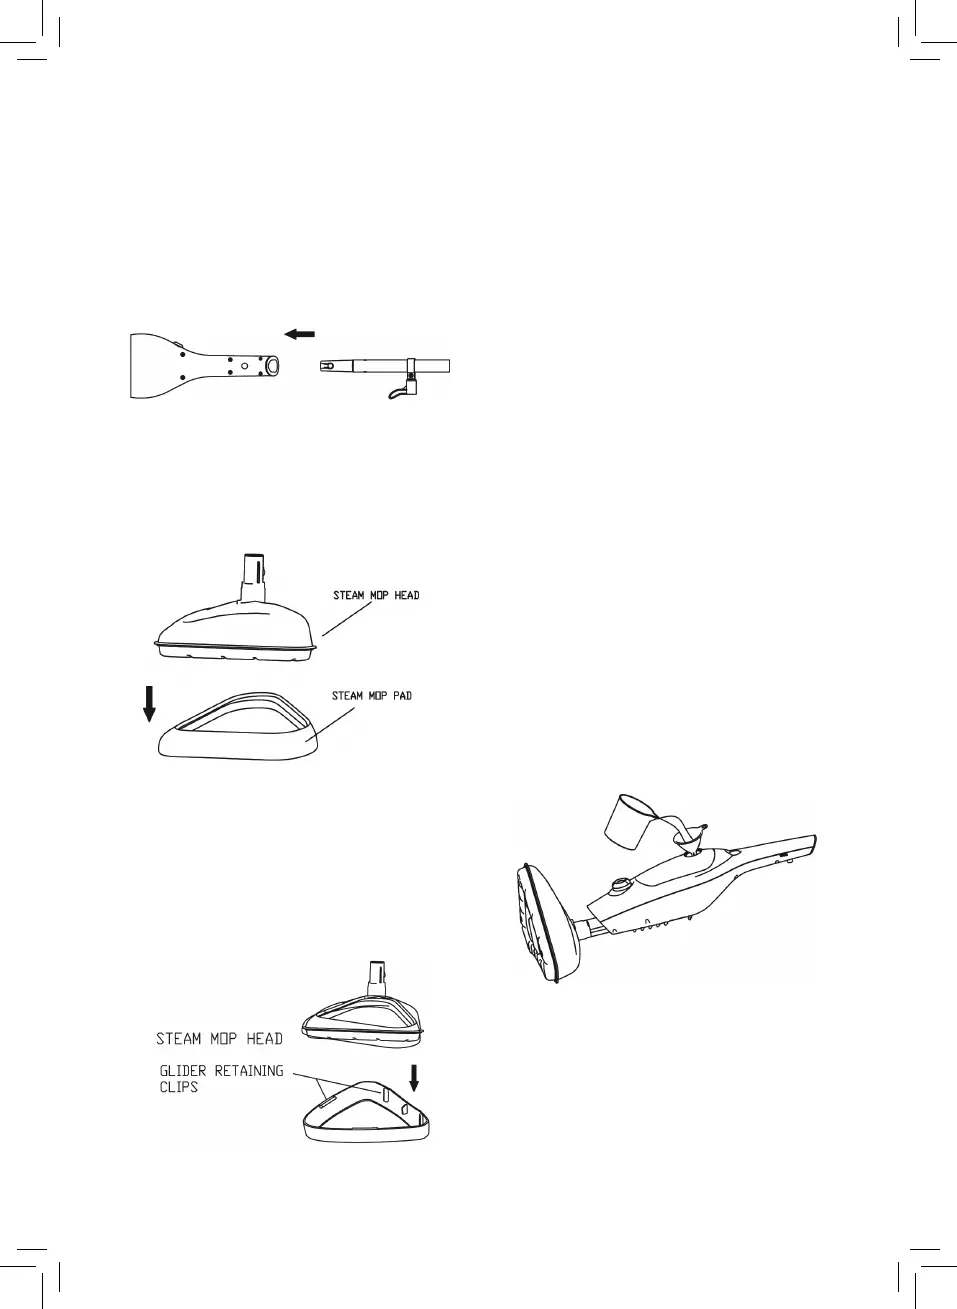
Handle sections assembly:
Push tube into body ensuring the locking
spring assembly has locked.
To disassemble: push button and pull out tube
with some full force. (Fig.1)
Pad assembly:
Fit the pad on base and pull the draw string to
secure. (Fig.2)
Carpet Glider Assembly:
Place the carpet glider part onto the base with
its pad covering it. Then let the retaining clips
x it into position. To remove pull gently on the
outer rim of the glider until it is free. (Fig. 3)
FILLING THE UNIT
IMPORTANT: Always insure that the unit is
disconnected from the wall socket prior to initial
lling and before tting the bottom of the mop
head.
Never use the steam mop without the
microbre cleaning pad securely in place.
Filling the water tank:
Turn the cap anti-clockwise and then lift up to
remove from the water tank. (Fig, 4)
Using the lling cup and funnel, pour one cup
of water into the water tank. Do not overll the
tank. (400ml) (Fig, 4)
Replace the cap onto the water tank
After lling up the water tank, turn the power
button on. The light on button will show red
indicating that the boiler is beginning to heat
the water, the pump will also engage and the
steam will be produced from the base. To
switch o the steam mop set the power switch
to the o position then unplug from the main
supply and allow to cool.
Fig 1
Fig 2
Fig 3
Fig 4