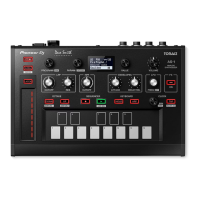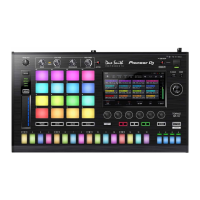
Do you have a question about the PIONEER DJ TORAIZ SP-16 and is the answer not in the manual?
| Type | Sampler |
|---|---|
| Number of Pads | 16 |
| Display | Yes |
| A/D, D/A Converter | 24-bit |
| Frequency Response | 20 Hz - 20 kHz |
| Total Harmonic Distortion | 0.005% |
| S/N Ratio | 100 dB |
| Headphone Output | 1 x 1/4" TRS |
| Power Consumption | 15 W |
| Power Supply | AC adapter |
| Display Size | 7 inches |
| Sampling Rate | 48 kHz |
| Sequencer | Yes |
| Effects | Delay, Reverb, Distortion |
| Inputs | 2 x 1/4" TS |
| MIDI | In/Out/Thru |
| USB | USB 2.0 |
| Storage | SD Card |
| Audio Outputs | 2 x 1/4" TS (main out), 2 x 1/4" TS (assignable out) |
Enables immediate sampling of sound from input terminals for performances.
Instructions on how to access the LIVE SAMPLING interface.
Procedure for initiating the sampling process on a performance pad.
Instructions for duplicating and removing sequences within the unit.
How to access the interface for editing sequences.
Procedure for duplicating and removing individual tracks.
Improved functionality for magnifying waveform displays.
Method to remove all triggers from a track.
Increased recording duration for samples.
Detailed settings for SCALE mode have been added for SAMPLE tracks.
Instructions to access the SET SCALE screen for SAMPLE or MIDI tracks.
Procedure for selecting a scale and assigning notes to performance pads.
Setting the area assigned to the performance pads using an adjustment knob.
Adjusting the ROOT NOTE for MIDI tracks/TORAIZ AS-1 tracks.
Adjusting the KEY SHIFT for SAMPLE tracks to alter the keynote.
Selecting PITCH/NOTE for modulation on triggers in step modulation.
Stretching samples to sync with tempo, affecting the range of tones.
Explanation of how root and octave keys are determined and displayed.
Exporting created patterns as SCENE files for use in other projects.
Importing SCENE files (.scn) into the TSP-16 or a USB flash device.
Inserting the analog filter into a track via the MIXER screen settings.
Details on the PHASER effect for INSERT FX and MASTER/SEND FX.
Explanation of the DUCKER effect parameters for INSERT FX.
Setting the BYPASS mode for individual modules within the TRACK MENU.
Procedure for sending BANK SELECT messages for MIDI tracks.
Selecting AS-1 programs using Bank Select and Program Change.
Setting MIDI NOTE parameters for MIDI tracks and TORAIZ AS-1.
Configuring MIDI CC parameters for TORAIZ AS-1.
Added parameters for LFO modulation in FX1 category and MIXER category.
Feature for receiving MIDI messages from external MIDI devices.
Managing reception of individual MIDI messages like CLOCK, NOTE/CC.
Setting MIDI channels for incoming MIDI messages per track.
Managing transmission of MIDI messages like CLOCK, NOTE/CC to external devices.
Accessing the SET SLICE screen for precise slice editing.
Procedure for adding new slices to a sample.
Method for deleting a selected slice from a sample.
Details on the MULTI MODE FILTER effect parameters.
Selecting parameters for LFO modulation, one per track.
Choosing an LFO shape from seven available types.
Setting LFO behavior details including Mode and Trigger On.
Adjusting LFO parameters like SPEED, DEPTH, and PHASE OFFSET.
Using the COMPRESSOR as a MASTER/SEND FX with LOOK AHEAD setting.
Selecting tracks or mix for rendering into WAV format.
Choosing between PATTERN or ARRANGEMENT mode for rendering.
Selecting how to process the remaining tail of rendered audio.
Choosing where to save the rendered WAV files (internal/external memory).
Procedure to start the audio rendering process.
Syncing the unit to PRO DJ LINK compatible DJ players.
Setting SYNC type (BPM, BEAT, BAR) for PRO DJ LINK synchronization.
Configuration settings for PRO DJ LINK synchronization in the UTILITY screen.
Saving all project samples and settings as a package for easier exchange.
Details on the parameters for the 2 BAND EQ insert effect.
Setting METRONOME ON/OFF, MONITOR, and VOLUME.
Configuring COUNT IN settings for pre-count before sequence playback.
Setting PREVIEW output destination and monitor level.
Unloading a sample from a track in the BROWSE screen.
Procedure to remove all triggers from the current pattern sequence.
Quantizing triggers in the current sequence to the closest 16th note.
