Do you have a question about the Pioneer CT-F900 and is the answer not in the manual?
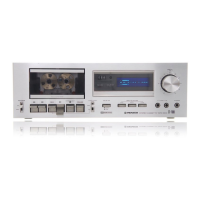
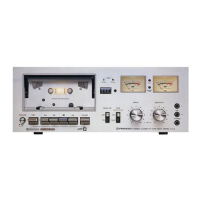
| Track System | 4-track, 2-channel stereo |
|---|---|
| Motor | DC servo motor |
| Tape Speed | 4.75 cm/s |
| Output | 0.3V (line) |
| Dimensions | 16.5 x 7.4 x 14.8 inches |
| Weight | 27.1 lbs |
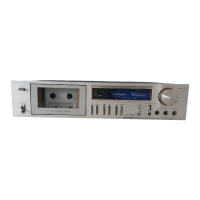
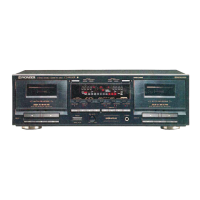
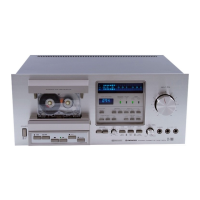
| Type | Cassette Deck |
| Heads | 1 x record, 1 x playback, 1 x erase |
| Tape Type | Metal |
| Frequency Response | 20 Hz to 20 kHz |
| Wow and Flutter | 0.04% WRMS |
| Total Harmonic Distortion | 0.8% |
Describes the dual capstan system for stable tape run.
Details the combination head for recording and playback monitoring.
Explains the microprocessor-controlled digital display for levels and tape counting.
Discusses circuitry for optimizing tape characteristics and bias adjustment.
Highlights LSI-based control for easy mode switching.
Lists six memory programs for tape functions like repeat and auto-stop.
Covers input selector and Dolby NR system features.
Focuses on human engineering for ease of use and digital display.
Guides on connecting via RCA or DIN connectors for recording/playback.
Provides safety instructions for handling the power cord.
Advises on suitable locations for optimal performance and avoiding damage.
Explains the power button's function and related displays.
Details how to monitor source or tape signals during recording.
Recommends keeping the dust cover on when not in use.
Describes the control for adjusting bias according to tape type.
Explains selecting tape type (STD, Fe-Cr) for recording/playback.
How to enable Dolby noise reduction for recording and playback.
How to choose program sources for recording.
Adjusts the playback volume for headphones or line output.
Input for connecting microphones for recording.
Adjusts recording signal levels from various inputs.
Output for stereo headphones.
Explains peak, peak hold, and average meter modes.
Describes indicators for tape types (CrO2, Fe-Cr) and Dolby NR.
Details the electronic tape counter and its reset function.
Covers STOP, PLAY, COUNTER, END modes for playback.
Shows when memory or repeat functions are active.
Explains REW, FF, STOP, PLAY, REC, PAUSE controls.
Details PEAK, PEAK HOLD, AVERAGE meter modes.
Controls for unattended recording and wake-up playback.
Step-by-step guide for loading a cassette tape.
How to stop tape motion and use the pause function.
Explains automatic tape stopping at the end of a side.
Details Play, Record, Fast Forward, and Rewind operations.
Describes the mechanism that removes tape slack.
Enables repeated playback of a section defined by the tape counter.
Allows continuous playback until manually stopped.
Rewinds tape to a set counter point and stops.
Rewinds tape to a set counter point and starts playback.
Provides tips on using memory/repeat functions and potential shifts.
Lists initial switch and control settings before recording.
Guides on selecting tape type and setting bias control.
How to engage Dolby NR and choose input sources.
Explains how to monitor audio quality during recording.
Steps to begin, pause, and finish the recording process.
Guides on using peak and average meter settings for optimal recording levels.
Explains how to use peak meters to avoid distortion from high peaks.
Details how to adjust bias for maximum sound quality based on tape type.
Explains selecting the tape switch for frequency response based on tape type.
Classifies tapes by standard, low-noise, and high-performance types.
Provides recording times for different cassette tape designations (C-30 to C-120).
Covers checking for slack and using erasure prevention tabs.
Details for mounting the unit using the JA-R102 rack mount adapter.
Explains listening to recorded sound vs. input signal.
How to fully erase a tape or record over existing content.
Guides on connecting stereo microphones for recording.
Advice on microphone types, cord length, and preventing howl.
Lists initial switch and control settings for playback.
Guides on setting the tape switch and Dolby NR for playback.
Steps to initiate playback and stop the tape.
Explains how the deck automatically detects chrome tapes.
How to set up automatic recording using an external timer.
How to set up automatic playback using an external timer.
Instructions for cleaning heads, capstans, and pinch rollers.
Explains the need for demagnetizing heads to prevent noise and treble loss.
Instructions for cleaning the exterior surfaces using mild agents.
Explains how Dolby NR reduces hiss and improves signal-to-noise ratio.
Tips for using Dolby NR effectively and avoiding unnatural sound.
Classifies tapes by standard, low-noise, and high-performance types.
Notes that tape size is constant but playing times vary with thickness.
Covers checking for slack and using erasure prevention tabs.
Details for mounting the unit using the JA-R102 rack mount adapter.
Lists motor, head, and time specifications for different models.
Details frequency response and signal-to-noise ratios for various tape types.
Provides sensitivity, maximum input, output levels, and harmonic distortion.
Lists transistors, diodes, ICs, and key subfunctions.
Physical dimensions and weight specifications for different models.
Lists included accessories and important notes on specifications.
How to change line voltage and fuse settings for different regions.
Important safety warnings regarding earthing and extension cords.
Color coding and connection instructions for the mains power cord.