This document serves as an operation and installation manual for Pioneer DEH-2300, DEH-1300, DEH-23, and DEH-12 high-power CD players with FM/AM tuners. It provides comprehensive instructions for using the device's various functions, adjusting audio settings, and ensuring proper installation and maintenance.
Function Description
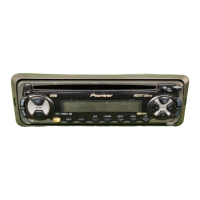
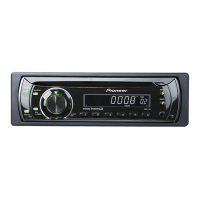
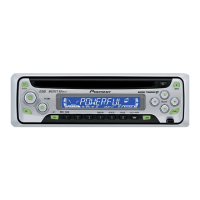
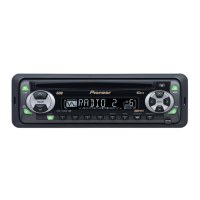
The Pioneer DEH-2300, DEH-1300, DEH-23, and DEH-12 are car audio head units designed to provide a high-quality listening experience. Their primary functions include:
- CD Playback: The built-in CD player supports standard 12 cm or 8 cm (single) CDs. It offers various playback modes such as Repeat Play (repeating the same track), Random Play (playing tracks in a random order), and Scan Play (playing the first 10 seconds of each track). The CD player also includes basic controls for track search and fast forward/reverse.
- FM/AM Tuner: The integrated tuner allows users to listen to FM and AM radio stations. It features both manual and seek tuning methods, as well as a preset tuning function to store favorite stations for quick recall. The Best Stations Memory (BSM) function automatically stores the strongest signals, and Local Seek Tuning helps select stations with especially strong signals.
- Audio Adjustment: The device offers a range of audio adjustment features to customize the sound quality. These include:
- Equalizer Curve Adjustment (EQ): Users can select from predefined equalizer curves (PWRFL, NTRL, VOCAL, FLAT, SBASS) or create a custom curve.
- Balance Adjustment (FADER): This function allows for adjusting the front/rear and left/right speaker balance to optimize listening conditions.
- Loudness Adjustment (LOUD): Compensates for deficiencies in low and high sound ranges at low volumes, with selectable loudness levels.
- Front Image Enhancer Function (FIE): Enhances front imaging by cutting mid- and high-range frequencies from rear speakers, limiting their output to low-range frequencies. Users can select the cut-off frequency.
- Source Level Adjustment (SLA): Prevents radical volume leaps when switching between different audio sources by adjusting their levels relative to the FM volume.
- Clock Display: The unit includes a clock display with settings for hour and minute.
Usage Features
The manual emphasizes ease of use, with many functions accessible through dedicated buttons on the head unit.
- Basic Operation:
- Source Selection: The SOURCE button cycles through available audio sources (built-in CD player, tuner).
- Volume Control: A rotary knob or +/- buttons are used to adjust the volume.
- Power Off: Holding the SOURCE button for 1 second turns the source off.
- Tuner Operation:
- Manual Tuning: Pressing the tuning buttons for 0.5 seconds or less allows step-by-step tuning.
- Seek Tuning: Holding the tuning buttons for more than 0.5 seconds initiates seek tuning.
- Preset Tuning: Buttons 1-6 can be used to memorize and recall broadcast stations.
- Local Seek Tuning: The LOCAL/BSM button switches this function ON/OFF, selecting only strong signals.
- Best Stations Memory (BSM): Pressing the LOCAL/BSM button for 2 seconds activates BSM, which automatically stores the strongest stations.
- CD Player Operation:
- CD Loading: Discs are inserted into the CD loading slot.
- Eject: A dedicated EJECT button removes the disc.
- Track Search/Fast Forward/Reverse: The tuning buttons are used for these functions, with different press durations for track search versus fast forward/reverse.
- Playback Modes: Dedicated buttons (5 for Repeat Play, 4 for Random Play, 3 for Scan Play, 6 for Pause) control these features.
- Audio Menu: The AUDIO button provides access to the audio adjustment menu, allowing users to select and modify settings like FADER, EQ, LOUD, FIE, and SLA.
- Time Setting: The time can be set by first turning off all sources, then entering the Time setting mode by holding the CLOCK button for 2 seconds. Hour and minute adjustments are made using the tuning buttons. The time display can be toggled ON/OFF using the CLOCK button.
- Theft Protection: The front panel is detachable (for DEH-2300 and DEH-23 models) to deter theft. Instructions are provided for detaching and replacing the panel.
Maintenance Features
The manual includes important precautions and care instructions to ensure the longevity and optimal performance of the device.
- General Precautions:
- Volume Control: Always keep the volume low enough to hear outside sounds.
- Moisture Protection: Protect the product from moisture.
- Memory Retention: If the battery is disconnected, preset memory will be erased and needs to be reprogrammed.
- Optical Instruments: Avoid using optical instruments with the product, as it will increase eye hazard.
- CD Player and Disc Care:
- Disc Compatibility: Only play CDs bearing the Compact Disc Digital Audio mark. Use of shaped CDs is not recommended.
- Disc Condition: Check all CDs for cracks, scratches, or warps before playing.
- CD-R Playback: Normal playback of CD-R discs (especially those not recorded with a music CD recorder) may not be possible due to disc characteristics, scratches, or dirt.
- Cleaning Discs: Wipe dirty or damp discs outward from the center with a soft cloth.
- Handling Discs: Avoid touching the recorded surface. Store discs in their cases when not in use.
- Environmental Factors: Keep discs out of direct sunlight and high temperatures. Do not affix labels or apply chemicals to discs.
- Condensation: If condensation collects inside the player (e.g., in cold weather with the heater on), turn off the unit for an hour and wipe damp discs with a soft cloth.
- Road Shocks: Be aware that road shocks may interrupt CD playback.
- Error Messages: The manual provides a table of common error messages (e.g., ERR-11, ERR-14, HEAT) and recommended actions (e.g., clean disc, replace disc, check disc, allow machine to cool).
- Installation Precautions:
- Wiring: Ensure all wiring is connected properly and secured with cable clamps or adhesive tape to prevent shorts and damage from moving parts or heat. Do not shorten leads or feed power to other equipment from the unit's power supply lead.
- Fuse Replacement: Use only fuses of the prescribed rating.
- Speaker Compatibility: Connect high-power speakers with a minimum rating of 45 W (50 W for DEH-2300/DEH-23) and an impedance of 4 to 8 ohms.
- ACC Position: If the vehicle lacks an ACC position on the ignition switch, connect the red lead to a terminal controlled by the ignition switch to prevent battery drain.
- Grounding: Ground the black lead separately from high-current products to prevent damage or fire.
- Installation Angle: Optimal performance is achieved when the installation angle does not exceed 60° from horizontal.
- Parts: Use only the parts included with the unit for proper installation.
- Location: Install the unit where it does not obstruct the driver or injure passengers, and away from heat sources to protect the semiconductor laser.
- After-sales Service: Contact the dealer or distributor for service. If necessary, contact Pioneer customer service in the USA or Canada. Do not ship products for repair without advance contact.