EasyManuals Logo

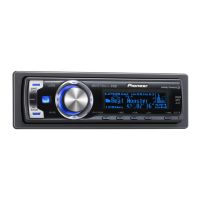
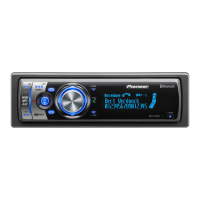
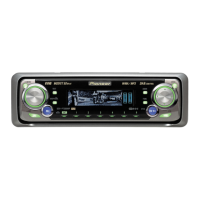
Pioneer DEH-P7950UB User Manual

Pioneer DEH-P7950UB
8 pages
To Next Page IconTo Next Page
Page #1 background imageLoading...
Page #1 background image
<KSNNX> <06K00000>
DEH-P7950UB
Printed in Thailand
<CRD4166-A/N> ES
This product conforms to new cord colors.
Los colores de los cables de este producto se
conforman con un nuevo código de colores.
As cores dos fios deste produto seguem um novo
padrão de cores.
u« l “UN'« «c¼ r−M¹Æ…b¹b'« „öÝô« Ê«
INSTALLATION MANUAL
MANUEL D’INSTALLATION
Installation ENGLISH
Note:
Check all connections and systems before final
installation.
Do not use unauthorized parts. The use of
unauthorized parts may cause malfunctions.
Consult with your dealer if installation requires
drilling of holes or other modifications of the
vehicle.
Do not install this unit where:
it may interfere with operation of the vehicle.
it may cause injury to a passenger as a result
of a sudden stop.
The semiconductor laser will be damaged if it
overheats. Install this unit away from hot places
such as near the heater outlet.
Optimum performance is obtained when the unit
is installed at an angle of less than 60°.
When installing, to ensure proper heat dispersal
when using this unit, make sure you leave ample
space behind the rear panel and wrap any loose
cables so they are not blocking the vents.
DIN Front/Rear-mount
This unit can be properly installed either from
“Front” (conventional DIN Front-mount) or
“Rear” (DIN Rear-mount installation, utilizing
threaded screw holes at the sides of unit chassis).
For details, refer to the following installation
methods.
DIN Front-mount
Installation with the rubber bush
1. Insert the mounting sleeve into the dashboard.
When installing in a shallow space, use a sup-
plied mounting sleeve. If there is enough
space behind the unit, use factory supplied
mounting sleeve.
2. Secure the mounting sleeve by using a screwdriv-
er to bend the metal tabs (90°) into place.
3. Install the unit as illustrated.
Removing the Unit
1. Extend top and bottom of the trim ring outwards
to remove the trim ring. When reattaching the
trim ring, push the trim ring onto the unit until it
clicks. (If the trim ring is attached upside down,
the trim ring will not fit properly.)
It becomes easy to remove the trim ring if the
front panel is released.
2. Insert the supplied extraction keys into both sides
of the unit until they click into place.
3. Pull the unit out of the dashboard.
53
53
1
1
182182
60°
Trim ring
DIN Rear-mount
1. Extend top and bottom of the trim ring outwards
to remove the trim ring. When reattaching the
trim ring, push the trim ring onto the unit until it
clicks. (If the trim ring is attached upside down,
the trim ring will not fit properly.)
It becomes easy to remove the trim ring if the
front panel is released.
2. Determine the appropriate position where the
holes on the bracket and the side of the unit
match.
3. Tighten two screws on each side.
Use either truss screws (5 mm × 8 mm) or
flush surface screws (5 mm × 9 mm), depend-
ing on the shape of screw holes in the
bracket.
Trim ring
Screw
Dashboard or Console
Factory radio mounting bracket
Rubber bush
Screw
Dashboard
Mounting sleeve

Questions and Answers:

Question and Answer IconNeed help?

Do you have a question about the Pioneer DEH-P7950UB and is the answer not in the manual?

Pioneer DEH-P7950UB Specifications

General IconGeneral
ModelDEH-P7950UB
Max Power Output50 W x 4
RMS Power Output22 W x 4
RMS Power Bandwidth20 Hz - 20 kHz
CD PlaybackYes
MP3 PlaybackYes
WMA PlaybackYes
AAC PlaybackYes
USB InputYes
BluetoothNo
RDSYes
Detachable FaceYes
Preamp Voltage4 V
Sub Preamp OutputYes
CD Signal-to-Noise105 dB
CEA-2006 CompliantYes
ID3 TagYes
AUX InputYes
iPod ConnectionYes
HD RadioNo
Satellite Radio ReadyYes
Remote ControlYes
Bass BoostYes
LoudnessYes
CD Frequency Response5 Hz - 20 kHz
High-Pass FilterYes
Low-Pass FilterYes
Preamp Outputs3
Radio Presets18
DIN Size1 DIN
Display ColorVariable color
Button ColorVariable color

Related product manuals