EasyManua.ls Logo

Pioneer GR-470 User Manual

Pioneer GR-470
16 pages
To Next Page IconTo Next Page
Page #1 background imageLoading...
Page #1 background image
Operating
GRAPHIC
EQUALIZER
F-47770
Q
PIONEER
Instructions
SO
em
150
pom
$00
meme
1X
orm
2
SKC
mem
XC
ng
SK
ee!
ee
GO
ee
SC
OC
1K
mK
SK
TAPE
MONTOR
——
QO
*:
rower
——
dill
|,
7.
10:
Thank
you
for
buying
this
Pioneer
product.
Please
read
through
these
operating
instructions
so
you
will
know
how
to
operate
your
model
properly.
After
you
have
fin-
ished
reading
the
instructions,
put
them
away
in
a
safe
place
for
future
reference.
In
some
countries
or
regions,
the
shape
of
the
power
plug
and
power
outlet
may
sometimes
differ
from
that
shown
in
the
explanatory
drawings.
However,
the
method
of
connecting
and
operating
the
unit
is
the
same.
WARNING:
To
prevent
FIRE
OR
SHOCK
HAZARD,
DO
NOT
EXPOSE
THIS
APPLIANCE
TO
RAIN
OR
MOISTURE.
IMPORTANT
NOTICE
[For
U.S.
and
Canadian
models]
The
serial
number
for
this
equipment
is
located
on
the
rear
panel.
Please
write
this
serial
number
on
your
enclosed
war-
ranty
card
and
keep
it
in
a
secure
area.
This
is
for
your
security.
[For
Canadian
model]
CAUTION:
to
prevent
ELECTRIC
SHOCK
DO
NOT
USE
THIS
(POLARIZED)
PLUG
WITH
AN
EXTENSION
CORD,
RECEP-
TACLE
OR
OTHER
OUTLET
UNLESS
THE
BLADES CAN
BE
FULLY
INSERTED
TO
PREVENT
BLADE
EXPOSURE.
ATTENTION:
pour
prevenir
LES
CHOCS
ELECTRI-
QUES
NE
PAS
UTILISER
CETTE
FICHE
POLARISEE
AVEC
UN
PRO-
LONGATEUR
UNE
PRISE
DE
COURANT
OU
UNE
AUTRE
SORTIE
DE
COURANT,
SAUF
SI
LES
LAMES
PEUVENT
ETRE
INSEREES
A
FOND
SANS
EN
LAISSER
AUCUNE
PARTIE
A
DECOUVERT.
Rear
Panel
Facilities
System
Connections
|
System
Connections
II
Front
Panel
Facilities
LINE
VOLTAGE
SELECTOR
SWITCH
Only
multi
voltage
models
are
provided
with
this
switch,
U.
S.,
Canadian,
U.
K.,
Australian
and
European
models
are
not
provided
with
this
switch.
You
will
find
the
line
voltage
selector
switch
on
the
rear
pan-
el.
Before
your
model
is
shipped
from
the
factory,
the
switch
is
set
to
the
power
requirements
of
the
destination;
neverthe-
less,
you
should
check
that
it
is
set
properly
before
plugging
the
power
cord
into
the
AC
outlet.
If
the
voltage
is
not
properly
set,
or
if
you
move
to
an
area
where
the
voltage
requirements
differ,
adjust
the
selector
switch
as
follows.
Before
adjust-
ing,
disconnect
the
power
cord.
1.
Use
a
medium-size
screwdriver.
2.
Insert
the
screwdriver
into
the
groove
of
the
selector
switch
and
turn
it
so
that
the
power
voltage
marking
of
your
area
points
to
the
arrow.
VOLTAGE
SELECTOR
Vv
Medium-size
screwdriver
Individual
Operations
Troubleshooting
Block
Diagram
Specifications
Question and Answer IconNeed help?

Do you have a question about the Pioneer GR-470 and is the answer not in the manual?

Pioneer GR-470 Specifications

General IconGeneral
TypeGraphic Equalizer
Number of channels2
Total harmonic distortion0.008%
Input Sensitivity150mV
Output Level150mV

Summary

Important Notices and Safety Warnings

Polarized Plug and Voltage Selector

Cautionary notes for polarized plugs and details on the line voltage selector switch.

Comprehensive Safety Instructions

General Operating Safety Guidelines

Covers general safety guidelines for operating the appliance, including location, ventilation, and power.

Rear Panel Facilities and Connections

Amplifier and Tape Deck Connectivity Options

Explains how to connect the equalizer to stereo amplifiers and tape decks.

System Connections: Two Tape Decks

Wiring Diagram for Two Tape Decks

Illustration of system connections when the amplifier has two sets of tape jacks.

System Connections: One Tape Deck

Wiring Diagram for One Tape Deck

Illustration of system connections when the amplifier has one set of tape jacks.

Front Panel Controls and Indicators

Front Panel Switches and Indicators

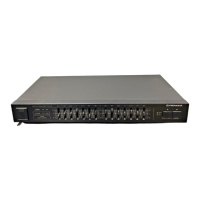
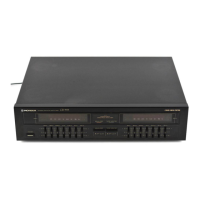
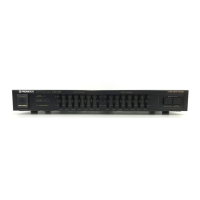
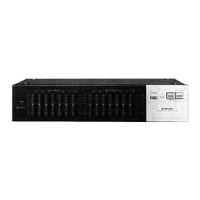
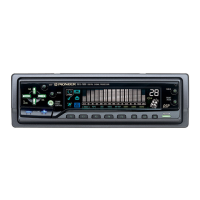
Description of power, equalizer, and tape monitor switches on the front panel.

Front Panel Equalizer Controls

Explanation of the seven equalizer controls for frequency band adjustments.

Equalizer Controls: Sound Adjustment

Frequency Response Compensation

How to adjust equalizer controls to flatten playback frequency response.

Optimizing Listening Room Acoustics

Tips for adjusting equalizer settings to improve sound in different room environments.

Equalizer Controls: Advanced Techniques

Coloring Sound with Equalizer Bands

Techniques for adjusting equalizer bands to shape instrument and vocal sounds.

Equalizer for Recording and Noise Reduction

Methods for using the equalizer during recording for noise reduction and tone shaping.

Individual Operations: Record Playback

Integrating Equalizer with Record Playback

Step-by-step guide for integrating the equalizer with record playback.

Individual Operations: Broadcasts

Equalizing Broadcasts and Recording Audio

How to use the equalizer while listening to broadcasts and recording them.

Individual Operations: Tape Playback

Using Equalizer During Tape Playback

Procedure for using the equalizer during tape playback.

Individual Operations: Tape Editing

Tape Copying with Equalization Adjustment

Guide for copying tapes between decks while applying equalization.

Individual Operations: Tape Recording

Recording Tape Deck 2 to Tape Deck 1 with Compensation

Steps for recording from tape deck 2 to tape deck 1 with equalizer compensation.

Troubleshooting Common Issues

Diagnosing Audio and Equalizer Functionality

Checklist for resolving issues related to no sound or lack of equalizer functionality.

System Block Diagram

Technical Specifications and Accessories

Detailed specifications including electrical, dimensions, weight, and accessories.

Related product manuals