Do you have a question about the Pioneer PL-335 and is the answer not in the manual?
Instructions for adjusting the line voltage selector switch to match power requirements using a screwdriver.
Instructions for wiring the plug for use in the United Kingdom, matching wire colors to terminals.
Appliance should not be used near water to prevent fire or shock hazard.
Install appliance in a stable location, away from heat sources and ventilation blockage.
Appliance should not be mounted to a wall or ceiling.
Ensure proper ventilation by not blocking openings on bed, sofa, rug, or built-in installations.
Situating appliance away from radiators, heat registers, stoves, or other heat-producing appliances.
Connect to power supply type described or marked on the appliance.
Route power cords to prevent them from being walked on or pinched.
Instructions for polarized plug, ensuring full insertion to prevent blade exposure.
Clean with a soft dry cloth; avoid volatile liquids to prevent cabinet corrosion.
Locate outdoor antennas away from power lines to prevent interference.
Unplug the power cord when the appliance is left unused for a long period.
Prevent objects from falling or liquids from spilling into enclosure openings.
Refer to qualified personnel for damage to cord, plug, enclosure, or abnormal operation.
User should only perform servicing described in instructions; contact service center for others.
Ground antenna system for protection against voltage surges and static charges per NEC.
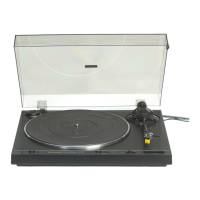
Highlights fully-automatic operation and a low mass tonearm for performance.
Features a DC servo motor for reduced rumble, wow, and flutter.
Includes a high-performance cartridge for superior audio playback.
Advice on handling condensation by allowing the unit to acclimatize to room temperature.
Install on a solid, flat surface away from heat, moisture, direct sunlight, dust, and speakers.
Place away from TVs/tuners; use outdoor antenna or turn off devices to avoid interference.
Use antistatic spray or cleaning fluid; avoid dry cloth wiping to prevent static noise.
Handle power cord by plug, avoid wet hands, do not pinch or knot the cord.
Check for included accessories like platter, mat, EP adaptor, and counterweight.
Details on radio frequency energy, interference, and user-corrective measures per FCC rules.
Step-by-step guide for fitting the drive belt onto the pulley and platter spindle.
Instructions for fitting and setting the counterweight to the zero position on the tonearm.
Adjust the antiskating control to match the tracking force for proper playback.
Remove the protective plastic cover from the cartridge stylus before operation.
Guide to balancing the tonearm by adjusting the counterweight until it floats freely.
Rotate counterweight to set recommended tracking force (2.0g) aligned with the center line.
Connect ground lead, red plug to PHONO R, and white plug to PHONO L on amplifier/receiver.
Plug the power cord into an AC wall socket or amplifier/receiver AC outlet.
Identifies key parts like dust cover, spindle, platter, mat, and cabinet with their functions.
Details parts such as counterweight, antiskating control, armrest, tonearm, and headshell.
Explains the PLAY/STOP button and SIZE selector for starting, stopping, and record size selection.
Steps before playing: open cover, place record, set speed/size, and position tonearm.
Press the PLAY/STOP button to stop the tonearm and platter rotation.
Lift the tonearm using ARM-ELEVATION UP to pause, then DOWN to resume.
Initiate auto play by setting ARM-ELEVATION DOWN and pressing PLAY/STOP.
Use manual play for specific tracks: leave cover open, set ARM-ELEVATION UP, move tonearm.
Adjust tonearm's automatic start position using a screwdriver if it sets down incorrectly.
Steps to remove the old cartridge and install a new one by unscrewing and connecting wires.
Details on adjusting cartridge position for correct stylus tip alignment and angle.
Guide to replacing the stylus after approximately 800 hours of use using the specified model.
Remove dust with a soft brush, wiping forward. Avoid fluid on plastic parts.
Solutions for platter not rotating or no sound, covering power, belt, and connections.
Addresses noisy music, skipping tonearm, feedback, humming, and abnormal tempo/pitch.
Guidance on adjusting tonearm lead-in position for correct auto play start.
Details motor type, drive system, speed, wow/flutter, S/N ratio, and platter dimensions.
Information on tonearm type, usable cartridge weight, and supplied cartridge specifications.
Covers power requirements for different regions, power consumption, and unit dimensions/weight.
Lists supplied accessories like EP adaptor and operating instructions, with design modification notes.