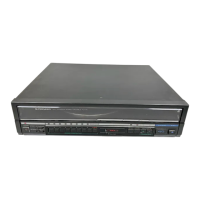
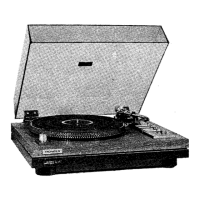
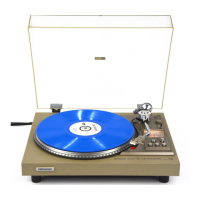
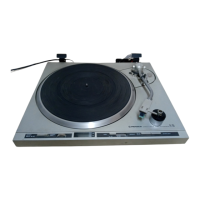
This document is a service manual for the Pioneer Stereo Turntable models PL-V70 (BK) and PL-L90 (BK). The PL-L90 is noted to be identical to the PL-V70 except for its exterior design. The manual provides comprehensive information for circuit descriptions, repair, and adjustments.
Function Description:
The Pioneer PL-V70 (BK) and PL-L90 (BK) are stereo turntables designed for automatic and programmed playback of vinyl records. Key functions include auto lead-in, auto return, auto cut, and repeat play. The turntables feature arm elevation for manual play and program search, skip functionality, auto disc size selection, and record detection. An auto speed selector automatically adjusts the rotation speed based on record size. The unit can be controlled via front panel buttons or an infrared remote control.
Important Technical Specifications:
- Drive System: Belt-drive
- Motor: DC servo motor
- Turntable Platter: Aluminum alloy die-cast
- Speeds: 33-1/3 and 45 rpm
- Wow and Flutter: Less than 0.05% (WRMS), ±0.065% WTD Peak (DIN)
- Signal-to-Noise-Ratio: More than 70 dB (DIN-B) (with Pioneer cartridge model PC-291)
- Tonearm Type: Integrated straight pipe arm
- PC-291 Cartridge Specifications:
- Type: IM type
- Stylus: 0.5 mil diamond (PN-291)
- Output Voltage: 2.5 mV (1 kHz, 5 cm/s LAT. Peak)
- Tracking Force: 1 g to 1.5 g (proper 1.25 g)
- Frequency Response: 10 to 30,000 Hz
- Recommended Load: 50 kΩ
- Weight: 4 g
- Power Requirements: AC 120 V, 60 Hz
- Power Consumption: 11W
- Dimensions: 420 (W) x 104 (H) x 350 (D) mm (16-1/2 (W) x 4-1/8 (H) x 13-3/4 (D) in.)
- Weight: 7.5 kg / 16 lb 8 oz
- Accessories: EP Adapter, Remote control cord, Remote control plate, Operating Instructions.
Usage Features:
The turntables offer a user-friendly interface with several control options:
- POWER switch/indicator: Turns the power on/off.
- SPEED switch: Selects 33-1/3 rpm, 45 rpm, or AUTO speed. In AUTO mode, the speed is automatically set based on record size (30cm/25cm for 33-1/3 rpm, 17cm for 45 rpm).
- SENSOR switch: Adjusts sensitivity for programmed play, with settings for NOR (normal records), HI (narrow intervals), and LO (wide sound-groove pitch).
- PROGRAM switches (1-8)/indicators: Used to program the playback order of up to 8 tracks. Indicators flash for the currently playing track.
- CLEAR switch: Clears programmed selections.
- REPEAT switch/indicator: Initiates or stops repeat play for a selection, up to 8 times.
- ARM ELEVATION switch (ARM EV)/indicator: Raises/lowers the tonearm for manual play, suspending playback, or changing tracks. The indicator lights when the tonearm is raised and flashes during tonearm movement.
- LOCATE/SKIP switches (ARM LOCATE/PROGRAM SKIP): Starts manual playback or changes tracks during programmed play. Moves the tonearm left/right. In programmed play, '<' moves to the next track, and '>' moves back to the beginning of the current track.
- PLAY/STOP switch: Starts auto play or stops playback.
- EJECT button: Ejects the slide base for mounting or removing a record.
- Remote Control: The unit can be operated via an infrared remote control (SA-V70), allowing for remote selection of functions like track programming, skip, stop, start, arm control, repeat, and clear.
Maintenance Features:
The service manual details various maintenance and adjustment procedures:
- Disassembly: Step-by-step instructions for disassembling components such as the bonnet, control panel, turntable platter, belt, ADJ cover, motor assembly, switch boards, power transformer, and slide base.
- Carriage Wire Replacement: Detailed steps for replacing the carriage wire, including adjusting its length, attaching grommets, winding it onto the worm wheel, connecting it to the wire guard, and securing it around the pulley.
- Lead Line Disposal: Instructions for positioning and securing lead lines to prevent interference with the carriage.
- Stylus Lowering Position Adjustment: Procedure to adjust where the tonearm rests on the record using a test record and an adjustment screw.
- Tracking Sensor and Offset Adjustment:
- Gain Adjustment: Connecting a DC voltmeter to specific pins and adjusting VR201 while pushing the tonearm to achieve a 3V ± 0.1V reading.
- Offset Adjustment: Returning the tonearm to rest and adjusting a screw until the DC voltmeter reads 1.1V ± 0.1V.
- Stylus Height Adjustment: Adjusting the stylus tip height (5-7mm) above the record surface using a screw.
- Band Sensor Offset Adjustment: Setting the O/C switch to ON, turning VR1 and VR2 counterclockwise, and adjusting VR3 to achieve a voltage of 0 ± 30 mV between specific pins.
- Band Sensor Gain Adjustment: Using a test record and a notched rubber sheet, adjusting VR1 to achieve an AC voltmeter reading of 55 ± 3 mVAC, then adjusting VR2 for a DC voltmeter reading of 0 ± 30 mV.
- Program Selection Adjustment: Setting sensor sensitivity to "H" and using a test record to ensure the needle rests correctly in the band before selection, adjusting with a screw if necessary.
- Phono Motor Speed Adjustment: Using a strobo-sheet on the turntable and a small driver to adjust turntable speed via VR4 (45rpm) and VR5 (33rpm).
- Troubleshooting: Extensive flowcharts are provided to diagnose issues related to the tonearm not tracking, no sound, speed selector malfunction, 30cm size sensor issues, and remote control unit malfunction, guiding technicians through checks of voltages, patterns, connections, and specific components.