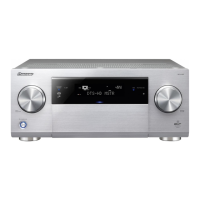
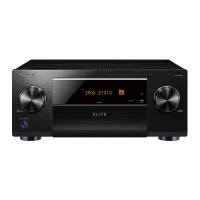
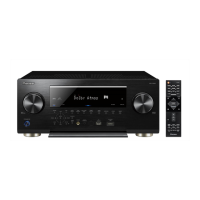
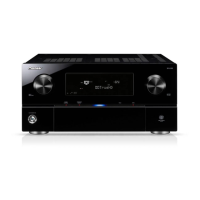
Disassembly
[1] Exterior Section
Remove the bonnet by removing the 22 screws.
1
1
1
1
1
2
4 4
3
3
Center beam V1Left beam 81
PRIMARY
Assy
Note:
(1) Even if the unit shown in the photos and illustrations in this manual may differ from your product, the
procedures described here are common.
(2) For performing the diagnosis shown below, the following jigs for service is required.
• 27P FFC (GGD1588)
• 19P FFC (GGD1589)
• 21P FFC (GGD1590)
• 11P FFC (GGD1650) x 2
• 17P + 19P board to board extension jig cable (GGD1593)
• 24P + 15P board to board extension jig cable (GGD1651)
• 8P PH Housing Assy (GGD1652)
• 5P PH Housing Assy (GGD1594) x 2
(3) Before starting the diagnosis, wait for three minutes until the electricity of the unit is discharged.
(1) Remove the five screws. (BBZ30P060FCC)
(2) Release the PCB holder.
(3) Release the binders, as required.
(4) Remove the center beam V1 and left beam 81.
[1-1] Center beam V1, Left beam 81
 Loading...