6
two cotter rings on the shroud adjuster should be on the cockpit side of the
fitting, not the outside. For normal setup of the rig, there should be 4 or 5
holes showing on the shroud adjuster between the clevis pin at the chainplate
and the clevis pin for the shroud. Now is the time to make any adjustment,
before the mast is raised.
Raising and stepping the mast
Before raising the mast, locate the headstay and the clevis pin and cotter ring
that attach it to the boat. Remove the cotter ring and clevis pin and place
them very near the headstay toggle on the boat, up in the very bow. If you
are tall enough or have a partner who can climb in the boat and “walk the
mast up” while you pull on the headstay, then simply pull on the headstay
until the mast is in position. (If you are not tall enough, tie your tow line to
the head stay and use that to pull the mast
up.) The mast will rotate up on the pin at the
base of the mast which has been placed in
the slot on the mast step. The mast will need
to have pressure applied to it from behind,
near the gooseneck, in order to attach the
headstay to the toggle at the bow. (You
should need to “work” for the last inch to
connect the headstay to the toggle.) The
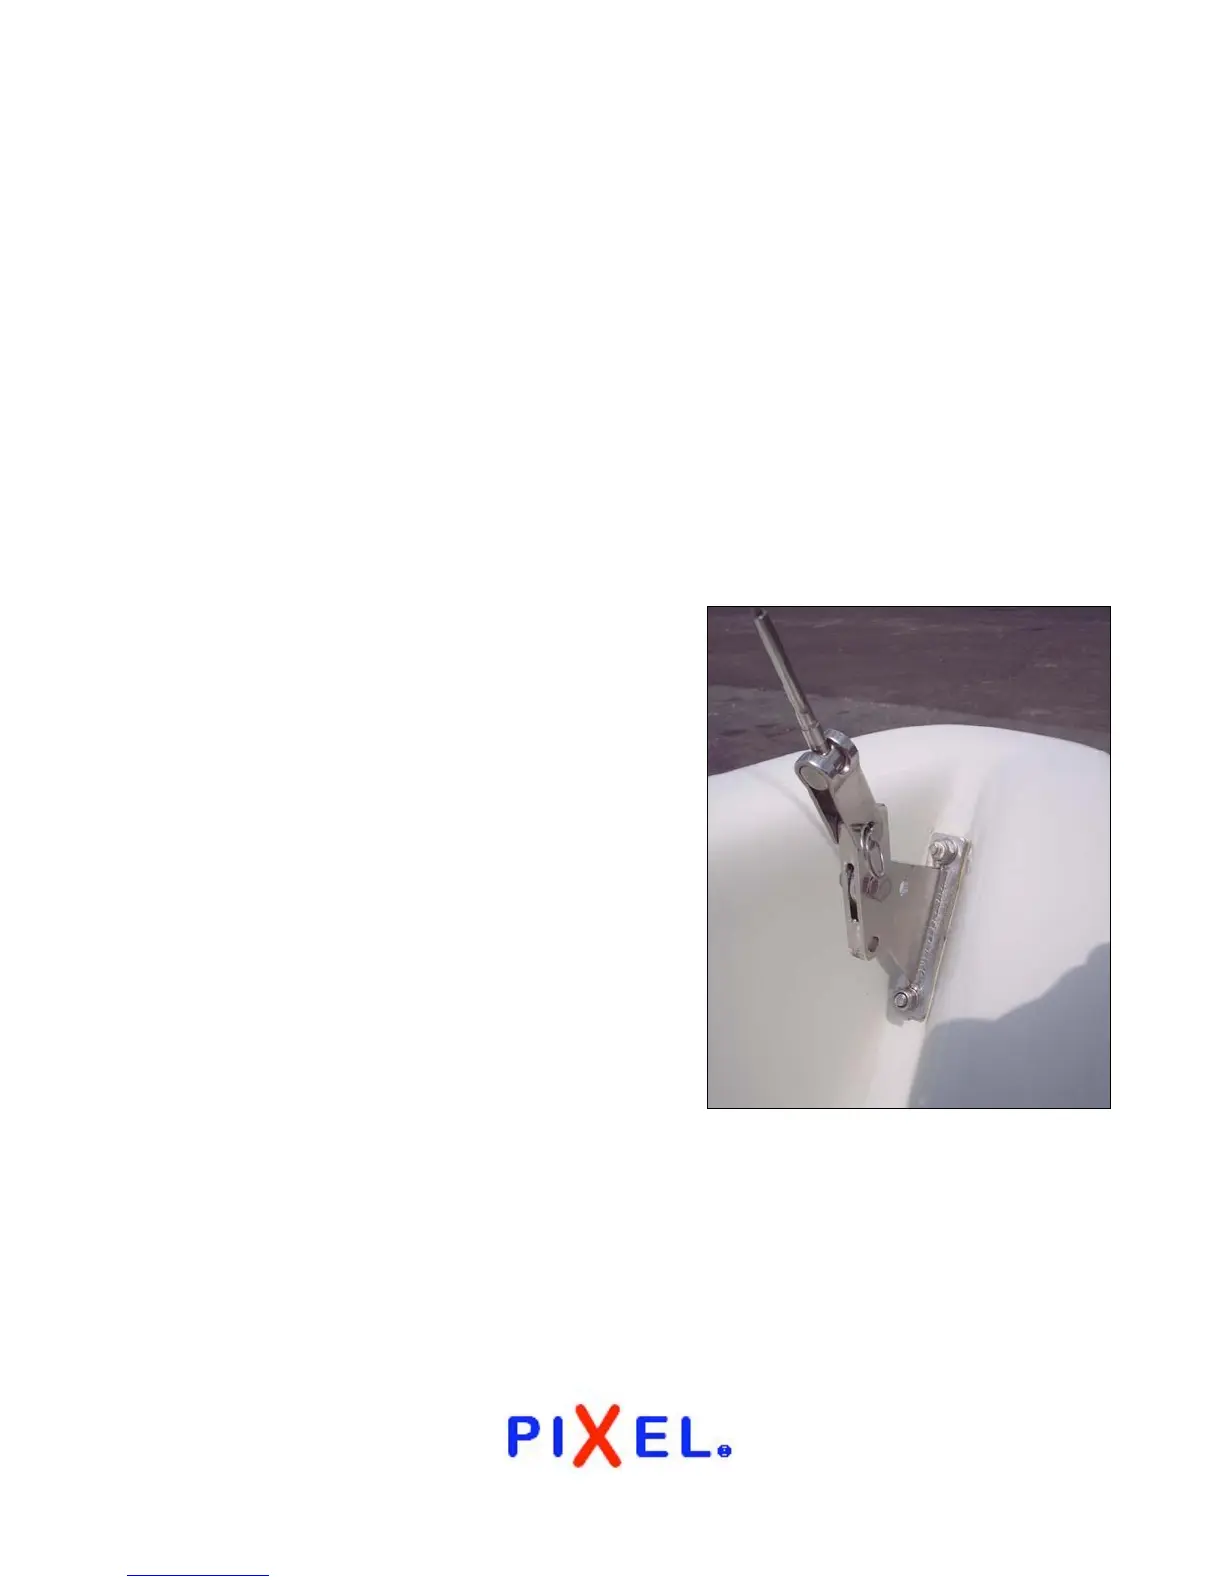
headstay toggle is a unique tuning
adjustment for the Pixel. The headstay is
attached to the forward hole in the toggle. It
is attached with a clevis pin secured with a
cotter ring.
Once the mast is up and the headstay and
shrouds are secured, you are ready to sort
out the halyards and other control lines on the mast.
Setting up the halyards
All lines on the Pixel are color coded.
 Loading...