5
EX2 Display Controller
QUICK LINKS
Contents
Index
Regulatory Compliance
Warranty
GETTING STARTED
About the Display Controller
Check Package Contents
INSTALLING THE BOARD
Check System Requirements
Install Controller
Connect Cables
INSTALLING THE DRIVER
Install Display Driver
Adjust Display Properties
APPENDIXES
Troubleshooting
Specifications
Video Modes
Driver Removal
Gallery
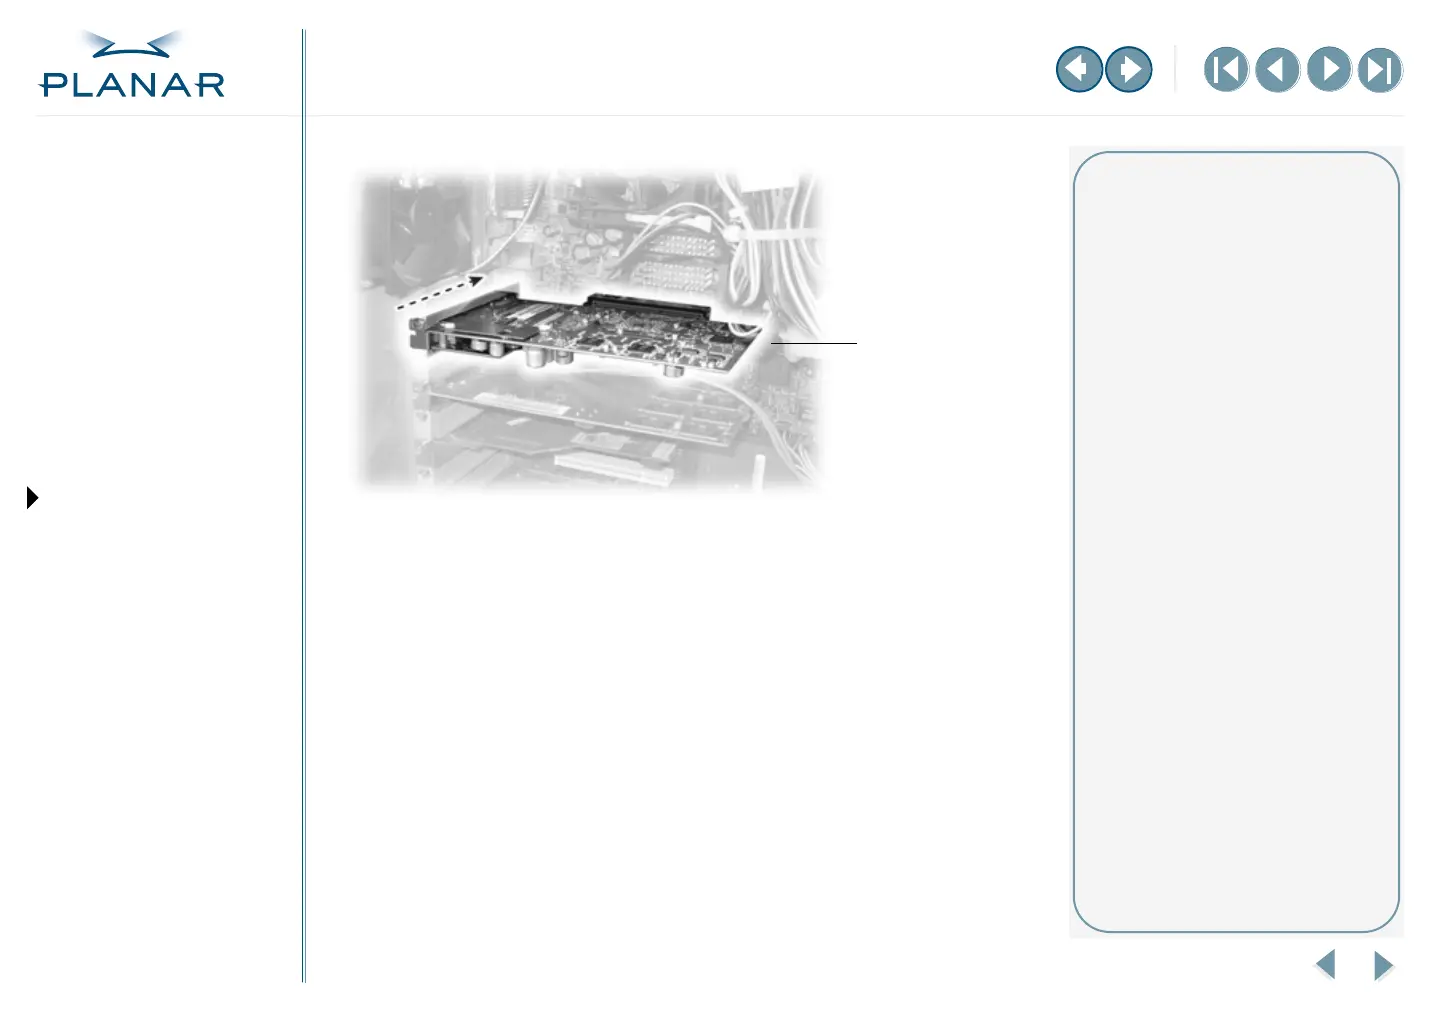
5
Insert the EX2 controller into the AGP slot, align the connector pins, and
press the board down until it is firmly seated.
6
Use the power extension cable to connect the EX2 controller to the
computer’s hard drive power connector. Connect the A plug to the
controller, the B plug to the computer power supply, and the C plug to
the hard drive power connector.
Click here to see connections for the power extension cable.
7
Secure the mounting bracket.
8
Reattach the computer cover and the peripherals.
Installed EX2 controller
Installation tips
The EX2 board requires connection
to the computer internal power
supply for operation. A 300 W power
supply or greater is recommended
to ensure normal operation where
a number of other internal devices
are installed.
Remove the power cable from
the hard drive power connector
before you install the power
extension cable.
Note that the cable may already
be connected to the controller. If so,
proceed to connect the B plug to
the computer power supply and
the C plug to the hard drive power
connector.