Power
and Remote Level Control connections
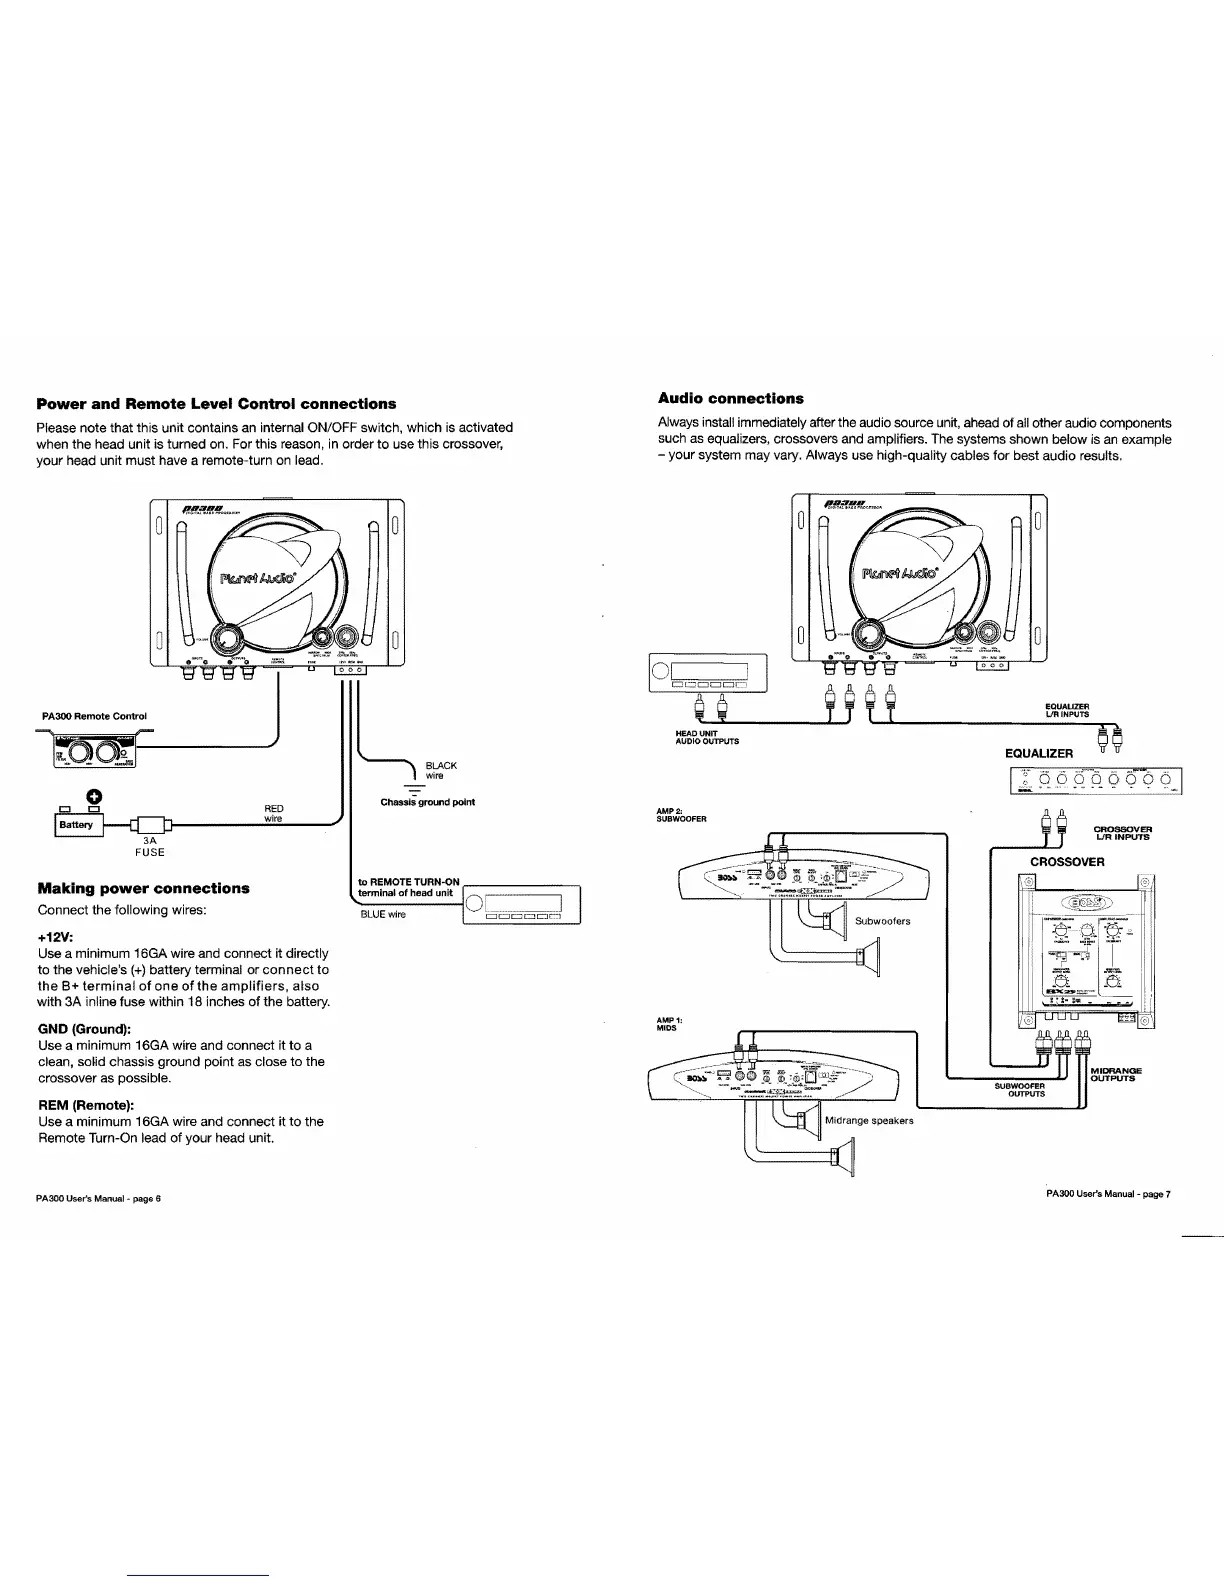
Please note that this unit contains an internal ON/OFF switch, which is activated
when the head unit is turned on. For this reason,
in
order to use this crossover,
your head unit must have a remote-turn on lead.
PA300 Remote Control
RED
wire
3A
FUSE
Making
power
connections
Connect the following wires:
+12V:
Use a minimum 16GA wire and connect it directly
to
the vehicle's
(+)
battery terminal or
connect
to
the
8+
terminal
of
one
of
the
amplifiers,
also
with
3A
inline fuse within 18 inches
of
the battery.
GND
(Ground):
Use a minimum 16GA wire and connect it to a
clean, solid chassis ground point as close to the
crossover as possible.
REM (Remote):
Use a minimum 16GA wire and connect it
to
the
Remote Turn-On lead
of
your head unit.
PA300 User's Manual -
page
6
o
o
Chassis ground point
to
REMOTE TURN-ON
.--
______
--,
terminal
of
head
unit
'
BLUE
wire
Audio connections
Always install immediately after the audio source unit, ahead
of
all
other audio components
such as equalizers, crossovers and amplifiers. The systems shown below is
an
example
- your system may vary. Always use high-quality cables for best audio results.
o
o
100m~I'!
I
~
~
~
$
~~~
¢~
o
HEAD
UNIT
AUDIO OUTPUTS
EQUALIZER
AMP 2:
SUBWOOFER
CROSSOVER
LlRINPUTS
CROSSOVER
AMP1:
Midrange speakers
MIDS
MIDRANGE
OUTPUTS
SUBWOOFER
OUTPUTS
PA300 User's
Manual
-
page
7
 Loading...