This document is a Quick Installation Guide for the PLANET GS-6320-8P2X, an L3 8-Port 10/100/1000T 802.3at PoE+ + 2-Port 10G SFP+ Managed Switch.
Function Description:
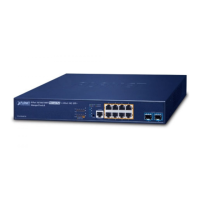
The GS-6320-8P2X is a Layer 3 (L3) managed Power over Ethernet (PoE) switch designed for network environments requiring advanced management capabilities, high-speed connectivity, and power delivery over Ethernet cables. It features eight 10/100/1000T ports with 802.3at PoE+ support, enabling it to power compatible devices such as IP cameras, wireless access points, and VoIP phones directly through the network cable. Additionally, it includes two 10G SFP+ ports for high-bandwidth uplinks or connections to backbone networks, ensuring fast data transfer and network scalability. The "Managed" aspect indicates that the switch offers extensive configuration and monitoring options, allowing network administrators to optimize performance, enhance security, and troubleshoot issues effectively.
Important Technical Specifications:
- Port Configuration: 8 x 10/100/1000T ports with 802.3at PoE+ and 2 x 10G SFP+ ports.
- Layer: Layer 3 (L3) functionality, indicating advanced routing and network management capabilities beyond basic Layer 2 switching.
- PoE Standard: 802.3at PoE+, providing higher power output per port compared to standard 802.3af PoE.
- Default IP Address: 192.168.0.100
- Default Subnet Mask: 255.255.255.0
- Default Username: admin
- Default Password: admin
- Console Port Settings: Speed: 115200, Data: 8 bits, Parity: None, Stop bits: 1, Flow control: None.
Usage Features:
The switch offers multiple methods for configuration and management:
Maintenance Features:
- Configuration Saving:
- Configurations made via the console or web interface can be saved to ensure they are loaded automatically upon system reboot.
- On the console, use
copy running-config startup-config.
- On the web interface, click the "Save" icon on the top menu bar or navigate to "Maintenance" -> "Save Startup Config."
- Factory Default Recovery:
- If the IP address has been changed or the admin password forgotten, the switch can be reset to its default settings.
- This is achieved by pressing the hardware-based reset button on the front panel for approximately 10 seconds.
- After rebooting, the switch will revert to the default IP address (192.168.0.100) and default login password ("admin").
- Firmware Upgrade: The web management interface includes a "Web Firmware Upgrade" option under "Maintenance" for updating the switch's firmware.
- Configuration Download/Upload: The web interface allows for downloading and uploading configuration files, simplifying backup and restoration processes.
- Diagnostics: The "Maintenance" section of the web interface provides diagnostic tools such as Ping, IPv6 Ping, Remote IP Ping, Cable Diagnostics, Traceroute (IPv4), and Traceroute (IPv6) for network troubleshooting.
- Customer Support: PLANET offers online FAQs, a user's manual, and a support email address (support@planet.com.tw) for assistance. The user's manual for the GS-6320-8P2X can be found at a specified URL.