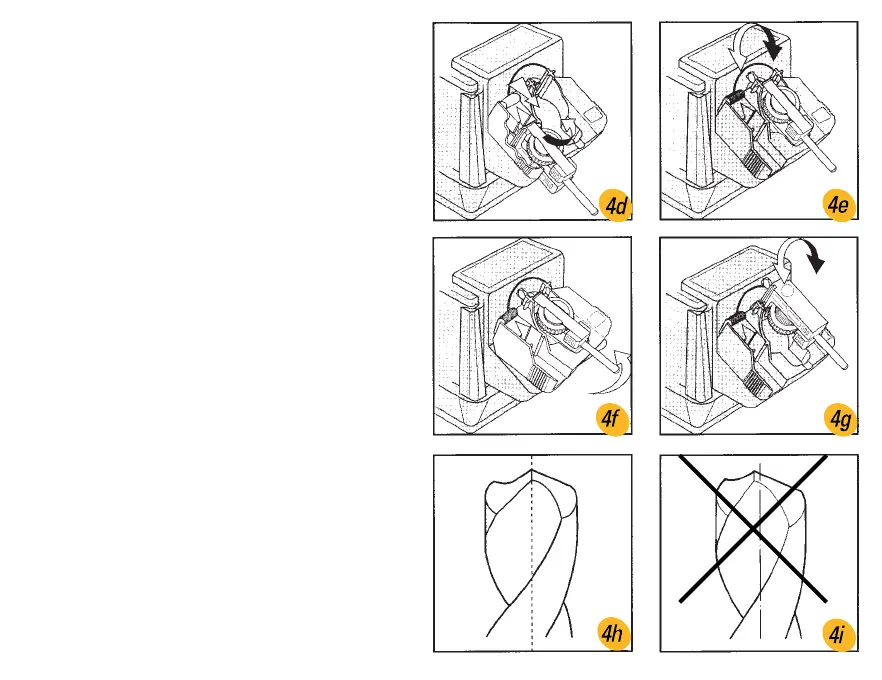
6. Ensure that the drill and holder are fully
downin the setting slot. With the drill bit in this
position, tighten the clamping ring (4d).
7. Lift up the ‘V’ guide and remove the clamp and
drill bit.
8. Transfer the clamp and drill bit into the clamp
holder on the Power Unit module (4e).
9. Switch the Power Unit on.
10. Move the clamp holder from side to side,
securing with light finger pressure (4f).
11. Remove the drill bit and holder and turn over
(4g). Repeat No. 10.
12. Check the leading edge of both flutes are
equally sharp and that the tip is “backed off”
equally on both sides - they should meet exactly
in the middle as in (4h) not (4i).
13. Switch the Power Unit off. Before removing
module, ensure the grinding wheel has stopped.
 Loading...