SYSTEM STATUS CODES
TO PAIR A CONTROLLER TO THE LIFT
DOWN CALL
Down arrow pressed on remote control. Lift will move in DOWN direction until it reaches the bottom charging strip.
Display may say MOVING LEFT or MOVING RIGHT, this is dependent on the side of the staircase the lift is installed in.
PARK CALL
Park button pressed on remote control. Lift will move in UP direction until it hits a charging strip.
CALL CONFLICT
Conicting instructions received. Eg – UP pressed on one remote control while DOWN pressed on the other.
LOW BATTERY REMOTE
Batteries in a remote control are running low. Change batteries in remote controls.
LOW BATTERY JOYSTICK
Batteries in armrest control pod are running low. Change batteries in armrest control pod.
LOW BATTERY REM & JOY
Batteries in armrest control pod and at least one remote control are running low. Change batteries in armrest control pod and in
both remote controls.
REPLACE AA BATTERIES
All batteries in all controllers are running low. Change batteries in armrest control pod and in both remote controls.
****GYRO ERROR****
Gyroscope is out of tolerance. Contact your local stairlift service centre for guidance. Normally this is the company that carried
out the installation.
ARM TILTED:
Arm is lifted while pod direction controller is being used.
OVERSPEED GOVERNOR
OSG safety circuit has activated. Contact your local stairlift service centre for guidance. Normally this is the company that carried
out the installation.
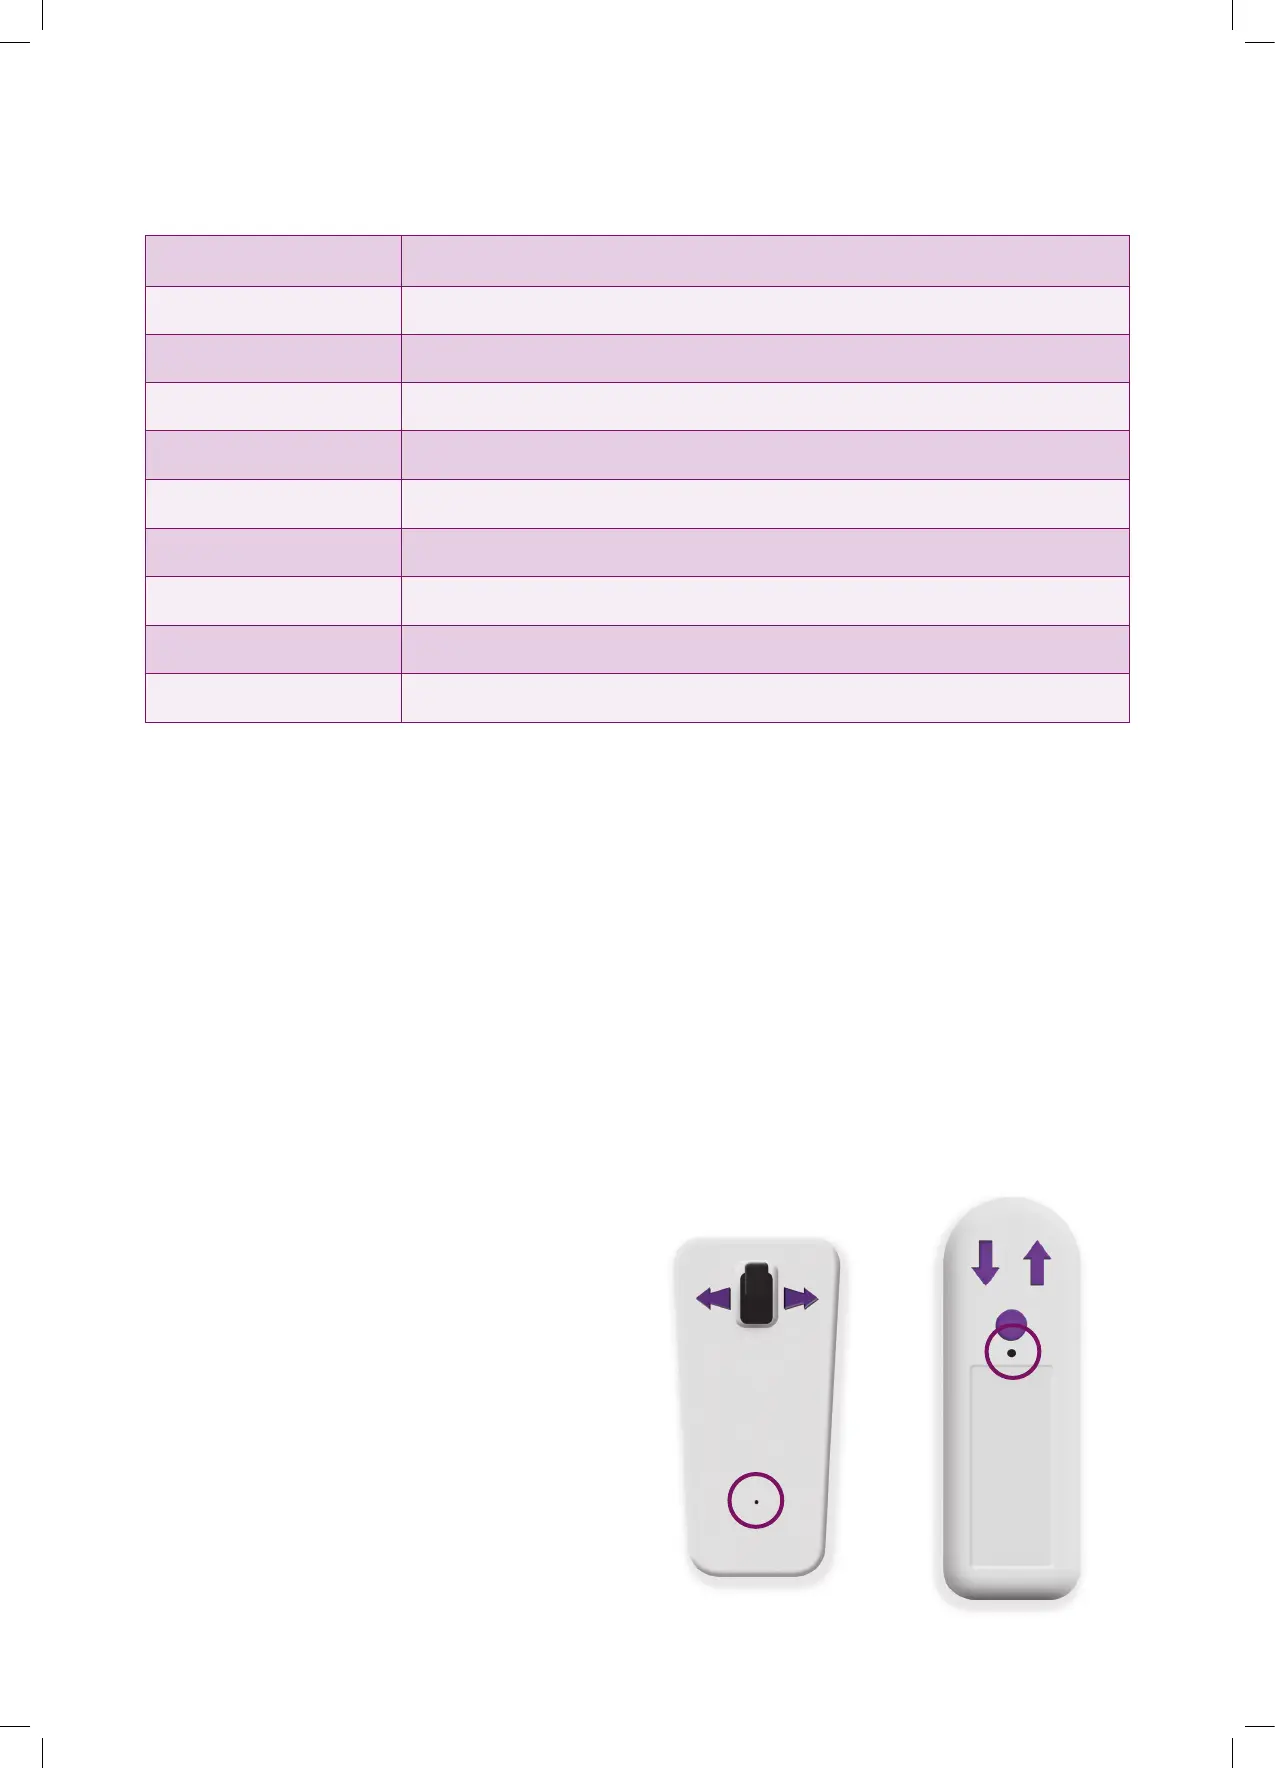
TO PAIR A CONTROLLER TO THE LIFT
Pairing the controllers to the carriage (This may be
necessary after replacing the batteries in the remote
controls)
• Ensure the lift batteries are connected but the lift is
turned OFF with the key switch.
• Fit all batteries (normally 6 batteries, 2 in the control pod
and two in each of the remote controls).
• Switch lift ON with key switch. You now have 1 minute to
carry out the below procedure, switching the lift OFF and
back ON will reset this minute.
• Using a paperclip or something similar, press the button
behind the hole in the housing on the rst remote
control. Release it and then press the UP and DOWN
arrows, in turn, on the remote. Press them again to verify
the lift operates normally. This remote is now paired to
the lift.
• Using a paperclip or something similar, press the button
behind the hole in the housing on the second remote
control. Release it and then press the UP and DOWN
arrows, in turn, on the remote. Press them again to verify
the lift operates normally. This remote is now paired to
the lift. If more than the standard 2 remote controls have
been supplied this procedure needs to be carried out
with them.
• Using a paperclip or something similar, press the button
behind the hole in the housing on the direction control
pod. Release it and then press the controller in the UP
and DOWN directions on the pod, press them again
to verify that the lift operates normally. The direction
controller is now paired to the lift.
Pairing button located behind hole
in housing (circled images below).
8