Page 7/14
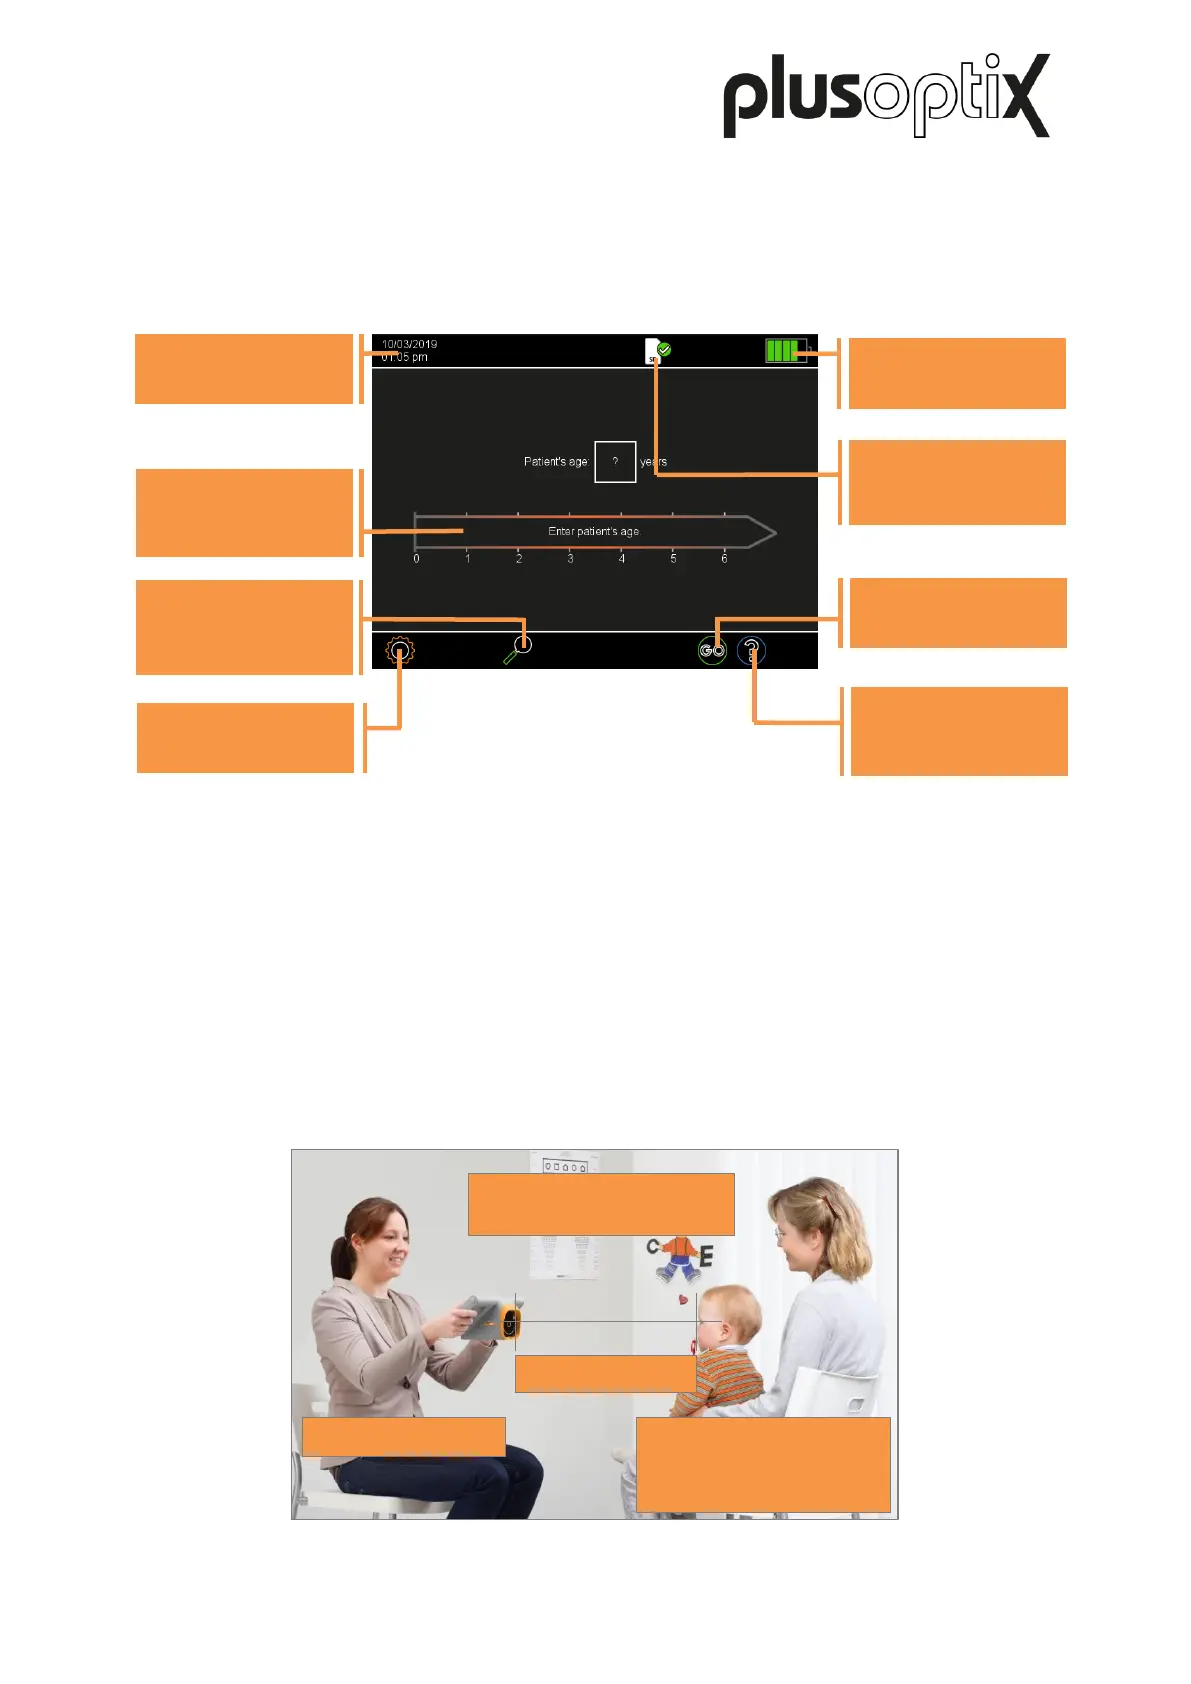
3.2. The home screen
After the start up, you will see the start screen. Similarly to all the screen displays of the
device, it has the following structure: the header is arranged at the top, the information part in
the middle, and the navigation bar at the bottom.
Figure 1: Home screen
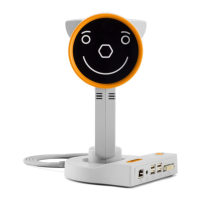
4. Starting a measurement and aligning the device
- Select an age group by touching the appropriate age range on the time bar. You must
select the age group in order to ensure that the measurement values of the patient are
compared with the correct age-specific referral criteria.
- Hold the device at eye level to the patient, about 1.2 meters away. The measuring
distance is one meter, but it requires practice to correctly estimate this measuring
distance. It is easier to hold the device further away when starting the measurement and
then slowly move it towards the patient.
Figure 2: Measuring environment
Minimum 3 mm
Select age group
(see Chapter 4)
Make settings
Enter or retrieve
patient data
Date and time
Status
SD card (S12C)
USB stick (S16)
Start measurement
(see Chapter 4)
View on-screen help
and training videos