6 Operation
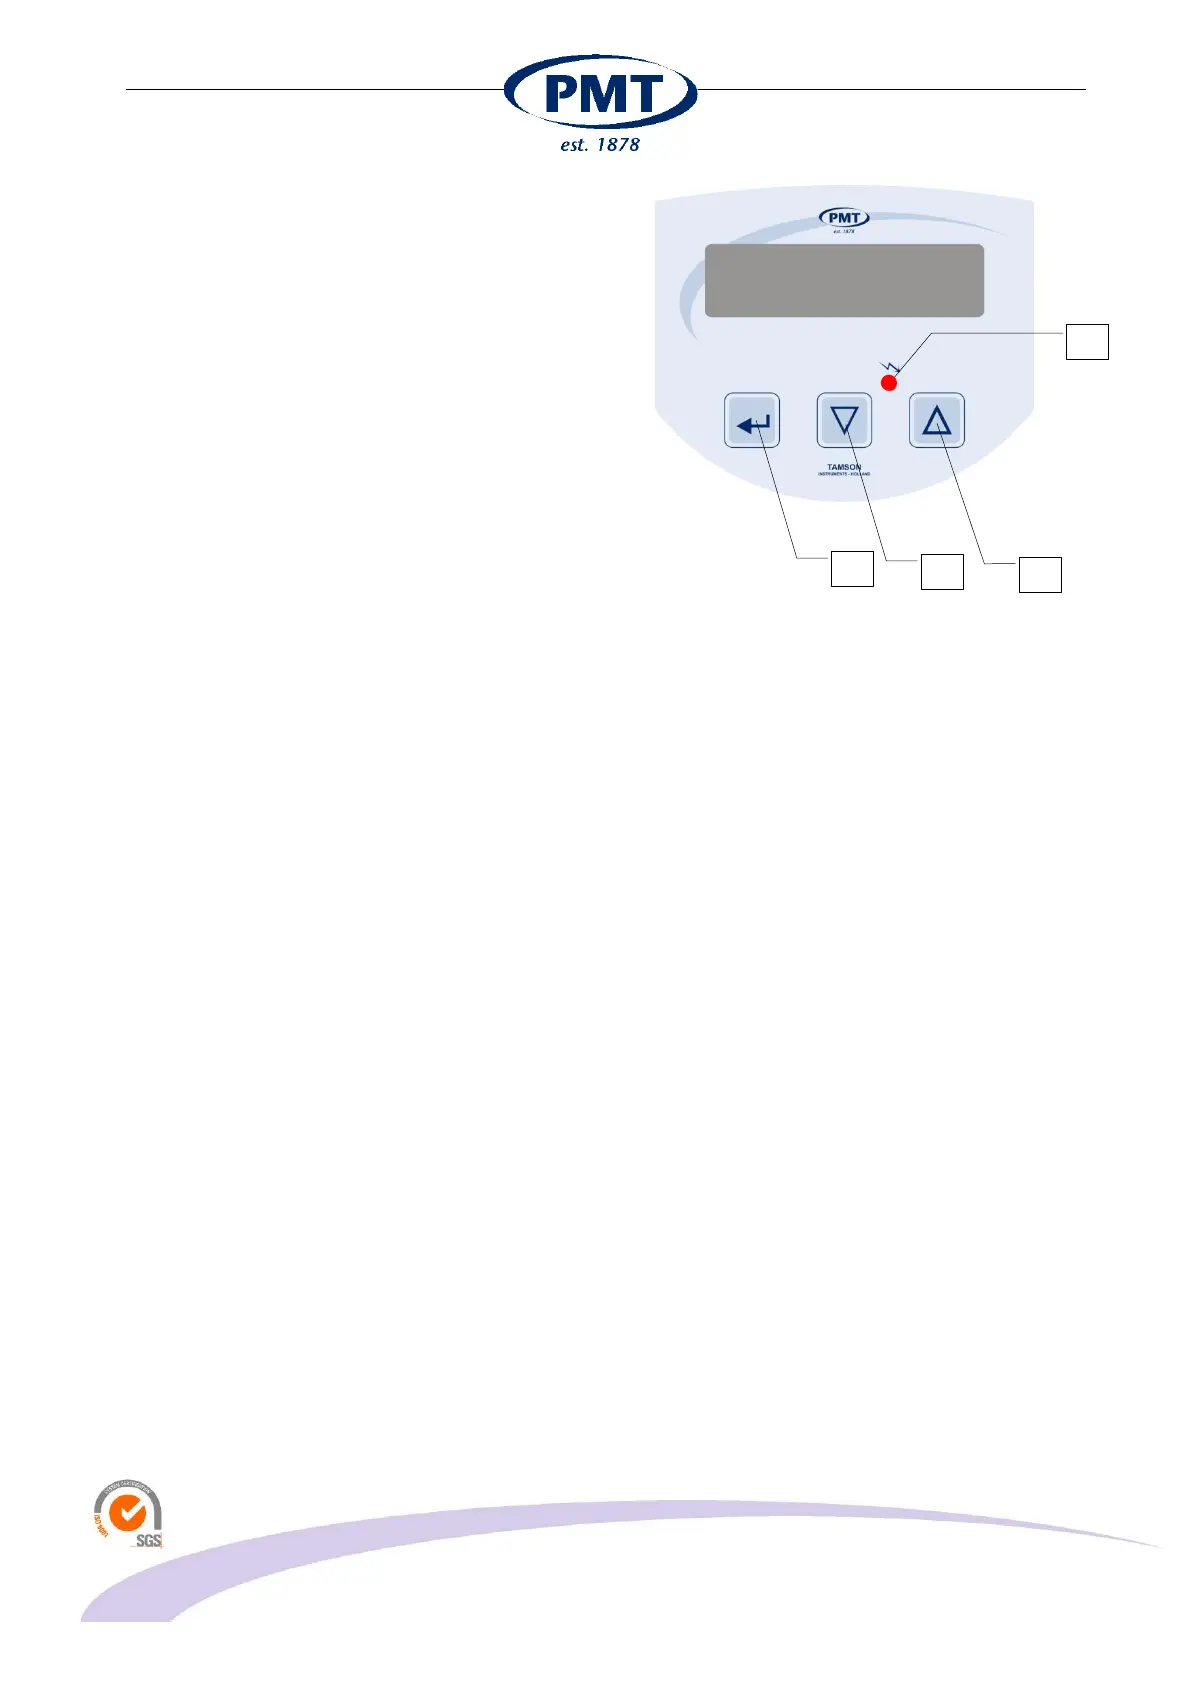
Switch the vacuum pump on using the on/off button (7).
The pump will start and vacuum will be generated at
connector (A).
When the pump is switched-off (7) the pump motor will
switch-off and vacuum is released.
Only when the pump is running the vacuum can be set
using the up (4) and down (3) buttons. Press the button
long for larger steps, press short for smaller steps.
Once the setting of the vacuum is altered, the displays
shows alternating “Conf. Sp” [Enter]. This indicates that
the feedback system of the pump needs this new
vacuum value to be confrmed. This can be done by
pressing the “enter” key (2). The new vacuum set point
is now programmed into memory (Eeprom). After
switching-off, this new value will be stored.
Ensure yourself that correct set-point is set by switching
the pump off and on again (7). Repeat the procedure if
the set point value deviates slightly. The cause for this is
that with a perfectly tight system it is difficult to lower the
set point as vacuum is not released. It is easier to
increase the value using the up key than lowering the
value using the down key. This is the cause of using an
internal feedback system and well closed system.
7 Calibration
Span and zero can be calibrated easily.
Before going into calibration mode:
Connect a calibrated pressure meter to the suction
connector (A).
Activate the pump (7) and set the vacuum set-point to
the highest value i.e. 300 mmHg using (3) and (4).
Press enter (2) to program the Set-Point
Check that calibrated pressure meter has same
dimension as the TVS i.e. mmHg on the TVS and the
calibrated vacuum meter. Switch off the pump (7)
The calibration mode can now be selected by using a
paper clip or small pin to press the button located
behind the hole indicated with (F).
 Loading...