– 16 –
Manual P5/EP5 23740/98.10
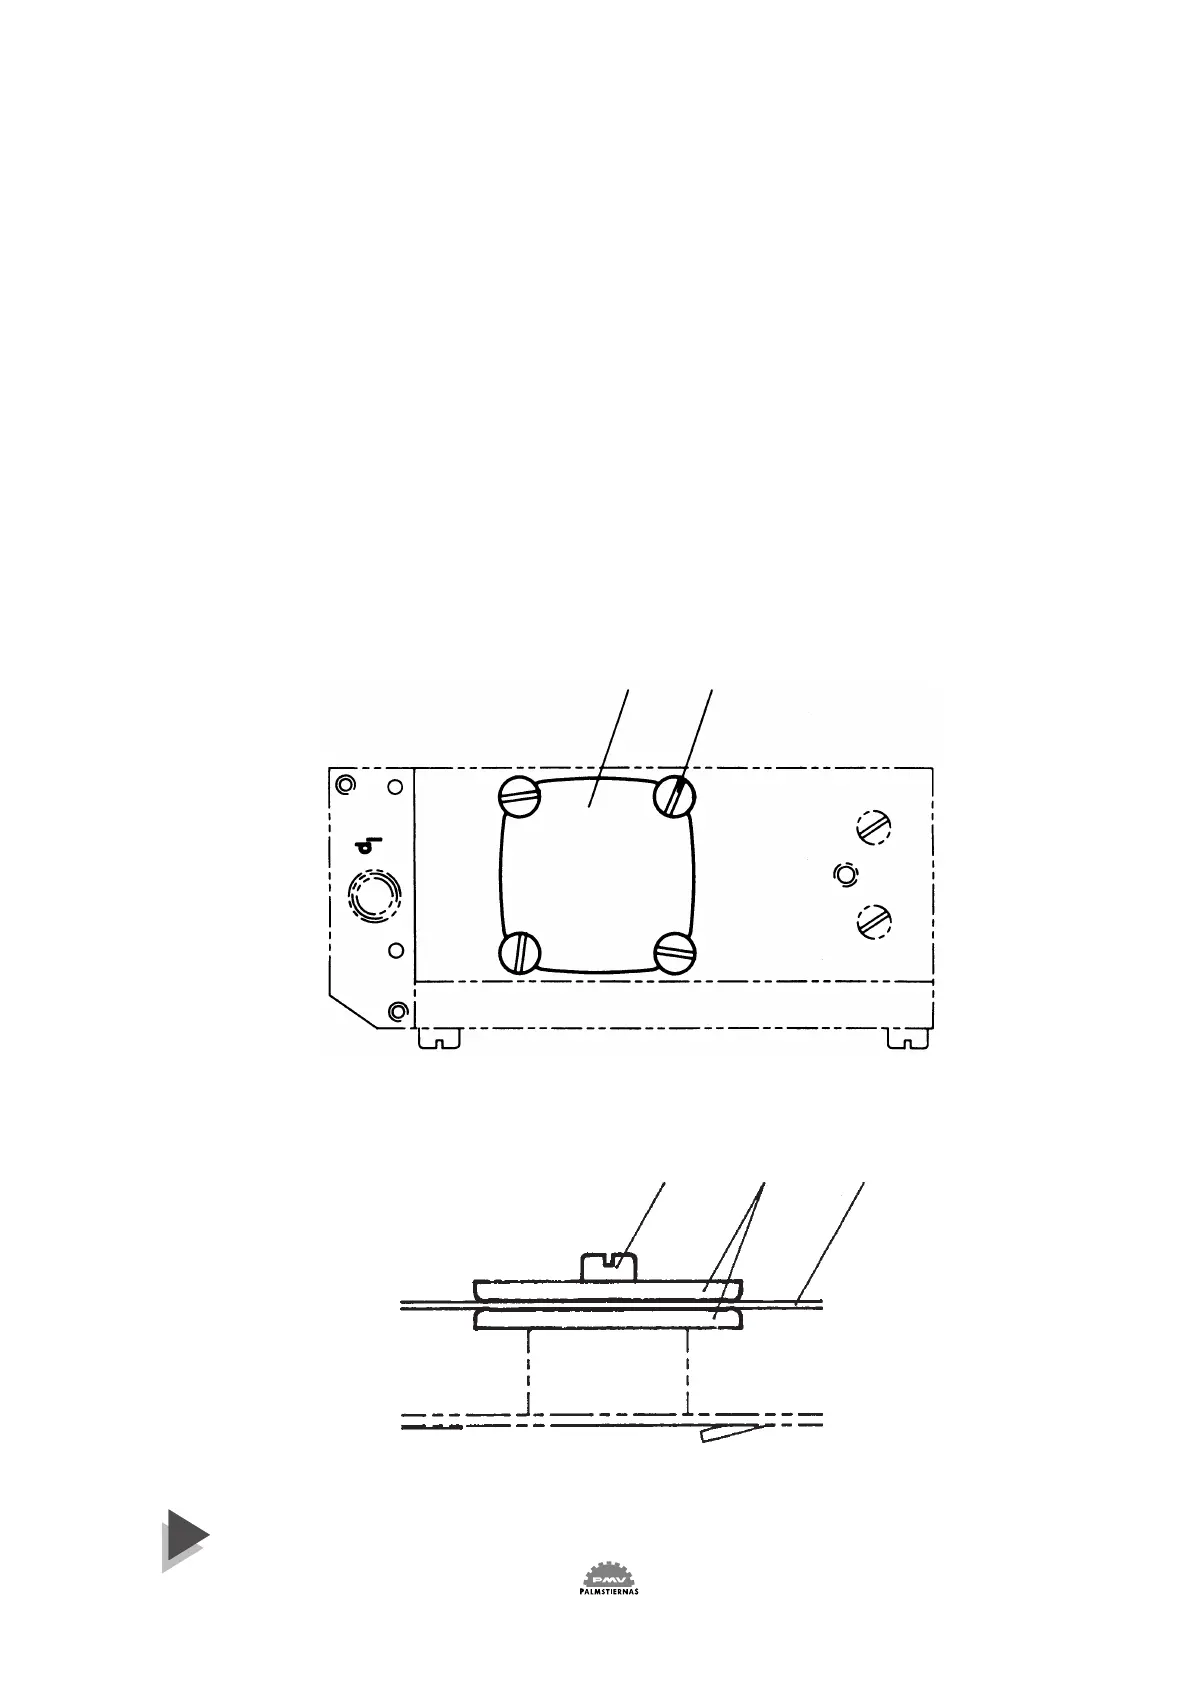
Diaphragm
2 1
If P5 is equipped with I/P unit (EP5), the I/P unit must be removed to
access the diaphragm.
Loosen screws 1 and remove the diaphragm cover 2. Loosen screw 3,
diaphragm 4 and washers 5 can be removed. The diaphragm can after
have being in use look wrinkled, this is fully normal due to the tension
in it.
When installing the diaphragm make sure to place one washer on each
side of the diaphragm.
Put some Loctite 577 on the thread, install the screw 3 and tighten.
Check the O-ring for the diaphragm cover 2, install the O-ring into the
positioner housing, then install cover 2. Secure with screws 1. Torque
shall be 4,5 Nm (40 in-lbs).
3 5 4