Model JSO Only:
Remuvlli
L
Open
tht: bellows
toO
detent
1t.)\,.'k~in
and move
the
fQCUS
bur
to
th~
extreme
CLOSEwUP
IlOSilion,
,
Open
the
battery l.'ompartlnent
and
remove
the
fwo batteries,
3.
Remove
tlu~
two saews holding
the
battery
cr.tdle
and
11ft
the
cr
...
dle up,
Cut
the
two
black leads as
dose
to
the
common
center
terminal as possible.
Remove
the
bauery
I.:radle,
4, Remove the latch and center retainer by
removing the screw holding them
to
the left
hand guard.
:'. Remove the
teft
hand guard by carerul1y
hipping its posts free
of
the fasteners using
<l
i
18
inch drive pin
punch
(Figure
Sw28).
Rellfacement
I. Route
the
baUl.!ry
wirl,."S
through the
cutout
:11
the
lower
~nd
of
the
n\!W
left hand guurd
and
lit
the
,;:uard
onto
the J.;amera.
.,.
Sel;ure the guard
with
fasteners using
tool
#CR 1 008 as
shown
in.
figure 5-29:
3. Replilce
the
center retainer and
latch
using
the
PhiUiprhead screw.
4.
Solder
the
two
black leads
to
the
common
ceoter
terminal
of
the
cradle.
5.
Replace
the
batteries and dose
the
compart-
ment.
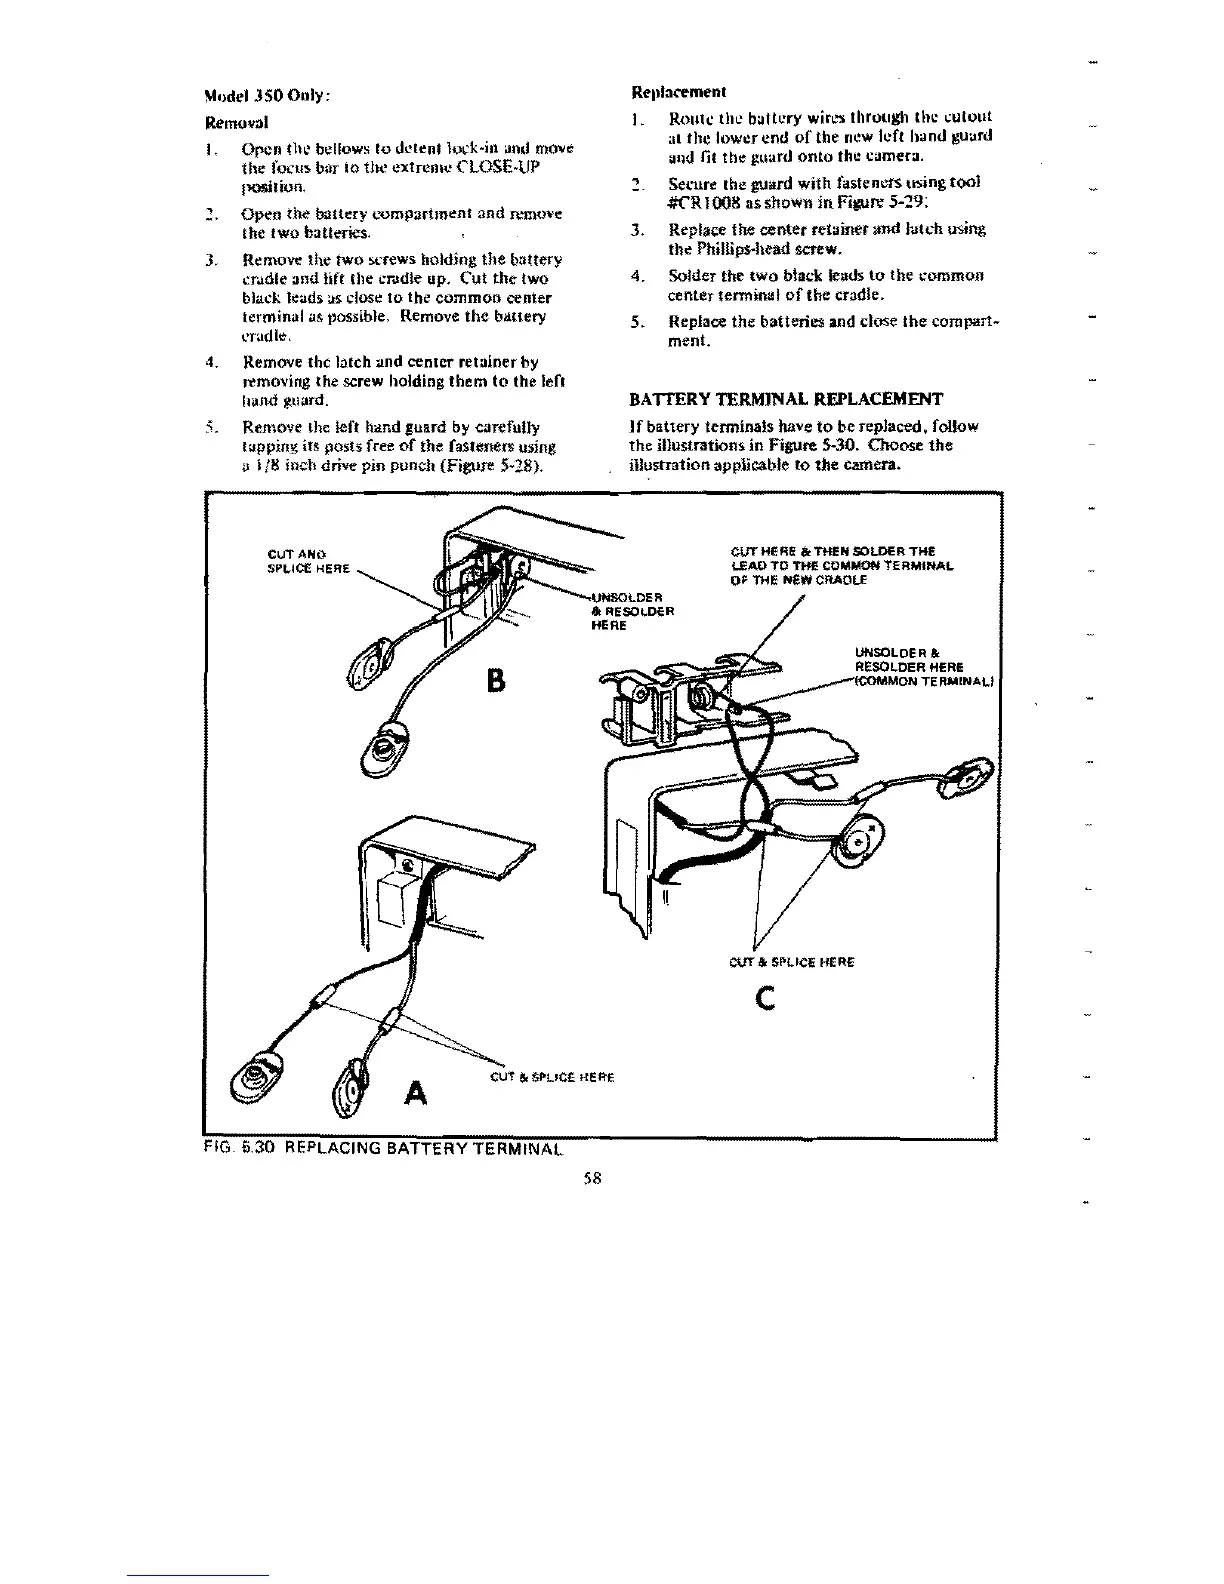
BATIERY TERMINAL REPLACEMENT
If
battery terminals have
to
be repJaced • follow
the
illustrations
in
Figure 5-30. Choose
the
illustration applicable
to
the
camera.
CUT ANO
SPLIce
HERE
B
& RESOt..DER
HERE
CUT
HERE,.
THE
..
SOLDER
THE
LEAD
TO
THE COMMON
TERMINAL
OF
THE
NEW
CRADLE
UNSOLDER
..
"::_---i",,,EjiSO,,L.iD;;;;ER
HERE
_ TERMINALI
CUT
'" SPLICE HERE
c
5.30
58
 Loading...