10 Watt Item # 02910
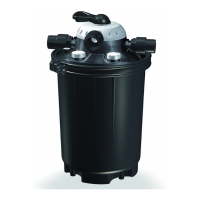
20 Watt Item # 02925
20 Watt Item # 02920
40 Watt Item # 02940
The quartz sleeve and UV lamp are
not installed and are located in
separate boxes inside the main
box. To install the sleeve, insert the
round end into the main body until
the rubber bushing is all the way
down into main body. A ange will
prevent the bushing from going any
further. It will rest against the main
body.
To install the lamp, unscrew the
ballast from the main body.
Align the center slot and pins
with the mating connector that is
inside the ballast. Push the
This unit is for seasonal use only. It should not be used in freezing conditions because the quartz tube will
quartz sleeve for breakage or small cracks.
Thank you for purchasing the PONDMASTER ULTRAVIOLET CLARIFIER. This device emits ultraviolet light.
String algae, which clings to the sides of ponds, does not travel through the lter and therefore is not exposed to UV rays.
at. This indicates that the lamp is working. Please note that the lamp will still produce visible light long after it has
stopped producing UV light.
PONDS ARE DANGEROUS TO SMALL CHILDREN!
NEVER LEAVE CHILDREN UNSUPERVISED NEAR A POND.
Always use a properly grounded outlet. Do not immerse the plug in water. DO NOT REACH INTO THE WATER TO
REMOVE THE PLUG. TURN OFF CIRCUIT FIRST. A "drip loop" in the cords should be used. A "drip loop" is a loop in the
cord below the level of the receptacle or plug that prevents water from traveling along the cord. The national Electric
Code requires that a ground fault interrupter circuit (GFCI) be installed in every branch circuit supplying the fountain
or pond equipment. Your dealer can supply GFCI units. NEVER REMOVE GROUND PIN FROM PLUG.
CARE AND OPERATING INSTRUCTIONS
R
Ultraviolet rays are harmful to the eyes and skin. ALWAYS TURN OFF POWER BEFORE HANDLING
OR SERVICING THE UNIT. NEVER LOOK AT THE LAMP RAYS.
Barley is a natural inhibitor of string algae.
lamp in rmly. Slide the lamp and
ballast into the quartz sleeve and screw the ballast onto the main body. Do not over-tighten! Hand tighten until snug.
1
Round End
Water Tight Rubber Bushing
4
Main Body Ballast
3
Push the lamp in Firmly
2
Align Center Slot
and Groove in lamp