No Diving or Jumping. Observe all Safety Rules.
2-2
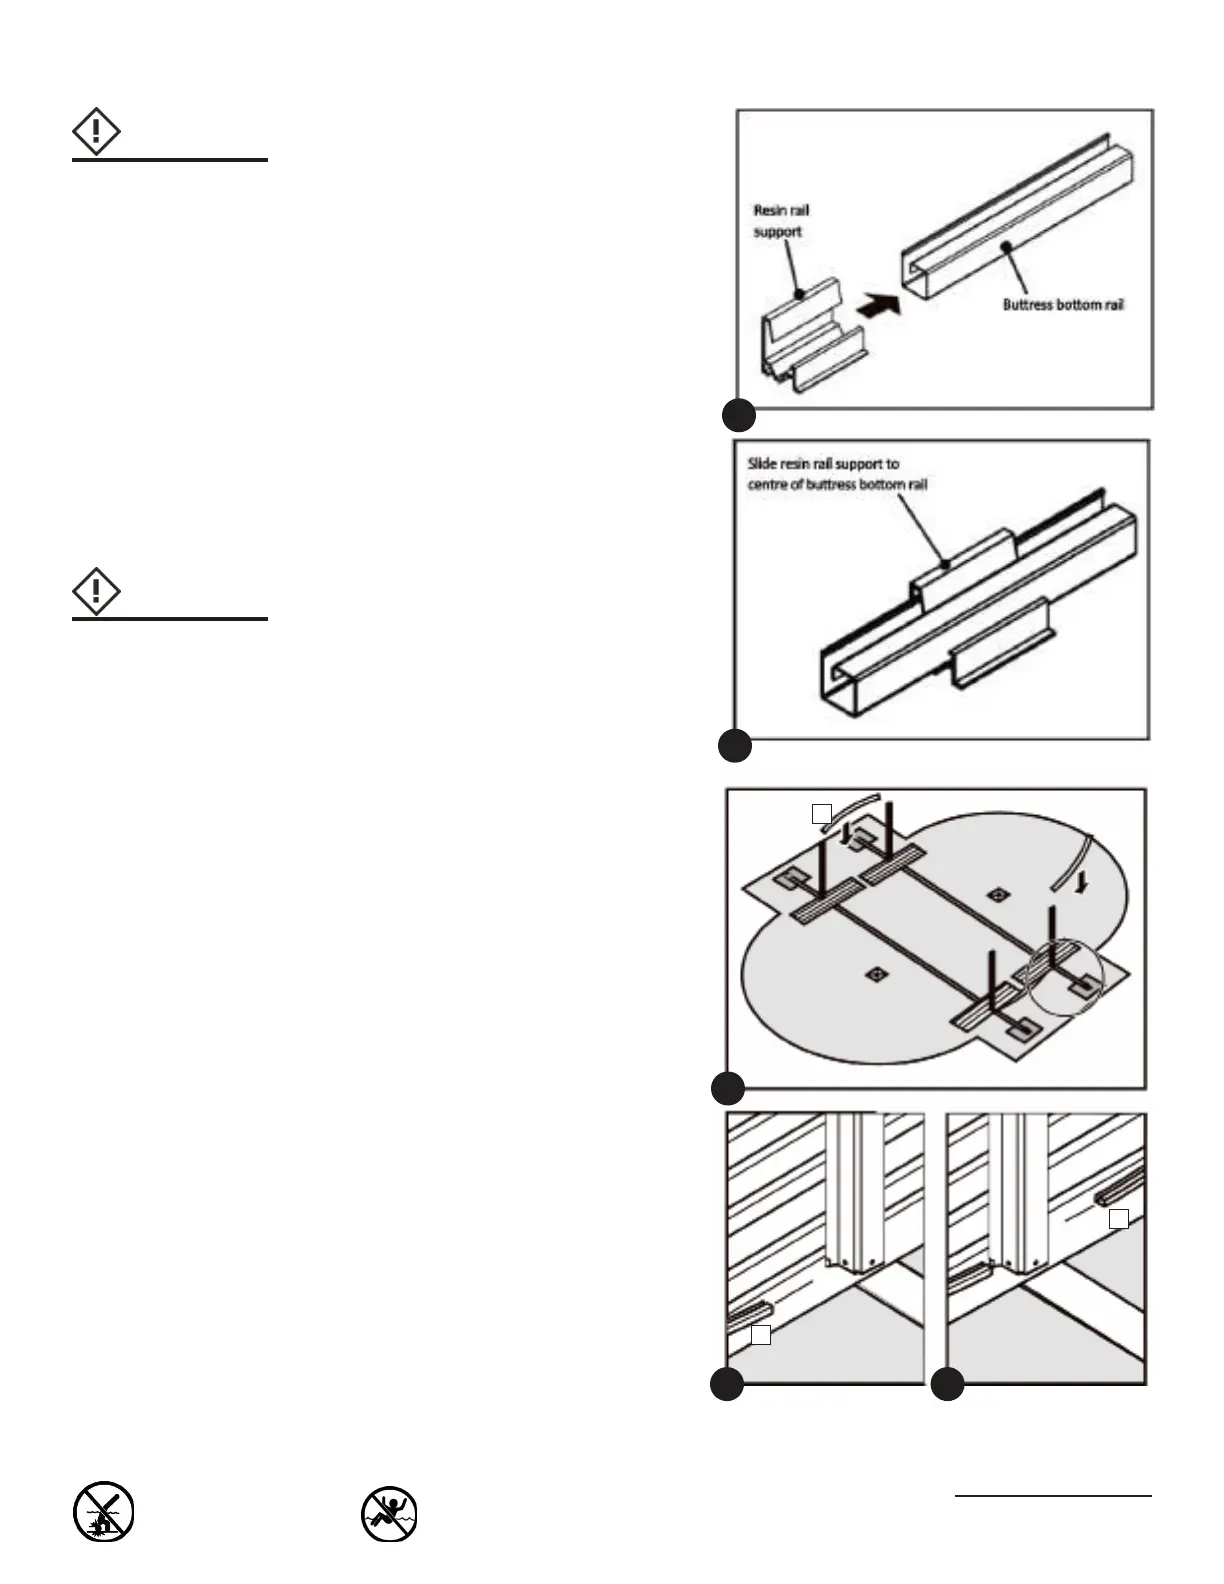
b. The pool has been supplied with resin
rail supports. If you have a 12 x 18
(3,66m x 5,49m) pool proceed to
step (d). For all other pools slide
the resin rail support to the middle of
the buttress bottom rail as shown in
diagrams (2) and (3). Repeat this step
for all otherbuttress bottom rails.
c. Insert the buttress rails between the
buttresses (if you have a 12 x 18
(3,66m x 5,49m) pool, skip step (c)
and go to step (d)). The bottom rails
insert into the notch in the upright.
Make sure the groove faces up.
d. Insert the transition A rails (key 13).
Slide one end of each rail into the
notch in the upright (see diagrams 5
and 6) and slide the other end together
with a base plate (key 14) (see dia-
grams 9, 10 and 11).
Hint:
When measuring the
distance to the face of
each base plate, use a
piece of string longer
than required and place
a mark on the string at
the required distance.
Hint:
Cut several small pieces
of wood approximately
(10 x 10 cm) square and
place one between the
two bottom rails located
at each base plate. This
will keep the bottom
rails from closing while
the wall is installed.
Be sure to remove the
blocks of wood later,
before installing the
verticals in Section 4.
2
3
4
65
13
13
13
 Loading...