No Diving or Jumping. Observe all Safety Rules.
3-3
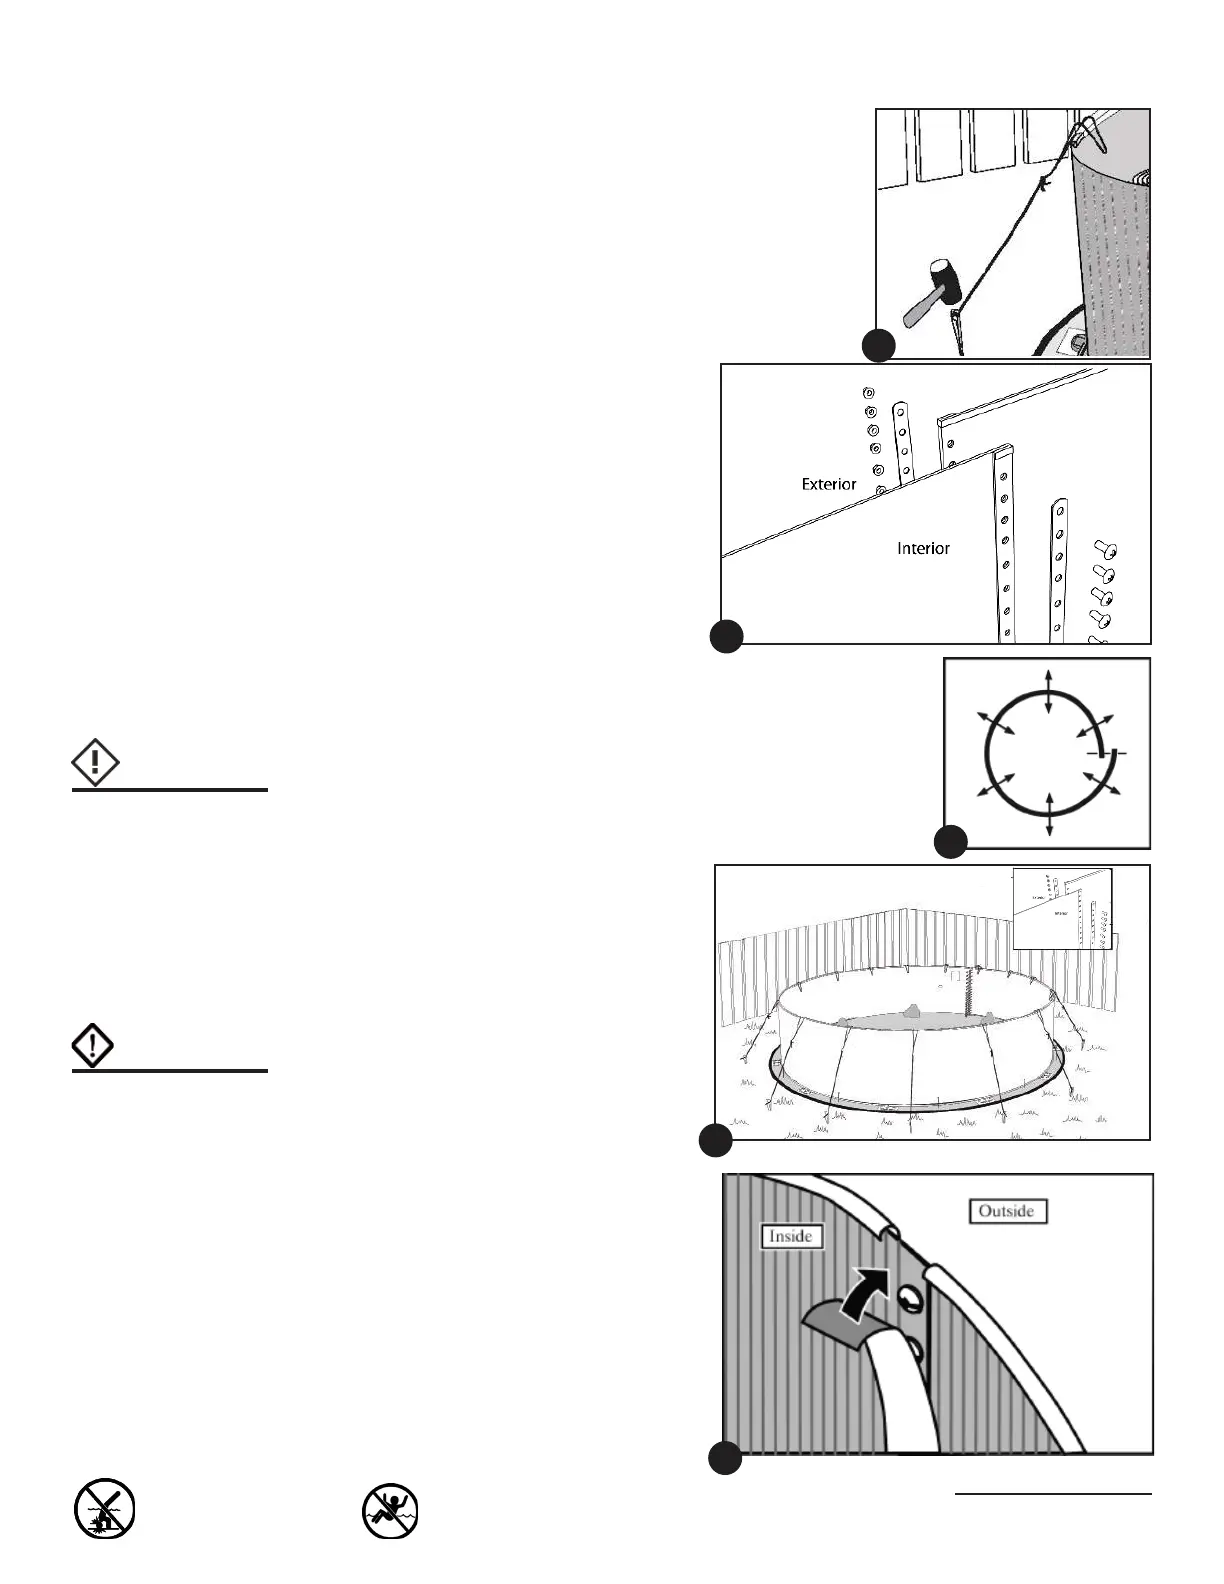
NOTE: We also suggest installing
vinyl-covered hooks and rope to hold
the wall steady.
e. Work around the foundation until the
entire pool wall is uncoiled into the
bottom rails and the top edge is cov-
ered with the omega stabilizer and
connectors (and beaded liner retain-
ers if you have a beaded pool liner)
2. Join the Ends of the Pool Wall
a. Line up the holes in the two ends of
the pool wall.
b. To line up the holes, make the circle
bigger or smaller by nudging the
base plates in or out with your foot.
c. To fasten the wall joint, overlap the
two steel bars, one on the inside and
the other on the outside. Tighten the
mechanical screws on the inside and
the nuts on the outside. Make sure
there is a bolt in each hole.
NOTE: When tightening the screws
start from either the top and go down
or vice versa. do not start a few
screws from top and a few from the
bottom to meet in the middle, this
can cause problems later on
d. Ensure that all bolts and all the holes
are used.
e. Cover the seam and bolt heads on
the inside of the pool wall complete-
ly with 2 layers of 2" (50 mm) duct
tape.
Hint:
Secure the omega stabi-
lizer connector to the wall
with a piece of duct tape
after installation to prevent
it from lifting off the wall.
6
7
9
Hint:
Stick a screwdriver
through two of the holes
to help line up the ends of
the wall.
4a
8
 Loading...