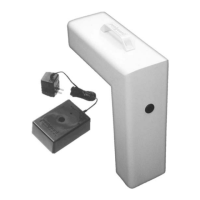
PLACEMENT
IN
YOUR POOL (Continued)
POOLGUARD automatically compensates
for
variations
in
pool
levels
within
the unit's operating range. The
unit
utilizes
a sensing
throat
which
projects
into
the
water
and
is
designed
to
operate
in
most
pools
with
an
in-wall
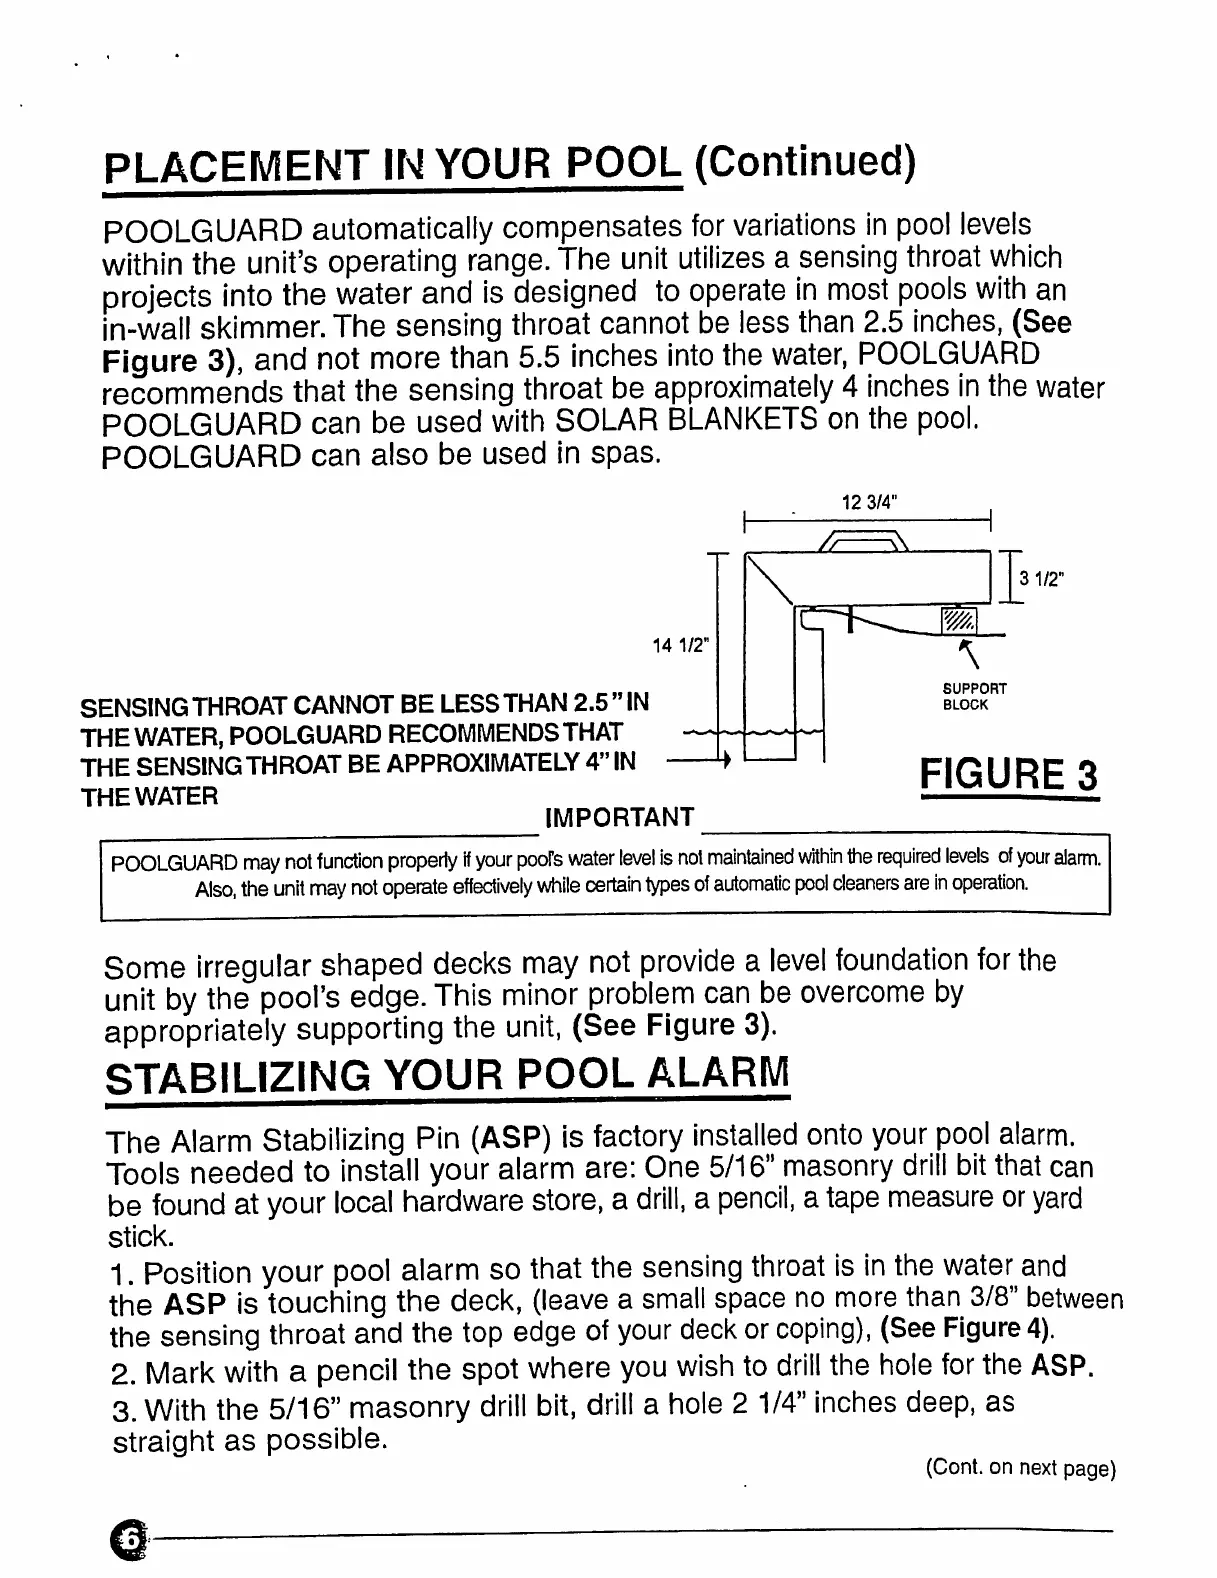
skimmer.The sensing throat cannot be less than 2.5 inches, (See
Figure
3),
and
not
more
than
5.5
inches
into
the
water,
POOLGUARD
recommends that the sensing throat be
approximately
4 inches
in
the
water
POOLGUARD
can
be
used
with
SOLAR
BLANKETS
on the
pool.
POOLGUARD
can
also
be
used
in
spas.
14
1/2"
SENSINGTHROAT CANNOT BE LESS THAN 2.5 "IN
THE
WATER,
POOLGUARD
RECOMMENDS
THAT
THE SENSING THROAT BE APPROXIMATELY 4"
IN
—
THE
WATER
IMPORTANT
12
3/4"
/F=^
I31/2"
\
SUPPORT
BLOCK
FIGURE
3
POOLGUARD
may
not
function
properly
If
your
poors
water
level
is
not
maintained
within
the
required
levels
of
your
alarm.
Also,
the
unit
may
not
operate
effectively
while
certain
types
of
automatic
pool
cleaners
are
in
operation.
Some
irregular
shaped
decks
may
not
provide
a
level
foundation
for
the
unit
by
the
pool's
edge.
This
minor
problem
can
be
overcome
by
appropriately
supporting
the
unit,
(See
Figure
3).
STABILIZING
YOUR
POOL
ALARM
The
Alarm
Stabilizing
Pin
(ASP)
is
factory
installed
onto
your
pool
alarm.
Tools needed to install your alarm are: One
5/16"
masonry
drill
bit
that
can
be
found
at
your
local
hardware
store,
a
drill,
a
pencil,
a
tape
measure
or
yard
stick.
1.
Position
your
pool
alarm so that the
sensing
throat
is
in
the
water
and
the
ASP
is touching the deck,
(leave
a
small
space
no
more
than
3/8"
between
the
sensing
throat
and
the
top
edge
of
your
deck
or
coping),
(See
Figure
4).
2.
Mark
with
a
pencil
the spot where
you
wish
to
drill
the
hole
for
the
ASP.
3.
With
the 5/16" masonry
drill
bit,
drill
a
hole
2
1/4"
inches deep, as
straight
as
possible.
(Cont. on next page)