MI TOWER STAIRS 2.2m & 4.2m - ASSEMBLY
Page 12
STEP 1
STEP 2
STEP 3
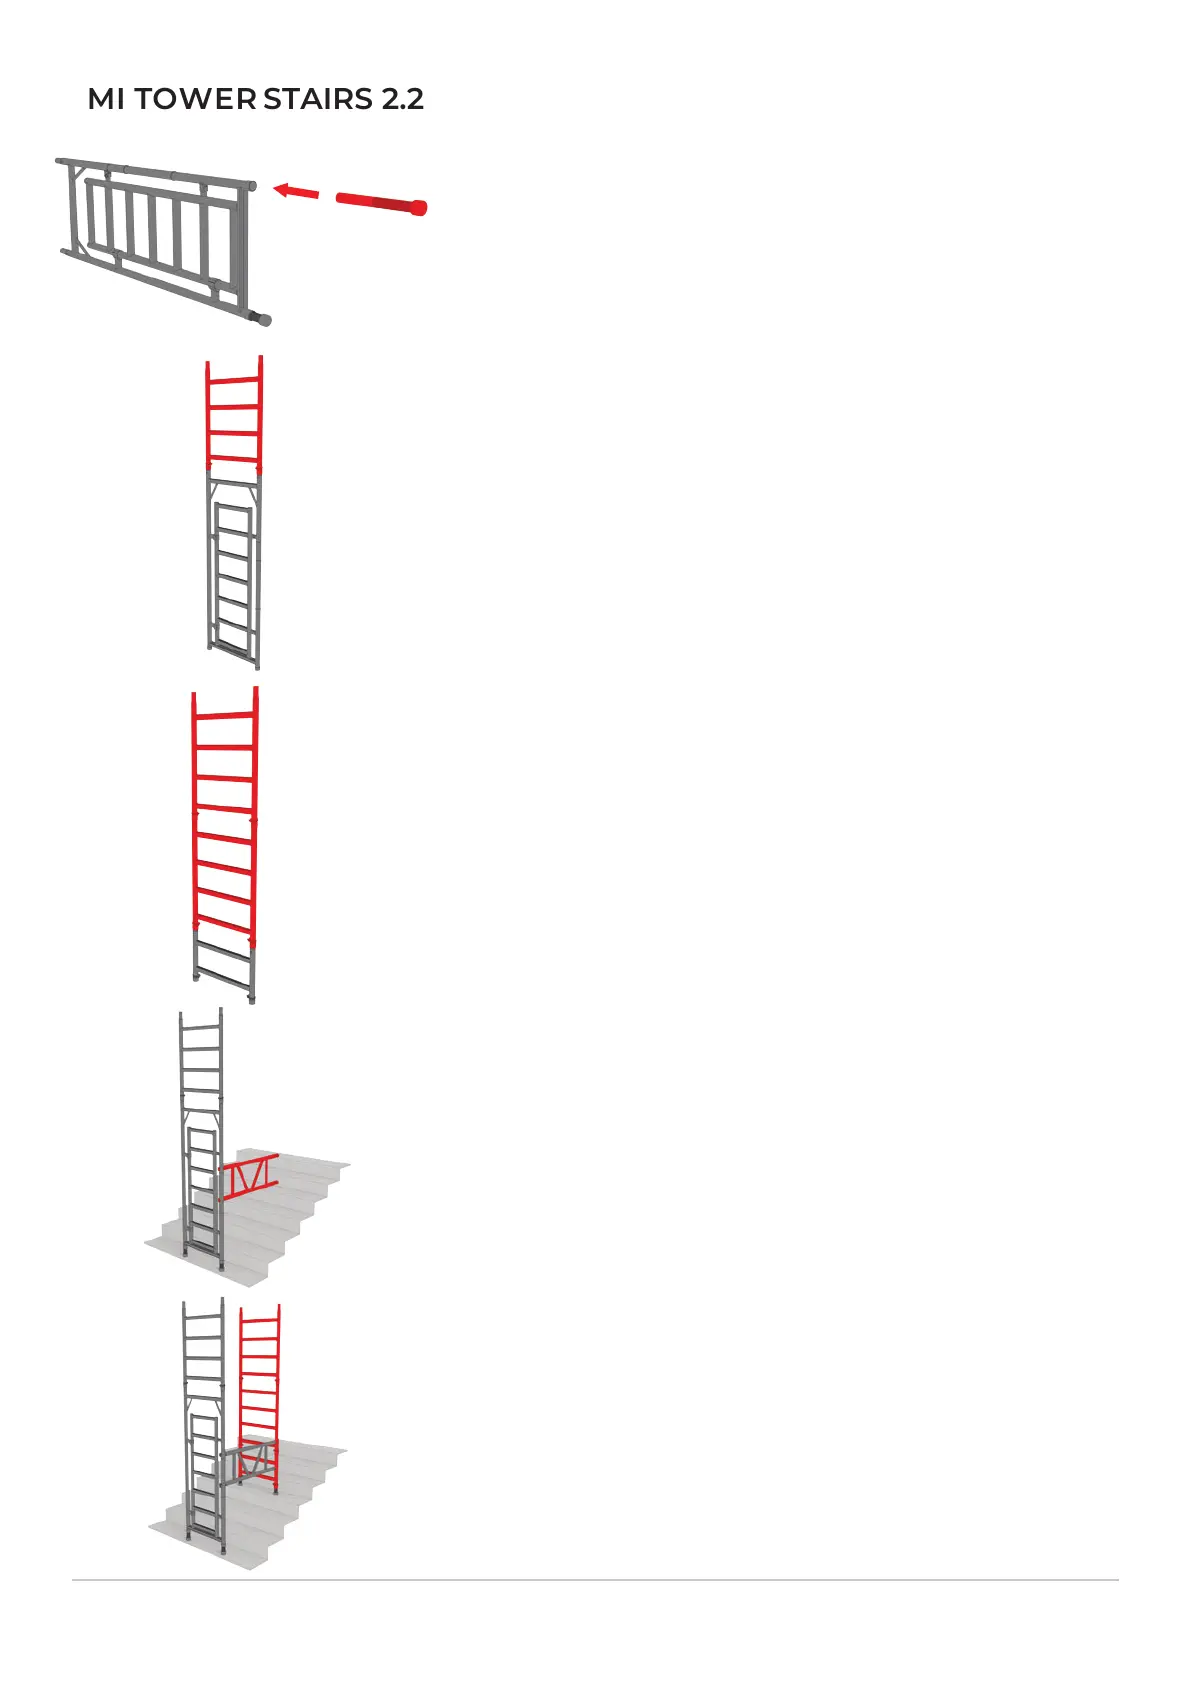
STEP 4
Take four adjustable legs with rubber feet and insert two into the
walk-through gate frame. Then insert the remaining two adjustable legs
with rubber feet into the two rung frame. Adjust all leg height adjustment
collars to bring all four legs to the lowest position.
STEP 5
Construct the lowermost frame assembly. Release the Easy-Clip frame clips
on one four rung frame. Take the lowermost walk-through gate frame and
fit the four rung frame on top.
Apply the Easy-Clip frame clips and ensure they are correctly locked.
Construct the uppermost frame assembly. Release the Easy-Clip frame
clips on the two rung and two four rung frames. Take one four rung frame
and fit it on top of the two rung frame. Take the second four rung frame
and fit it on top of the first four rung frame.
Apply all of the Easy-Clip frame clips and ensure they are correctly
locked.
Place the walk-through frame assembly at the lowermost position of the
staircase and attach the guardrail brace panel on the gate locking pin side
of the frame ensuring its upper jaw is placed above the upper positioning
ring.
Ensure the two hooks are facing outwards and correctly locked on to
the frame tube.
With your assistant holding the lowermost frame assembly and guardrail
brace panel, place the uppermost frame assembly at the uppermost
position of the staircase. Attach the guardrail brace panel to the vertical
tube of the uppermost frame assembly. Ensure the upper brace hook is
positioned above the third rung of the uppermost frame assembly.
Make sure the hooks are correctly locked on the frame tube of the
uppermost frame assembly.
 Loading...