TechnicalInformation
Cayman(987)
2/05 ENU 9160 9
Note
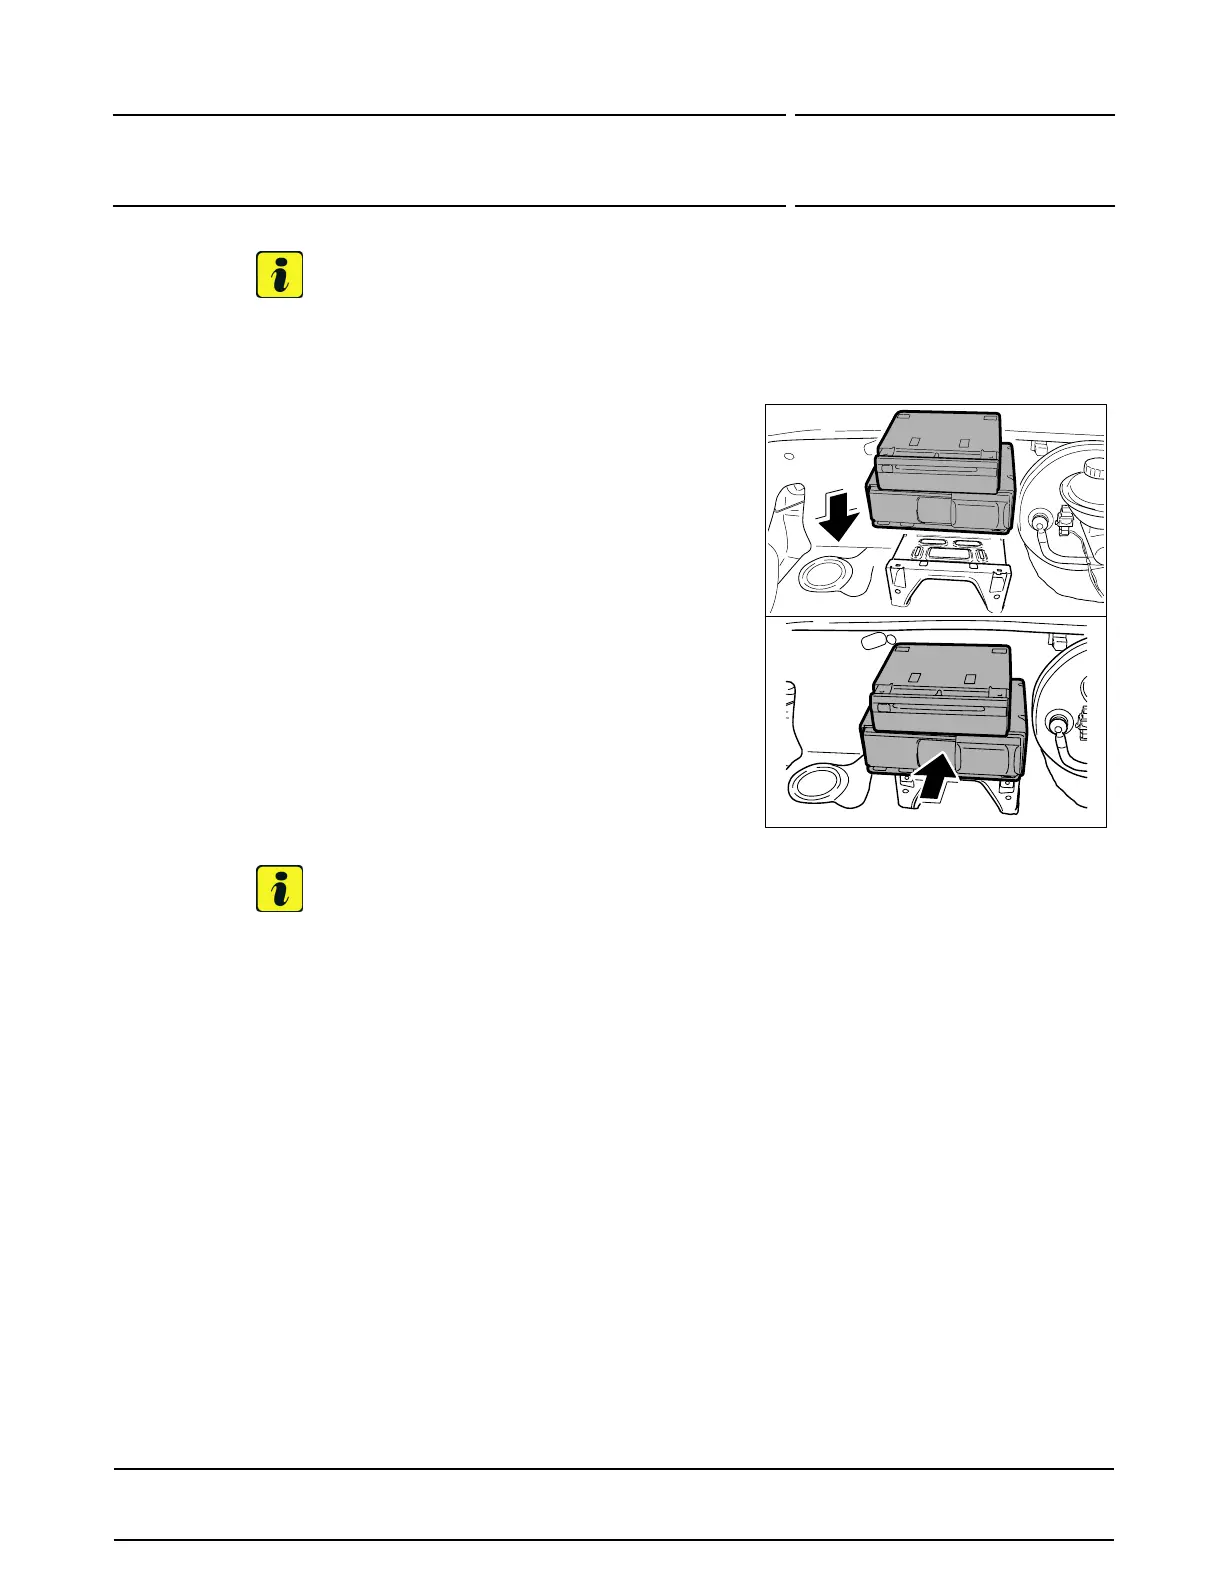
Figure14shows theRoW version oftheaudio components(CD changerandnavigationunitarrangedone
ontopof theother).
Figure14
5 PositionCDchanger withsupportontothe mounting
pointand pushittowardsthe frontpaneluntil theC D
changersupport clicksinto place.
6 Only for vehicleswith luggage compar tment cooling:
Installair guide.
7 Only for vehicleswith TirePressureMonitoring
controlunit:
Insert TirePressure Monitoringcontrolunitand
tightenfasteningscrews.
WorkshopManual
’443419Removing andinstalling TirePressure
Monitoringcontrolunit- sectionon "Installing"’
8 Installluggagecom partmentc over and tighten
plasticscrews.
WorkshopManual’703019
Removingand installingluggagecompartment cover
-section on"Installing"’
Note
Forfurtherinformation andinstructionson carrying outthemenu items,see
WorkshopManual
’911019Removing andinstalling PCMdisplay andoperator controlunit -sectionon "Programming"’.
9 Code CDchanger.
9.1 Connectbatterycharger.
9.1.1 PIWISTesterP 9718mustthen beconnectedand ignitionswitchedon.
9.1.2 Select"GATEWAY"controlunitand"Coding" functionselection. Press•F12“ to continue.
9.1.3 Inthe"Gatewaycoding" menu,selectRequiredinstalledcomponents listsand press•F8“to
changethe CDchangercoding toInstalled.
9.1.4 Select"PCM2.1" controlunitand "PCM 2.1 MMI"function selection.
9.1.5 Inthe"PCM 2.1MM I functionselection"m enu, selectPlanned & Actualconfiguration andcheck
thatthe CD changerisconfigured.
9.1.6 Inthe"PCM 2.1MMIPlanned & Actualconfiguration" menu,press•F8“ toacceptthe mapping.
9.1.7 Readoutfault memoryanderase itifnecessary.
9.1.8 Switchignitionoffand disconnectPIWIS TesterP 9718 .
2005©Porsche Cars North America,Inc.
Tequipment
Nov16, 2005
Page 7of 8