TechnicalInformation
Cayman(987)
2/05 ENU 9160 9
ATTENTION
Damage to aud io systems
due to voltage spikes
Beforeunplugging/removingan audio system, remove ignition key and switch off theaudio system.
Tools:
Sidecutters Phillipsscrewdriver(medium)
Socket,a/f 10mm Ratchet,3/8-inch withextension
PIWISTester P 9718 Carpetknife
Torquewrench0-30Nm(0-22ftlb.) Needle-nosepliers
WorkProcedure:1 Preparatorywork.
1.1 Removeluggage compar tment cover.
WorkshopManual’703019Removing and installing
luggagecom partmentcover -sectionon "Removing"’
1.2 Onlyfor vehicleswith TirePressureMonitoring controlunit:
Removefasteningscrewon TirePressureMonitoringcontrolunit andlay controlunit toone side.
WorkshopManual’443419 RemovingandinstallingTirePressureMonitoring controlunit-
sectionon "Removing"’
1.3 Onlyfor vehicleswith luggage compartment cooling:
Remove airguide fromfrontpanel.
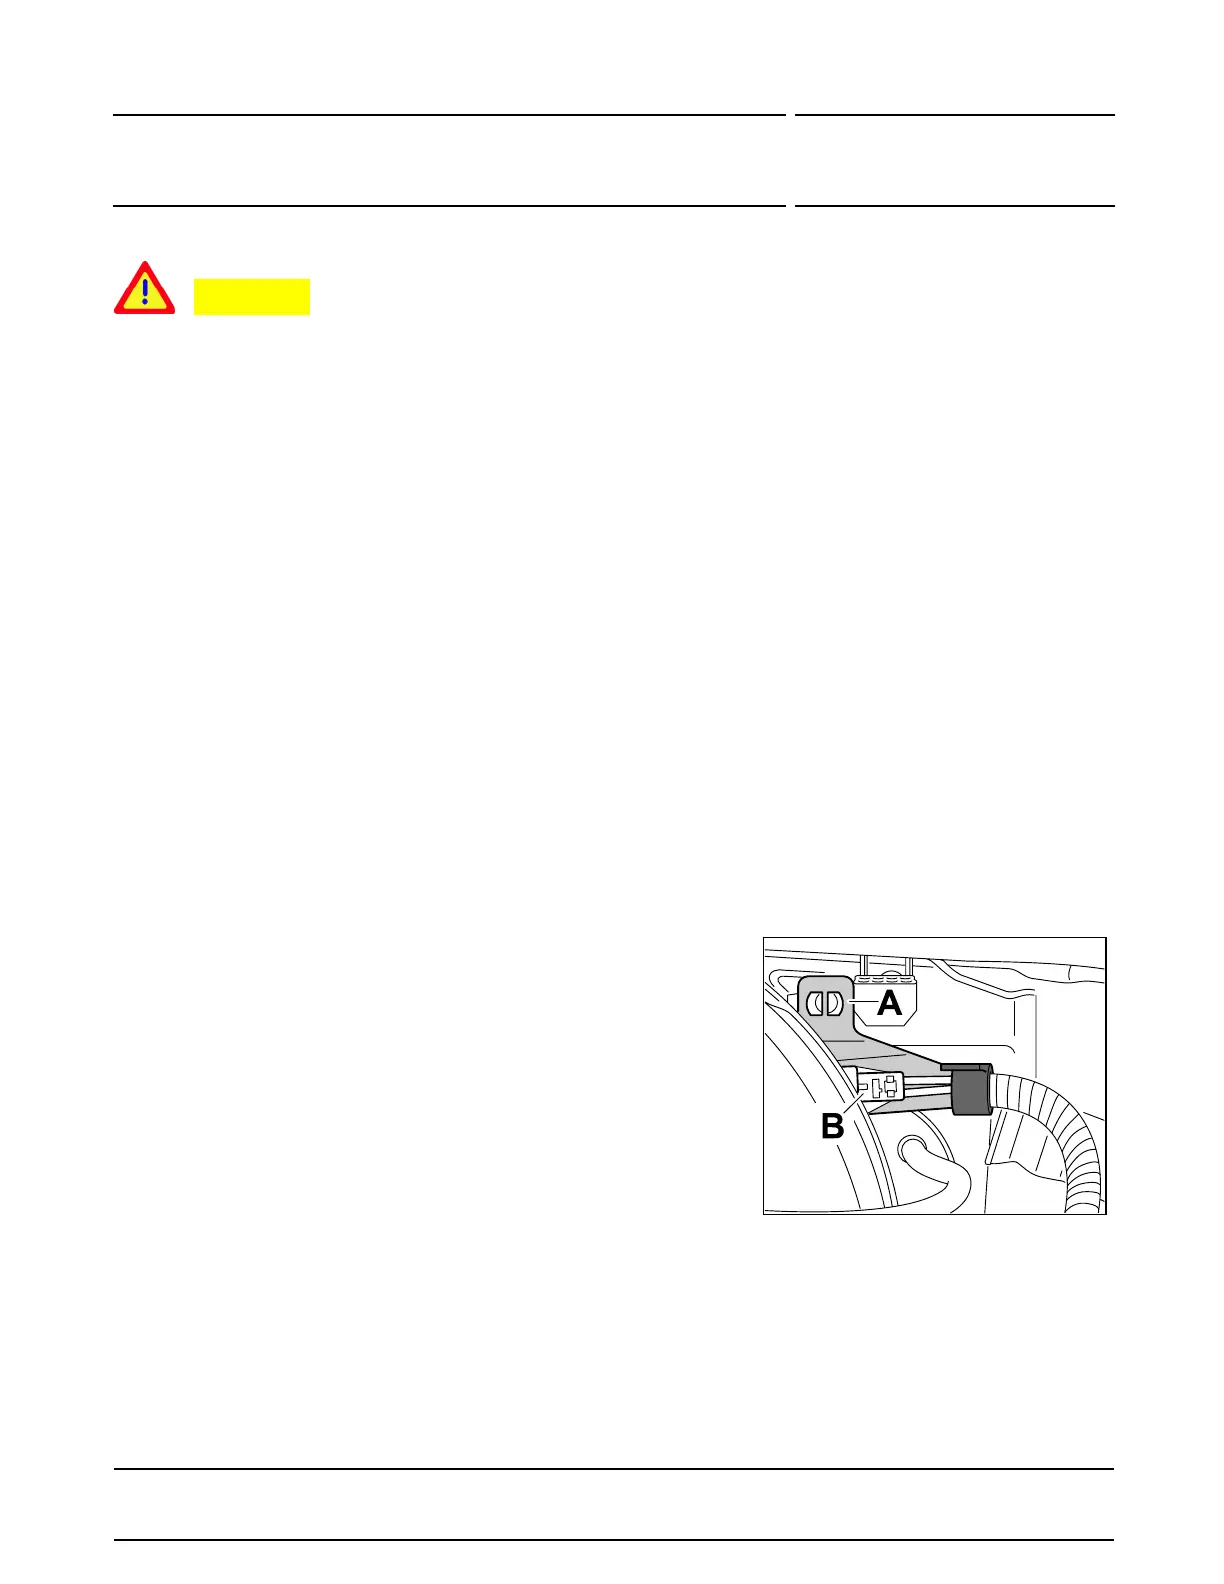
Figure4
2 Installopticalwaveguide.
2.1 Removeconnection pointholder.
2.1.1 Onlyforvehicles with opticalwaveg uide
component(navigationunita nd/or amplifier)in
theluggage compartment:
Disconnectoptical waveguide connection
point
Figure4 -B-in thefrontluggage
compartment. (Note: Figure3wasnot
applicablefor USA/Canada and wastherefore
skipped)
2.1.2 Removeconnectionpoint holder
Figure4-A-
from plenumpanelusing needle-nosepliers.
2005©Porsche Cars North America,Inc.
Tequipment
Nov16, 2005
Page 3of 8