12
ASSEMBLY OF UNIT
Clean and inspect all parts and check springs for breakage or weak 1.
sections. Check the Nailer Body Castings (Ref. Nos. 1 & 2) for
cracks or worn spots.
Insert the Nail Rail (Ref. No. 19) into the Nailer Body Casting (Ref. 2.
No. 1) being sure that the Rail Spring Pin (Ref. No. 18) and the hole
in the Nail Rail line up properly.
Insert the Ram Guide (Ref. No. 27) into the Nailer Body Casting 3.
(Ref. No. 1). NOTE: Be sure the Ram Stop Blocks (Ref. No. 35) are
well seated in the Nailer Body Casting recess under the Ram Guide
and that the holes in the Ram Guide will line up with the two (2)
Ram Stop Block Screws (Ref. No. 28).
Position the Nailer Body Castings (Ref. Nos. 1 & 2) together; check 4.
to be sure they are lined up properly.
Replace the three (3) Body Handle Screws (Ref. No. 37) in the 5.
Handle area and the four (4) Nailer Body Screws (Ref. No. 36) in
the Ram Housing area.
Insert the Pawl Housing Assembly (Ref. No. 47) into the Pawl 6.
Housing Cavity area.
Insert the Shoulder Screw (Ref. No. 29) thru the Nailer Body 7.
Castings and fasten with the Shoulder Screw Nut (Ref. No.30).
Position the Shear Plate (Ref. No. 13) and tap it lightly to seat it on 8.
the Wear Plate / Shear Plate Dowel Pins (Ref. No. 11) and against
the Nailer Body Castings. Position the Wear Plate (Ref. No. 12) on
the same Pins and tap into place against the Shear Plate. (Ref. No.
13).
Secure the Shoe Assembly (Ref. No. 4) with the four (4) Shoe 9.
Screws (Ref. No. 10).
Insert the Ram Spring Guide (Ref. No. 25) with the fl at end down 10.
and the round notch towards the front. Slide the Ram Spring (Ref.
No. 26) down over the Ram Spring Guide.
Lubricate the Ram (Ref. No. 22) lightly with silicone spray or a 11.
similar non-fl uid lubricant. Position the Driver Blade (Ref. No. 23)
into the recess in the Ram (Ref. No. 22). Slip the entire assembly
into the Ram Guide (Ref. No. 27).
13
Push the Ram down so the Driver Blade (Ref. No. 23) will slide 12.
down between the Wear Plate (Ref. No. 12) and Shear Plate (Ref.
No. 13). Hold the Ram (Ref. No. 22) down and tighten the two (2)
Ram Stop Screws (Ref. No. 28).
Slide the Pusher (Ref. No. 20) into the Nail Rail (Ref. No. 19) and 13.
secure it with the Connector (Ref. No. 17).
Check the Nailer for overall operation.14.
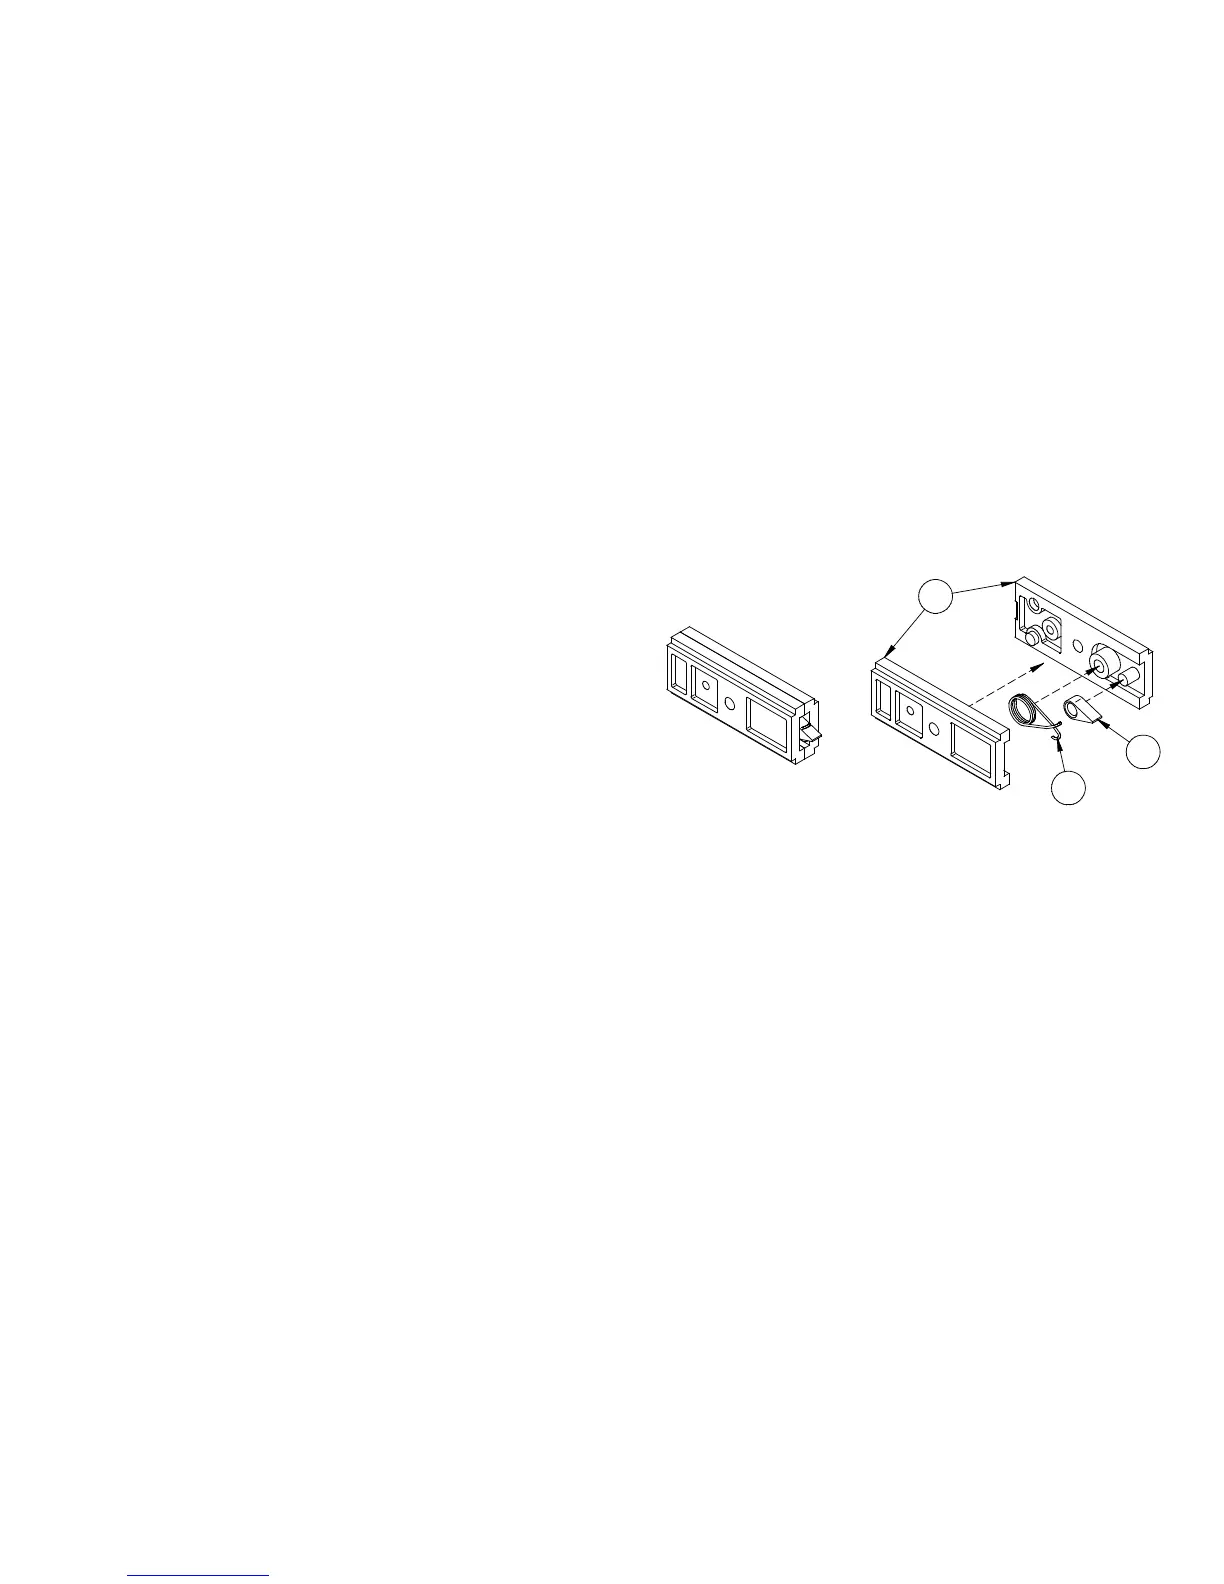
REPLACING THE PAWL & PAWL SPRING
31
32
33
Separate the Pawl Housings (Ref. No. 31). Remove the Pawl 1.
Spring (Ref. No. 32) and replace if needed. Remove the Pawl (Ref.
No. 33) and replace if needed. Insert the Pawl and Pawl Spring into
one side of the Pawl Housing (male side with posts). Position the
other Pawl Housing on top of the assembly and press together.
After pressing together, check to make sure the Pawl moves freely 2.
and always returns to the center position.
 Loading...