10
ASSEMBLY
WARNING: Disconnect the plug from the power source before making any
assembly, adjustments or changing accessories. Such preventive safety measures
reduce the risk of starting the tool accidentally.
WARNING: Risk of lacerations or burns. Do not touch the sharp edges of
accessories at any time. Do not touch work piece or blade immediately after operating
the tool. They can become very hot. Handle carefully. Always allow accessories and
work piece to cool before handling.
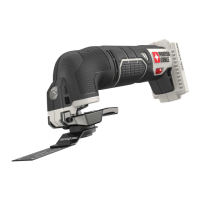
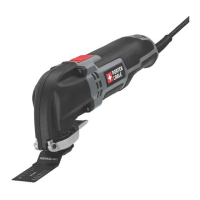
• Slidetheaccessorybetweentheshaftandtheaccessoryholdermakingsurethe
accessory engages all pins on the holder and is flush with the shaft (figure 5).
• Releasetheaccessoryclamplever.
• Someaccessories,suchasscrapersandbladescanbemountedatanangleif
required as shown in figure 6.
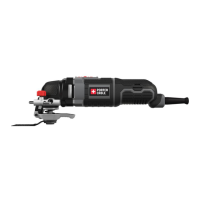
INSTALLING/REMOVING SANDING SHEETS
A diamond shaped platen uses a hook and loop adhesion system to attach the sanding
sheets. The platen allows you to use it on large flat surfaces and tight spots or corners.
• Attachthesandingplatenasdescribedunder“Installing/RemovingAccessories”.
• Aligntheedgesonthesandingsheet,withtheedgeofthesandingplatenandpress
the sanding sheet onto the platen as shown in figure 8.
• Firmlypressthebasewiththesandingsheetattachedagainstaflatsurfaceand
briefly switch the tool on. This provides for good adhesion between the platen and the
sanding sheet and also helps to prevent premature wear.
• Whenthetipofthesandingsheetbecomesworn,detachthesheetfromtheplaten,
rotate and reapply.
OPERATION
SWITCH
CAUTION: Because the PCC710 has a separate speed dial for setting the speed
(8,000 - 18,000 OPM), the tool will start at the speed where the variable speed dial is
set. Be sure switch is fully OFF before installing battery pack.
CAUTION: Do not hold or contact the accessory when inserting or removing the
battery pack or turning the unit on.
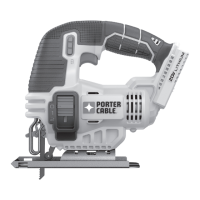
• ToturnthetoolON,holditasshowninfigure 8 and push the slide switch forward.
•
To turn the tool OFF, push the slide switch backward.
NOTE: The tool will start if the switch is left in the “on” position and the battery is inserted. The
switch must be moved to “off” to prevent the tool from immediately starting when battery is inserted.
VARIABLE SPEED DIAL
To operate the tool, select the speed setting you wish with the speed dial, shown in
figure 9, and slide the ON/OFF switch forward. The speed setting can be adjusted
either with the tool on or off.
CAUTION: Because the PCC710 has a separate speed dial for setting the speed
(8,000 - 18,000 OPM), the tool will start at the speed where the variable speed dial is
set. Be sure switch is fully OFF before installing battery pack.
The numbered positions,1 through 6 inscribed on the variable speed dial, do not
indicate any precise speed but are good reference points. The higher the number, the
higher the tool speed.
The approximate speed at each setting is:
SPEED SETTING 1 2 3 4 5 6
APPROXIMATE SPEED 8,000 10,000 12,000 14,000 16,000 18,000
(Actual OPM’s on your tool may vary.)
Be sure to select the proper speed for your oscillating tool operation. If in doubt about
the proper speed for your operation, test the performance at low speed settings and
gradually increase until a comfortable speed is found.
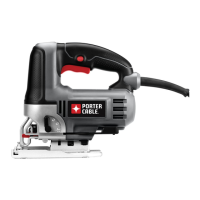
PLUNGE CUTTING
WARNING: Hold saw firmly with both hands for all cutting operations.
WARNING: Inspect work area for hidden electrical wiring, gas pipes or
water pipes before making blind or plunge cuts. Failure to do so may result in